History
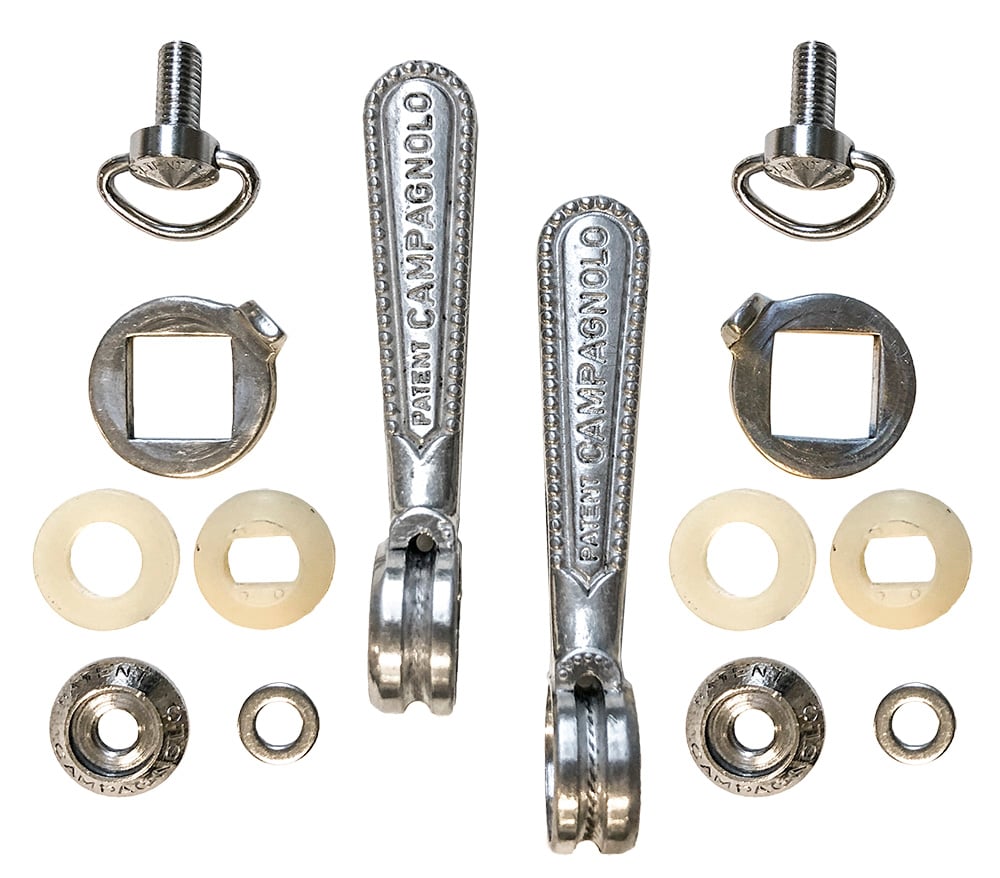
Campagnolo Super Record was released in 1974 and sold up to the mid 1980s. It replaced Campagnolo Nuovo Record as the premium group set offering and interestingly Campagnolo found no need to improve the original design of the shifters as they are the same as supplied in the Nuovo Record group, which then became the second tier offering.
Fitting & Materials
The levers are a lightweight alloy with a satin silver anodised finish. The other parts appear to be a mix of alloy, plastic (nylon washers) and stainless steel (bolts and washers).
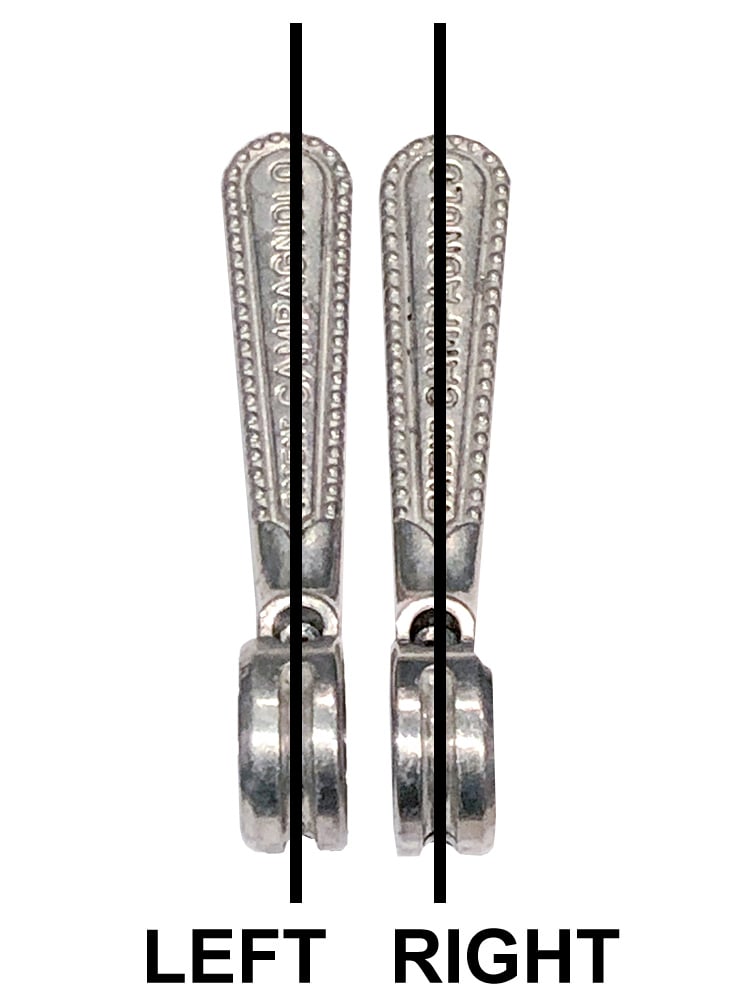
It is important to note that the shifters are not identical, you will need a left shifter and right shifter. The levers are actually offset from centre to make it easy to use then when mounted to the bike. Be careful when shopping online to get one of each.
Shifter Parts
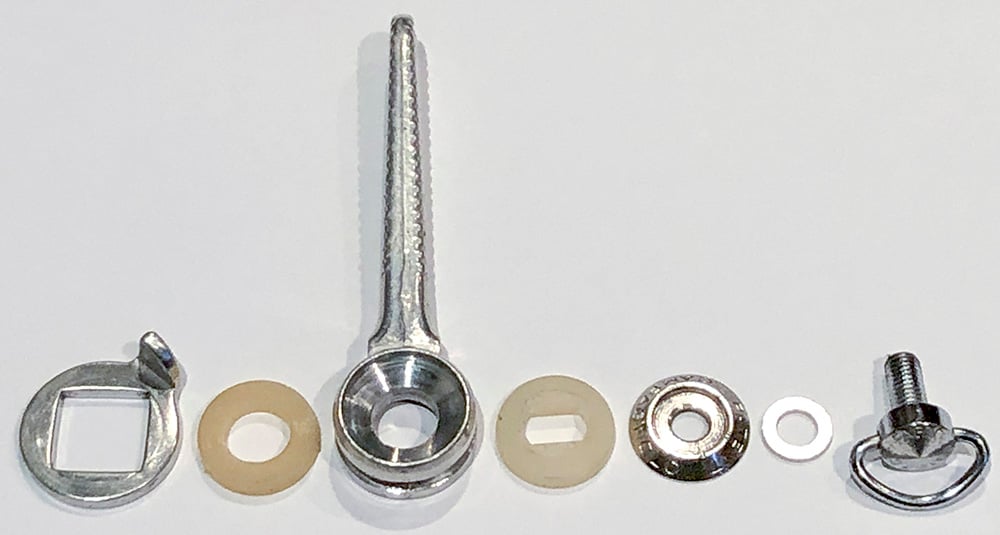
Each shifter is comprised of the following parts (shown below in the correct order of assembly). You will notice the on the inside of the metal lever, there is a conical face and a flat face. These 2 surfaces match the corresponding nylon washers. It is these nylon washers that provide the required ‘friction’ once the lever bolt is tightened.
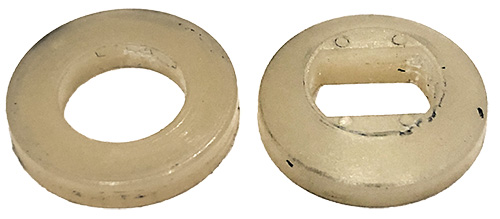
Looking at the 2 nylon washers below, you can see that the washer on the LEFT is flat on both sides with a round hole. This washer is described as the ‘Elastic’ washer in the 1984 Campagnolo catalogue.
The washer on the RIGHT is conical on top, flat underneath with a rectangular hole. This washer is described as the ‘Friction’ washer in the same catalogue. The rectangular hole in this washer fits onto the braze-on shifter boss, effectively preventing this washer from rotating which means it can now resist the contacting metal face of the shift lever to generate friction.
Shift Lever Mounting
There are 2 ways the levers can be mounted to your bike frame and it will depend on your frame as to which method you need to use. The mounting options are;
- the frame has no shifter mounts which means you will need a shifter mounting bracket which is clamped to the down tube (older frames) OR
- the frame features 2 x braze-on shifter mounts on your down tube.
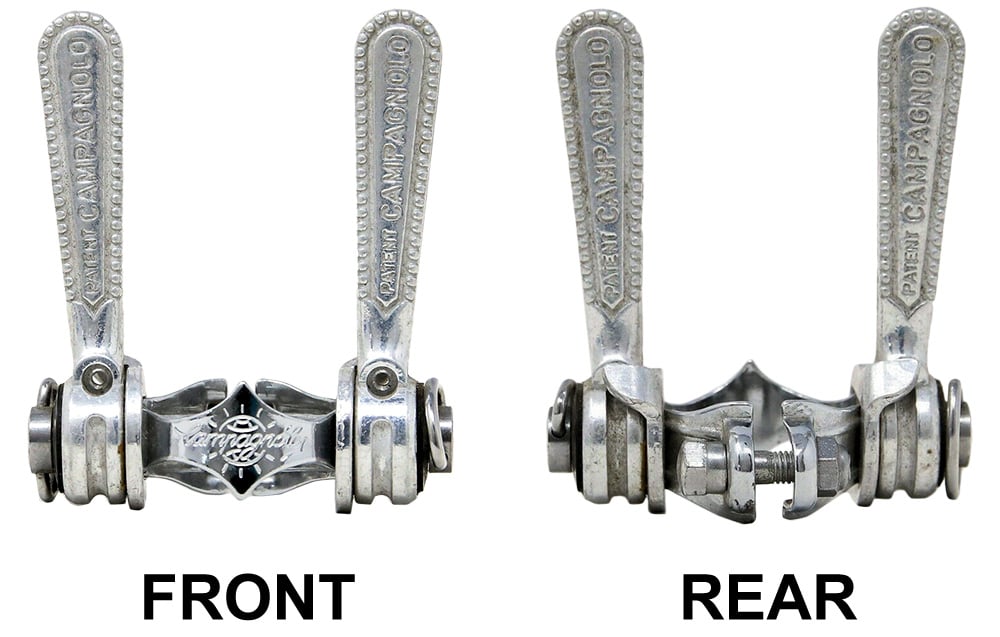
1. Clamp-on Shifter Mounting Bracket
If your frame is older and does not feature braze-on shifter bosses on the down tube, or for some reason they are not able to be used, then you can use this shifter mounting bracket.
2. Braze-on Shifter Mounting
Frames that were manufactured from the early 1980’s onward featured a braze-on shifter mount on the down tube of the frame. This provides a secure fitting location for your shift levers and was particularly useful with the advent of irregular frame tube shapes that began appearing in the same era.
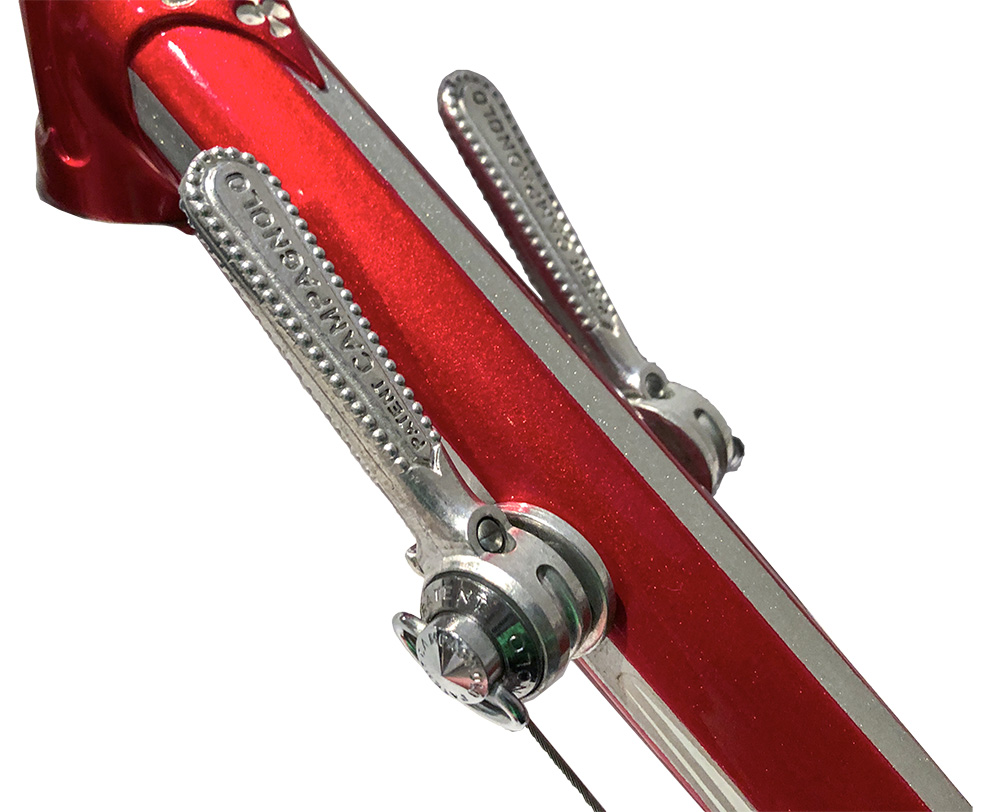
to braze-on shifter mounts on the down tube.
Campagnolo 50th Anniversary Shift Levers
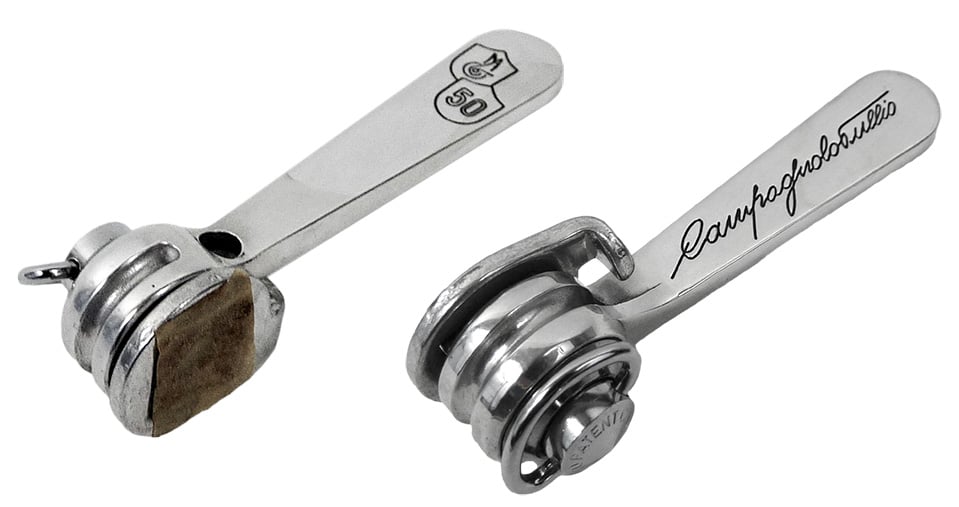
These friction shift levers were included in the Campagnolo 50th Anniversary group set which was essentially Super Record components that featured 50th anniversary markings. However, these levers were far more modern in appearance when compared with the standard Super Record levers.
Colnago 30th Anniversary Levers
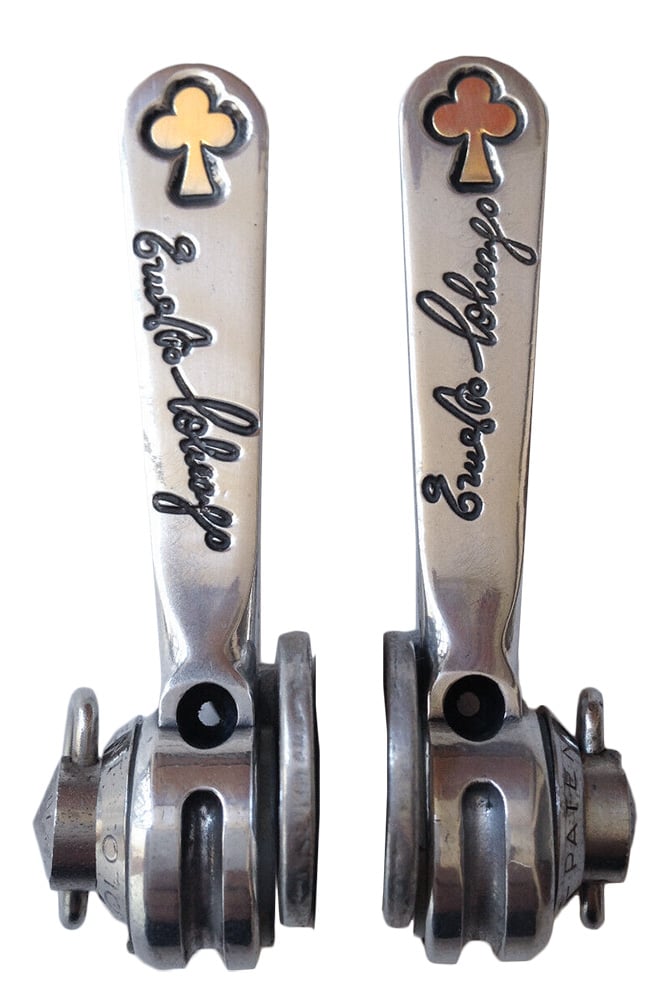
In 1984 Campagnolo manufactured a special version of the Super Record group set for Colnago to celebrate the 30th Anniversary of Colnago (founded in 1954). These group sets are very rare and were originally fitted to a limited release of Colnago Arabesque bicycles. This group set included a set of special friction shift levers which featured gold clubs and Ernesto Colnago’s signature.
Apply Grease or Not?
When I was first researching the best way to install these shifters, there was quite a lot of debate as to whether you apply grease to any of the parts?
In my opinion the answer is both YES and NO. The fixing bolt threads will require a light application of grease, but the other parts MUST be CLEAN and DRY. As the naming implies; ‘Friction’ shifters require a certain amount of friction to counteract the force of the return spring in each derailleur. Without this friction the levers will not hold your chosen gear position.
Regardless of your preference regarding greasing components, there is one very important component that needs to be inspected before installing the shift levers. This is the condition of the thread of the braze-on mount or down-tube shifter bracket (if you require one). Most importantly, this thread must be 1. clean and 2. easy to turn the threaded bolt to it’s maximum depth.
The reasons for this are;
- You will notice that the included Campagnolo fixing bolt is fitted with a d-ring lever that is only conducive to a light tension force. So if the threads are damaged or corroded, you wont be able to screw the shifter bolt down fully.
- If you can’t screw the bolt down to the required depth, you will not be able to compress the parts to generate the required friction. However, if the thread is too loose, the bolt may come loose after multiple shifts. You can read how to overcome this later in the article.
If you find you are unable to thread the bolt down easily, you have 2 options;
- 1. Re-tap the thread (especially if the thread is damaged), but you will need exact tap tool to match the Campagnolo bolt; both in diameter and pitch (threads per inch).
- 2. Clean thr corroded/dirty thread out using a different bolt of the exact same specification as the original Campagnolo bolt. By using another bolt, you can select one that works with a tool (like a screw driver or hex tool) which allows you to generate more screw force than the original Campagnolo bolt. It also means you wont wear the threads on your vintage Campagnolo bolt.
How: Apply some rust killer/lubricant (RP-7, WD40 or similar to the thread, then screw the bolt in gently until it starts to bind and then unscrew it. Clean the bolt threads, re-spray and gradually screw deeper as the thread loosens-up. Repeat as many times as necessary until the original Campagnolo bolt screws in and out easily to the maximum depth. Once the thread is cleaned, apply a light application of grease to the thread. We don’t want the bolt seizing up years down the track.
Shifter Installation Tips
1. [As discussed previously], check the bolts can easily be threaded to their maximum depth. Make sure all the parts are clean and free of grease.
2. Apply grease to the fixing bolt threads ONLY.
3. Test assemble the all parts together onto the frame or bracket (refer to parts schematic below).
4. Check how much friction you can generate in the levers by tightening the bolt. We want the lever to be able to move, but there must be enough friction to counteract the return spring force of the derailleurs.
5. If the lever is too loose or you suspect there is not enough friction, then follow my tip below on how to ‘add extra friction to your levers’.
6. Double-check you have definitely installed each lever on the correct side (the levers are not the same, there is a left and right side lever).
The Secrets of a Perfect Gear Change
Using friction shift levers definately requires more skill and practice than changing gears using modern indexed or electronic shifting, but I have created a separate article outlining all the tips and tricks of how to make perfect gear changes using friction shift levers.
Parts Schematic

Add Extra Friction to your Levers
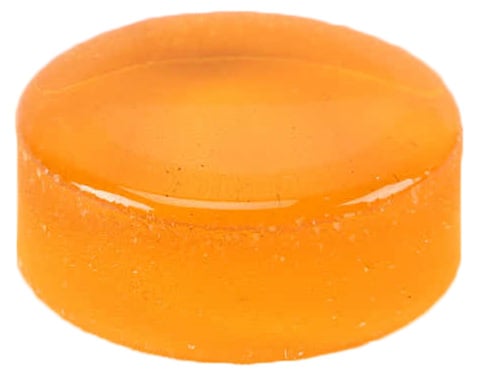
If you find there is not enough friction in your levers, it is very easy to add more friction to the system. Buy some rosin, which is applied to the bow of string instruments like violin, cello etc. It is easy to find online or at a specialist musical instrument store.
You only need a tiny amount of rosin to lightly dust a few parts. I used a fine grit sandpaper (or similar file) to extract a fine powdery dust from the rosin block.
Apply this dust to the conical side of the nylon ‘Friction’ washer ‘0190/06’ and the mating surface of the shift lever that contacts the washer. This should be enough to add the required friction. If you need more friction, you can also add rosin to both sides of washer ‘190/04’. Adding friction should mean the fixing bolt wont need to be as tight.
Shift Levers Becoming Loose When Shifting
If you find that continual lever movements cause the fixing bolt to become loose and the levers no longer stay in position. You can try using a LIGHT application of thread locker to the TOP FEW THREADS of the fixing bolt. First you must remove all grease from the bolt and threads inside the shifter boss on the frame and let them dry. Don’t apply too much thread locker as it will make it very difficult to remove the bolt in the future due to the tool-less nature of the d-ring fitting
Super Record Component Weight
I have weighed a set of Super Record components and quite surprisingly, these vintage parts compares quite favourably against the weight of a modern Campagnolo Super Record group set.
Learn more about Campagnolo Super Record
This article is just a small part of my full review of Campagnolo Super Record groupset.
Disclaimer!
Please remember that this information is only to be used as a guide.
I consider myself an enthusiast, not an expert. The information I have presented in this article is based on my many hours of online research.
Whilst I enjoy working on my own bikes, I am not a qualified bicycle mechanic. The content of this article is purely illustrative and does not constitute professional advice. For your own safety, any type of work should only be undertaken by a qualified bicycle mechanic. Incorrect assembly of parts could result in equipment damage, personal injury or death.
About Me.
I have been riding and working on my own bikes for many years now. I wanted to share my experiences, knowledge and research with others. My aim is to inspire people to get involved in all aspects of this amazing sport. Cheers.
Comments.
I welcome reader feedback in the comments section. Should you wish to suggest an amendment, please include a note advising the source of your information so that myself and other readers can ascertain the accuracy of your information. Note: Trolling or argumentative comments will be removed as they are counter-productive.
Great information !! Especially the addition of Rosin . I grew up with friction shifters and now have gone back to them on several Steel frame builds – I’m in the middle of a GIOS super record build and I completely forgot the washer sequence for the shifters ! So your article is spot on ! Much appreciated!!!
Glad to hear the page was of help to you Tim. The Super Record Gios sounds like a great project. These old bikes can give you a lot of satisfaction building and riding. Enjoy.
Thanks so much for this article!!!
I have a vintage Vitus 979 and it is in mostly good condition but the friction shifter have lost their grip.
The ironic/convenient thing: I play double bass so I have some rosin. I never would have thought of it though.
Hi Craig. Thanks for your comment, hopefully the rosin will help solve your friction shifter issue. I’ve used this trick on both my bikes and it seems to definately add the required grip to the older nylon washers. Enjoy the Vitus.
Hello,
Do you hopefully know roughly what torque for the clamp to downtube for clamp on shifters? Also is there a precise location as to where to clamp on the downtube? Thanks!
Hi Stan, unfortunately, I haven’t fitted any clamp-on shifters. Both my Colnago frames have the convenience of braze mounts for the friction shifters.
Essentially the clamp will need to be tight enough to resist rotation forces (when changing gears) and the pulling force from tensioning the cables to change gears.
I would tighten the bolt so it is firm (but not tight) probably somewhere between 5 to 7 Nm and test. This torque range is commonly used for tensioning bolts on modern drive train components like derailleurs, shifters etc.
On my Colnago 57cm frame, the shifter braze mounts are approximately 105 mm back from the head tube. This is measured as a straight line along the down tube from the centre of the head tube to the centre of braze mounts.
This distance will probably differ a little by frame size, but gives you an idea.
thank you for the info! love the knowledge.
Thanks Stan, good luck with the install.