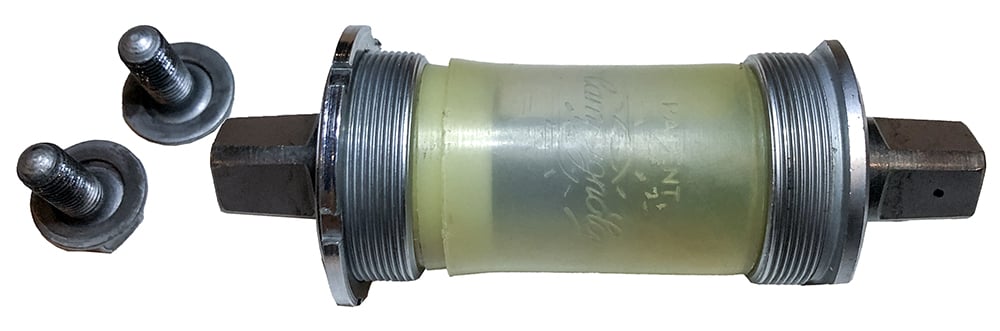
Campagnolo’s threaded bottom brackets were supplied in a variety of group sets over the years including their premium offerings; Nuovo Record, Super Record and C-Record from the 1960’s to 1980’s. Installing a bottom bracket is a relatively straight-forward process provided you have the correct parts, tools and the bottom bracket threads of your frame are in good condition.
Before deciding if this is a process you want to try please note that this article is purely an overview of how I install a bottom bracket and should not be treated as professional advice. Please read my disclaimer at the end of this article.
Which Bottom Bracket to Use?
There were a wide variety of bottom brackets manufactured to fit different types of frames ie. road bikes, track bikes as well as the different frame threading standards. So before you can fit a bottom bracket, you need to make sure the bottom bracket cups have the correct threading and the axle is the right length. Learn more about vintage Campagnolo bottom bracket standards.
Tools Required
To install a Campagnolo bottom bracket, you will need:
- 36mm box-end wrench.
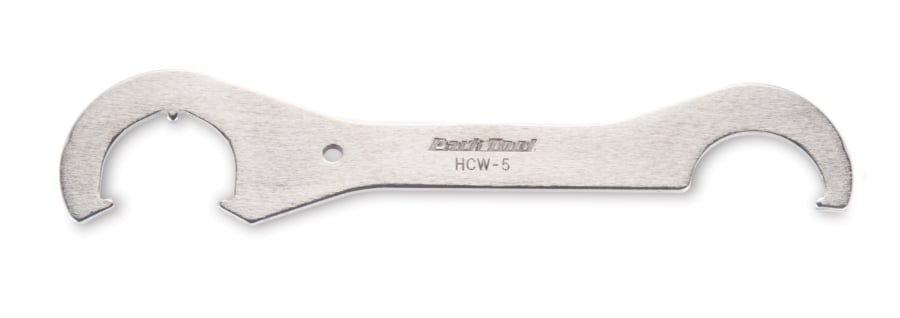
- Bottom bracket pin spanner.
- Bottom bracket lock-ring wrench.
- Measuring device (ruler, tape or calliper).
- A clean rag, cloth or towel.
- Good quality water proof grease for bicycle bearings.
- A pair of rubber gloves.
- Degreaser
Optional Items:
- Loctite 243 Medium strength thread locking compound (optional).
- Bicycle work stand.
- Bottom bracket tapping and facing tools.

Bicycle Work Stand

Whilst it is possible to install a bottom bracket without a bicycle work stand it is certainly much easier if you have one. I have 3 different bicycle stands and use them for different jobs, however when working on my vintage bike, I always use the type of work stand (pictured) because there is no contact on those fragile decals or paint work. It is also the perfect work stand when you need to exert considerable force on the bottom bracket as no other tubes are being stressed.
Prepare the Bottom Bracket Shell
1. Prepare Bottom Bracket Shell Threads.
Before we fit the bottom bracket, we need to make sure all the parts are clean including the bottom bracket threads in the frame. Degreaser and a toothbrush can be useful here. Once everything is clean, apply grease to everything and do a test run by threading each of the bottom bracket cups into the correct sides of the frame. They should smoothly screw all the way into the bottom bracket shell.
IMPORTANT: It is easy to cross thread these cups, so start gently threading only by hand. Don’t use any tools until you are certain the threads are aligned correctly to avoid damaging parts.
If the frame threads are tight or in poor condition, a bottom bracket tapping tool can be used to re-cut / clean the threads. If the threads are Ok but just a bit tight, the alternative is to use the actual bottom bracket cups to clean the frame threads.
Thread Cleaning Process: Apply grease to a cup and frame threads. Screw the cup in until it begins to tighten, then unscrew it a few turns, then screw it back in again. Repeat this process screwing the cup in and out. Occasionally remove the cup and clean all surfaces before greasing and repeating. Eventually the cups should screw in and out smoothly.
Paint needs to be removed.
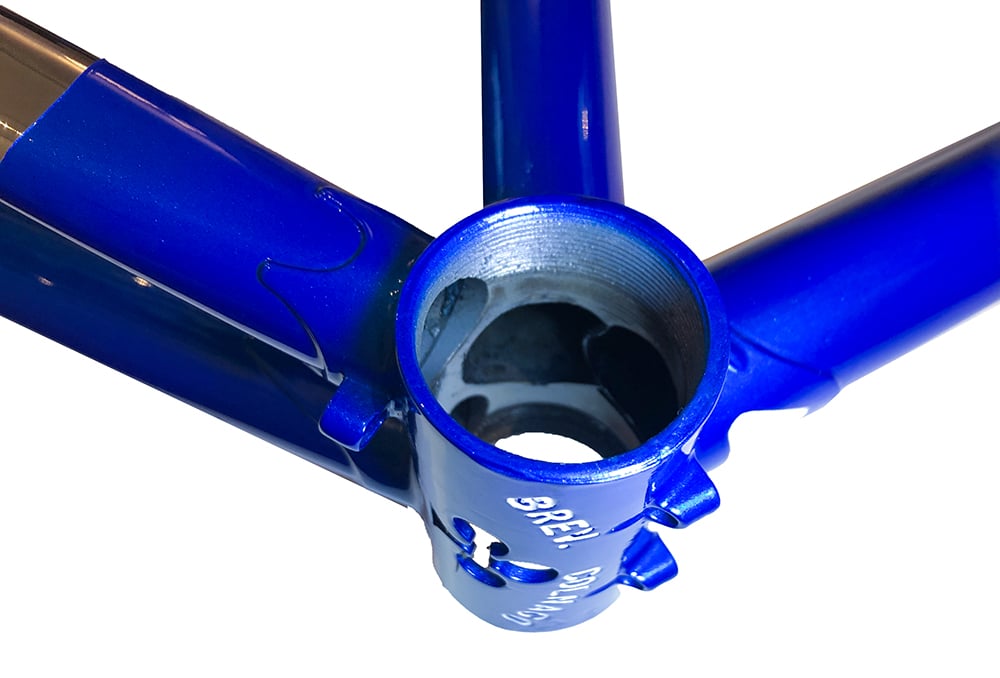
2. Prepare Bottom Bracket Shell Face.
We also want to make sure that the face of the bottom bracket shell is stripped back to bare metal; free of paint, corrosion etc. If you have a bottom bracket facing tool, then use that. Unfortunately I do not, so I went with the assumption that the bottom bracket was faced at some point in the past.
So I just removed the fresh paint using a sharp razor blade and finished with a gentle sanding (as pictured below). The idea is to create a perfectly smooth face for the bottom bracket to ensure correct fitting. You can apply some water proof grease to the shell face to prevent corrosion.

Measure the Bottom Bracket Axle
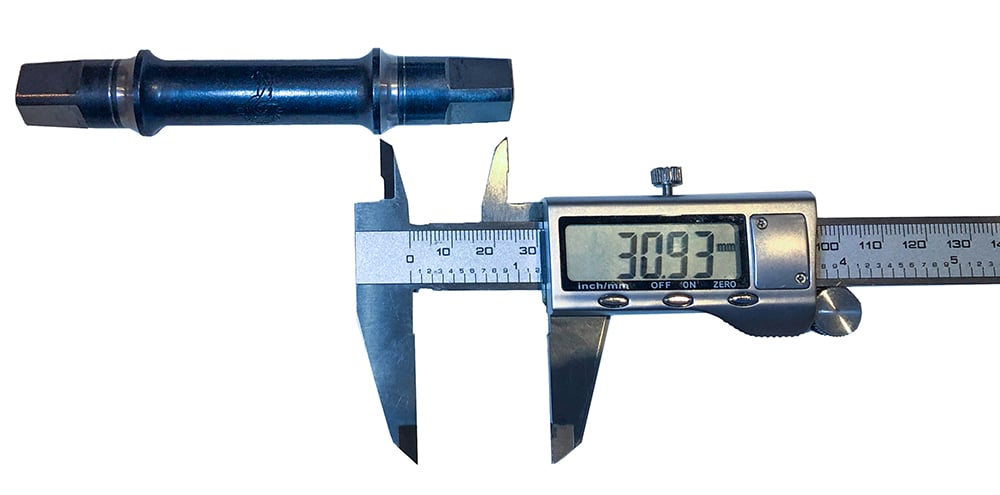
I will be fitting this Campagnolo Record axle which is a 70-SS and designed for use with a road bike (double chain ring) crank set. One side of the axle is slightly longer than the other. I have measured the longer side as 31mm, the other side is 3mm shorter.
The longer side of the axle must protrude out the right (drive) side of the bottom bracket. The crank set will be fitted on this longer side. I use a sharpie to mark the spindle, so I can easily identify it later on.
Prepare the Bottom Bracket Parts
Before we grease all the parts, make sure you know which way the bearings sit inside the bottom bracket cups. Do a quick test by fitting the bearing into the bottom bracket bearing cup and then insert the axle check it rotates smoothly. You can see the bearing orientation in the following picture.
Now grease the axle cones, bottom bracket cups and ball bearings using a good quality water-proof grease as shown below.
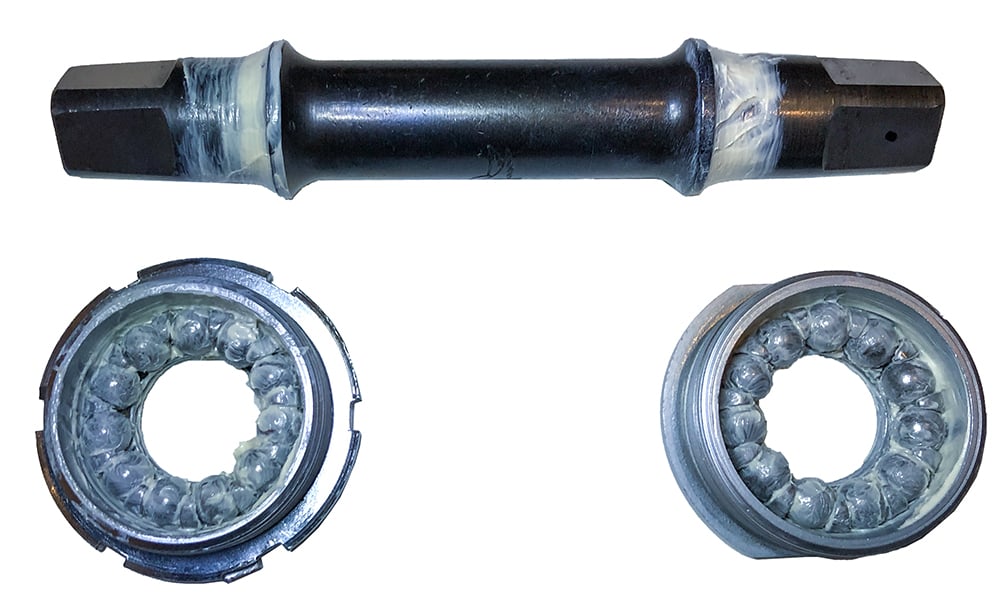
Left image is left BB cup (with lock nut fitted).
Right image is the right (drive) side BB cup.
Fit the Bottom Bracket Sleeve
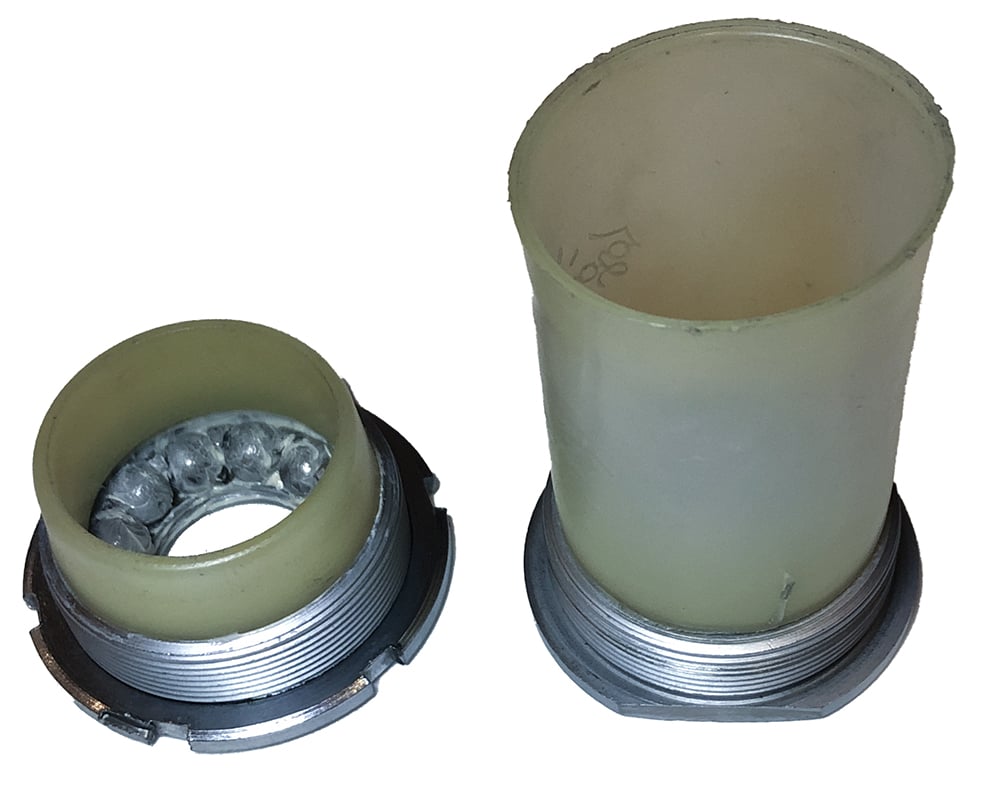
Campagnolo bottom bracket’s were usually supplied with a set of dust sleeves to protect the bearings from contaminents, however as they can degrade or were lost over time you may not have them. The bottom bracket will work perfectly fine without them, but you will need to service the bearings more regularly.
Once the bearings are greased and oriented correctly in the bottom bracket cups, we can fit the sleeves. I find the larger sleeve is often tricky to seat in the bottom bracket cup. You will notice on one end there is a tapered section that is designed to fit into the cup.
I fit the larger sleeve in the right cup, but you can fit the sleeves in the opposite configuration if you like. The most important thing is to fit them before assembling the bottom bracket in the frame.
Install the Right Cup
The right side cup is easily identified by it’s 2 flat sides. It is fitted on the drive side of the bike ie. the side that has the crankset and chain.
Right Hand or Left Hand Threads?
The right cup can be either right hand threaded (clockwise to tighten) or left hand threaded (anti-clockwise to tighten). You will figure this out quickly when installing the cup, but I recommend you make a note of the direction to loosen the cup should you want to remove it again in the future, particularly if it is left hand threaded.
Fitting a Left Hand Threaded Cup (English / Swiss Standard)
If you are fitting this type of cup, simply grease the cup and thread it into the frame with firm tension. The threading in this cup is designed to prevent it from coming loose over time.
Fitting a Right Hand Threaded Cup (Italian / French Standard)
I am fitting this bottom bracket to a vintage Colnago frame. The bottom bracket shell of this frame has Italian threading, which means the right side cup is right-hand threaded (clockwise to tighten). The disadvantage of this setup is the right cup can come loose over time. I believe this is due to the cranks rotating in a clockwise direction which causes the ball bearings to rotate in the opposite (anti-clockwise) direction and the force of this rotation can loosen the right side cup over time.
If you are fitting an Italian threaded cup, you have several options to prevent the cup coming loose over time;
- Apply grease and do it up really tight. But it can be hard to remove later. I believe this was the standard practice ‘back in the day’.
- Use Loctite 243 thread locker which acts like a lubricant when it is wet so the cup threads in easily to the frame. Once it dries, it is like a low strength adhesive that stops the part coming loose, but you can still remove the part in the future.
It’s up to you to decide which option to use. Regardless, the threads must be coated with something to prevent corrosion binding the cup into the frame over time.
I combined these 2 methods by applying grease to only the rear 50% threads (yes, it’s a bit fiddly – you can use a brush to apply the grease or your finger through the other side of the frame) and Loctite to the front 50% threads as explained below.

Apply a generous application of Loctite before threading the cup in fully.
I don’t apply grease to the cup and screw it about half way into the frame. Next, I applied a generous coating of Loctite to the exposed threads before screwing the cup all the way into the frame.
My idea is to coat the cup with 50% Loctite and 50% grease. Finally I tightened the cup firmly but not ridiculously tight. I’ve tested this process on a previous frame and the cup has not come loose whilst riding but was still easy enough to remove.
Note: Loctite only works on clean dry threads. Leave it for 1 day to set before riding the bike.

Fit the Bottom Bracket Axle
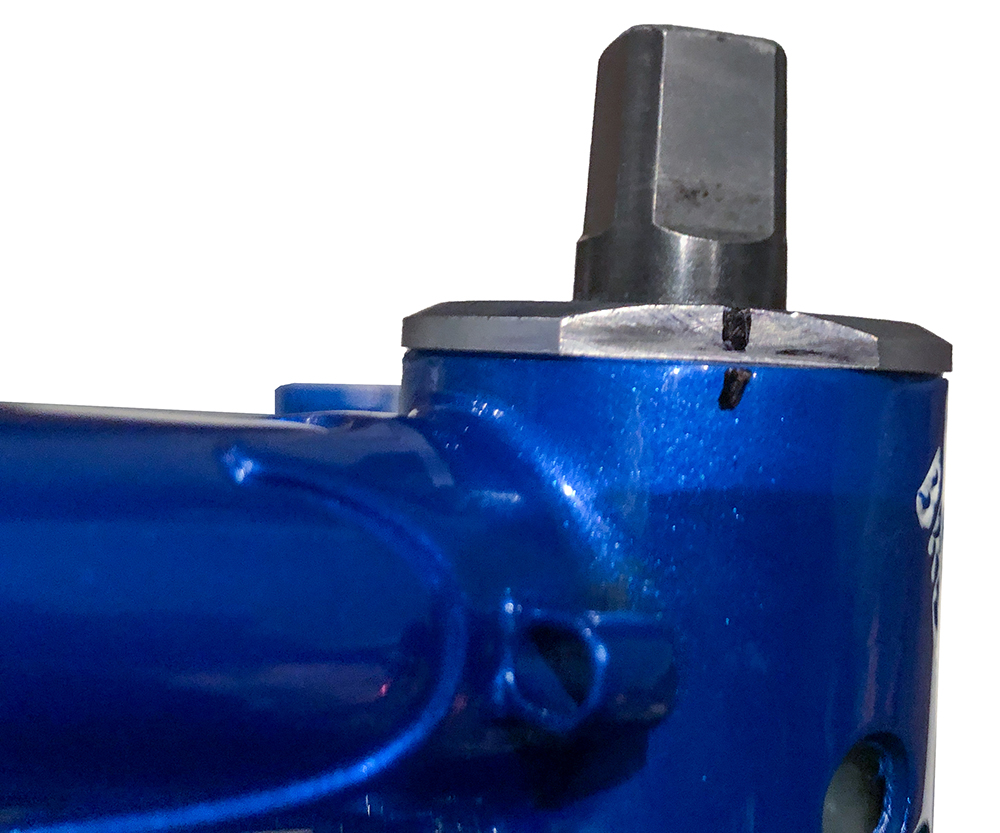
Now that the right side cup has been fitted we can install the axle. Remember to insert it in the correct way so that the longer side exits the right side cup you just fitted. You can see the small black dot I used to mark the longer end.

Install the Left Side Cup
Grease all the threads of the bottom bracket shell and left cup.

Thread the left cup into the frame with the axle protruding through it. Make sure the threads are aligned correctly before using the pin spanner. Screw the cup in until it makes contact with the axle cone. At this point some threads of the cup are still exposed as pictured below.

Adjust Bearing Tension & Fit Lock Nut
Now we need to adjust the tightness of the left cup to ensure that the axle rotates easily and smoothly, but it must not have any left/right or up/down play. Adjust the tension to find the perfect setting.
Now grease the threads of the lock nut. Loosely fit it to the left cup without rotating the cup out of position. Fit the pin spanner to the cup to keep it in position while tightening the lock nut to the frame.
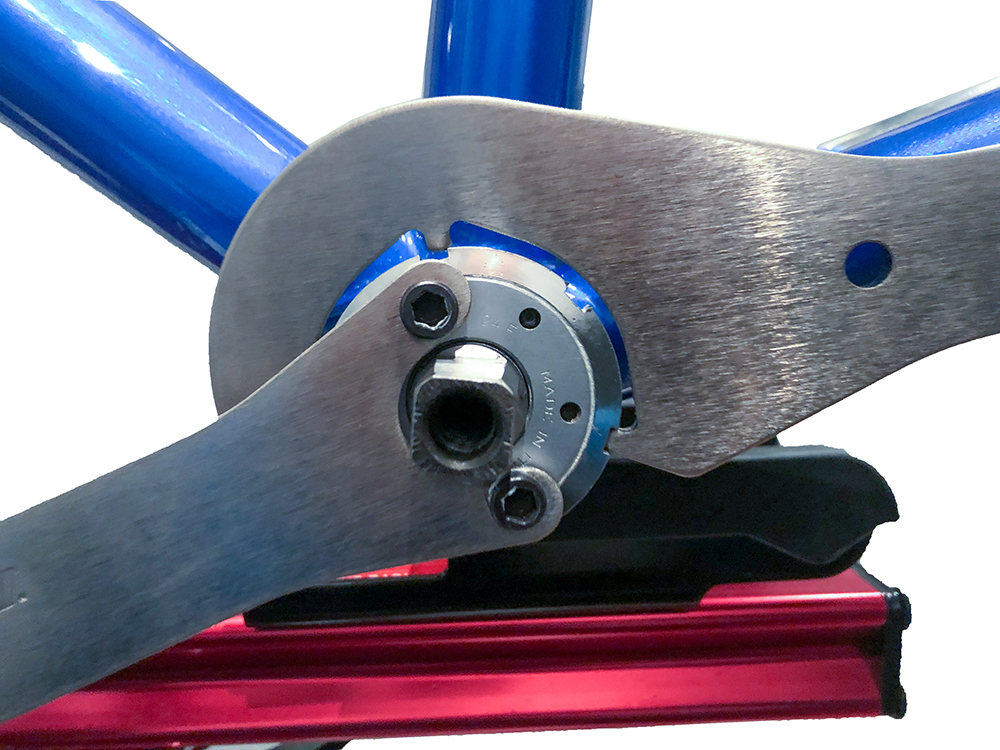
Keep the pin spanner fitted to the cup and now use the lock-ring wrench to tighten the lock nut (again making sure the cup does not rotate). Due to the slotted design of the lock nut, you will only be able to tension it to a moderate tension.
Final Step
Once you have completed installing the left cup, double check the axle still rotates smoothly with no play. Now I perform one final check to ensure the lock nut is tight:
Fit the pin spanner to the left cup and try tightening the cup with moderate pressure. If the cup doesn’t move, then the lock ring is tight, however if the cup moves, you will then need to re-check the axle tension is still OK. If the axle tension requires re-adjustment, loosen the cup a small amount and tighten the lock nut with the lock-ring wrench. Repeat this test until the lock nut is firm.
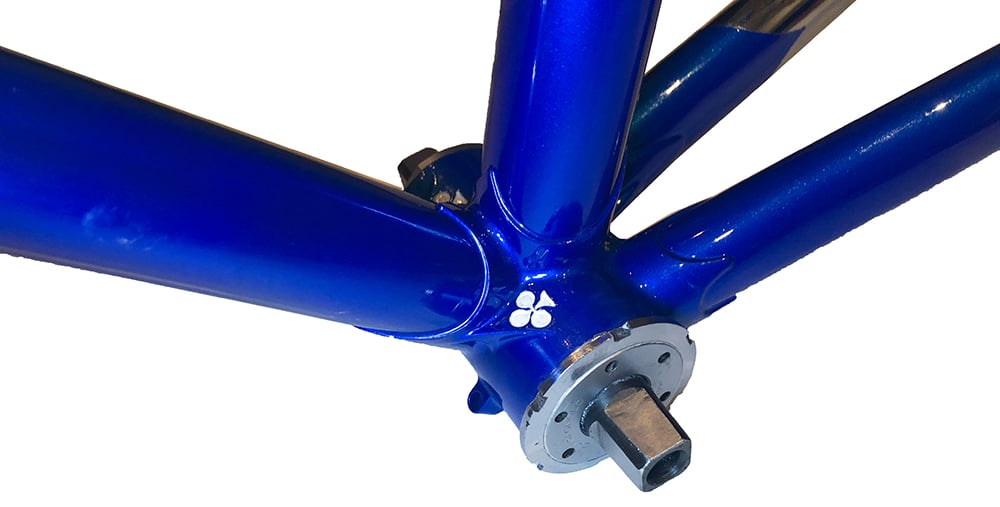
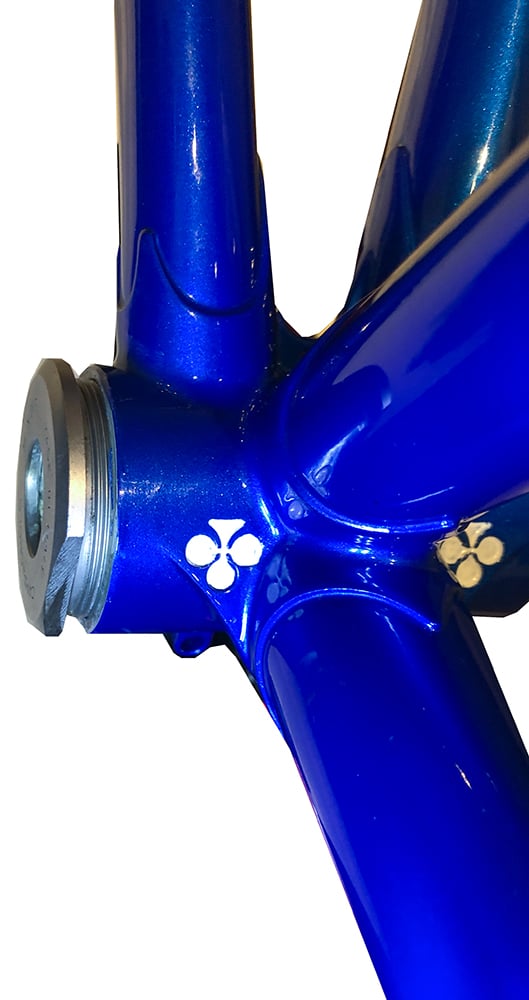
Optional Alignment Mark on Right Side Cup
If you have an Italian threaded bottom bracket (like me), I recommend this little trick to help determine if the cup has come loose. Using a Sharpie, draw a small alignment mark on the frame and right cup. I draw the mark on the underside of the frame to be less visible. If the marks are not aligned at some point in the future, the cup has moved and will need to be tightened again. Be careful when washing the bike not to wipe off the marks.
References
I hope you found this article interesting. I have listed the following website pages as general references.
Park Tools – Bottom Bracket Service: Adjustable Cup-and-Cone
Disclaimer!
Whilst I enjoy working on my own bikes, I am not a qualified bicycle mechanic. The content of this article is purely illustrative and does not constitute professional advice. For your own safety, this type of work should only be undertaken by a qualified bicycle mechanic. Incorrect assembly of parts could result in equipment damage, personal injury or death.
About Me.
I have been riding and working on my own bikes for many years now. I wanted to share my experiences, knowledge and research with others. My aim is to inspire people to get involved in all aspects of this amazing sport. Cheers.
Comments.
I welcome reader feedback in the comments section. Should you wish to suggest an amendment, please include a note advising the source of your information so that myself and other readers can ascertain the accuracy of your information. Note: Trolling or argumentative comments will be removed as they are counter-productive.
Hello your page is very useful!
What blue colnago model used for this example?
best regards
Hi Megan, yes that frame is my Colnago Nuovo Mexico
Hello, Thanks for the detailed and easy to follow description. How do you determine the proper spindle length, as well as size bearings?
Thank you.
Hi Jaime, there was a link on the page regarding help with that information. You need to know your BB width, diameter and the type of cranks to be fitted to determine it.
Really fantastic article, brilliant explanation how to fit a bottom bracket, I’ll definitely use this a my go to reference when I’m servicing the Ciöcc.
Hi Philip, thanks for your comments, glad to hear this article was helpful for you.
Brilliant, thank you!
Hi Rob, glad to hear the article was of help to you.
Extremely well done and easy to follow. You also cover everything (including the sleeve) and ofer excellent tips. Better than any YouTube video! I am restoring an “84 DeRosa with SR and C Record components, so your site is invaluable to me. Thank you.
Hi Richard, thanks, glad to hear the articles are of help. Best of luck with your restoration, enjoy.
Brilliant. Thank you!
Thank you so much!
This detailed explanation is gold!
Thanks Tobias, great to hear the page was helpful to you. All the best.