Introduction
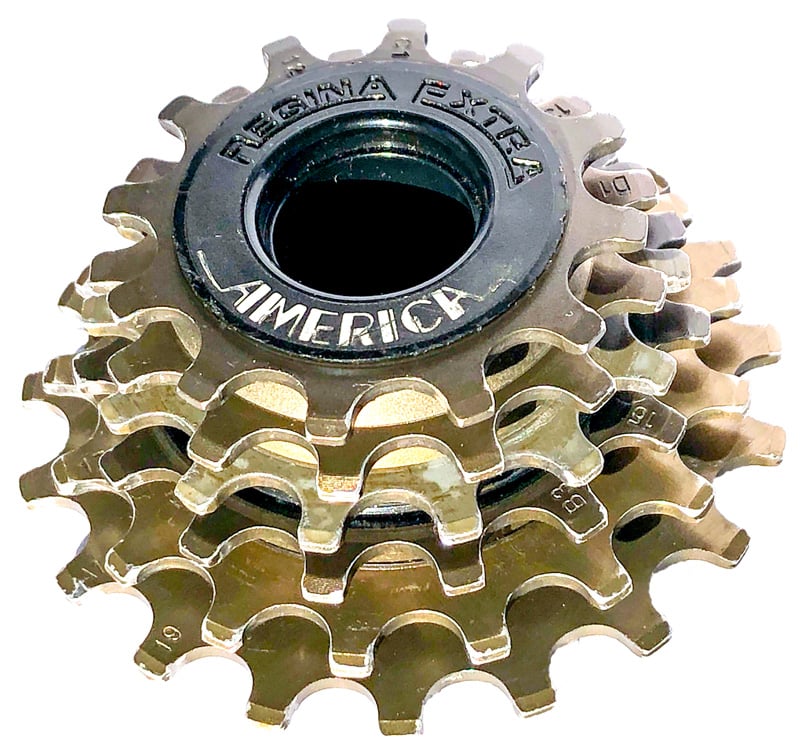
Regina was a highly regarded Italian manufacturer of high quality vintage freewheels and chains. This article discusses the Regina Extra America Superleggera freewheel that was released in the late 1980’s. By incorporating alloy cogs, the overall weight of the freewheel was reduced, hence Italian term ‘Superleggera’ was used in the name which translates to ‘Super Light’ in English.
Whilst alloy cogs are extensively used in modern day cassettes, back in the 1980’s most freewheels featured steel cogs which are heavier, but also more durable. Apparently these alloy cogs were heat treated and anodized to improve reliability and performance which gave them a unique brass/gold color. The black plastic America top cap provided some protection from the elements.
Weight Comparison
Below are the weights of 3 different Regina freewheel models. You can see the Superleggera freewheel is nearly 100 gms lighter than some of Regina’s other models.
- Regina Extra America Superleggera (12t – 19t) weight: 233 gms.
- Regina Corsa 6 speed freewheel (12t – 19t) weight: 298 gms.
- Regina CX 6 speed freewheel (12t – 19t) weight: 321 gms
The Regina America Metal Container
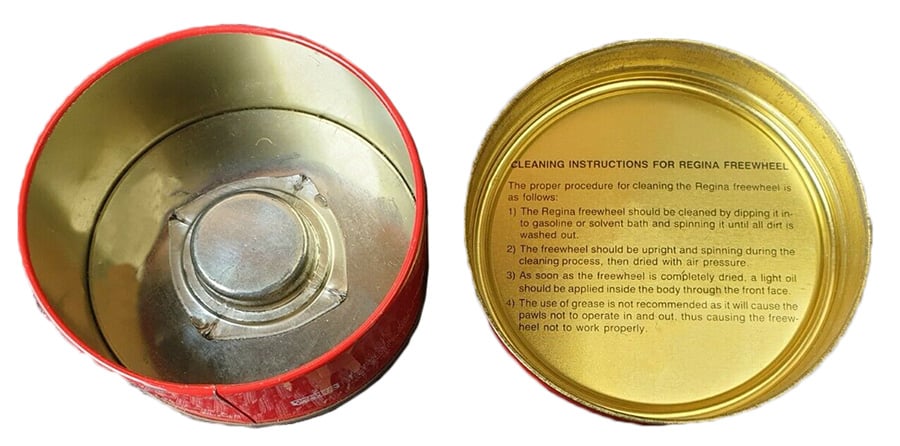
The Regina America freewheels were sold in a bright red metal container that was great for storing the freewheel and I have read that it could be used to soak and degrease the internals of the freewheel.
Overview of the Cogs on this Freewheel
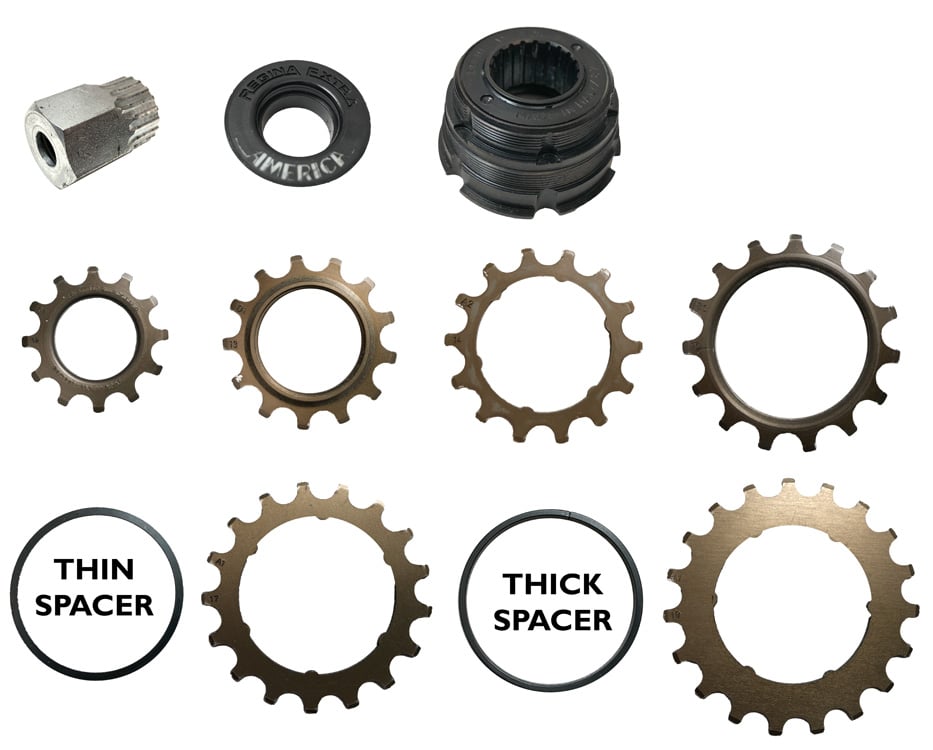
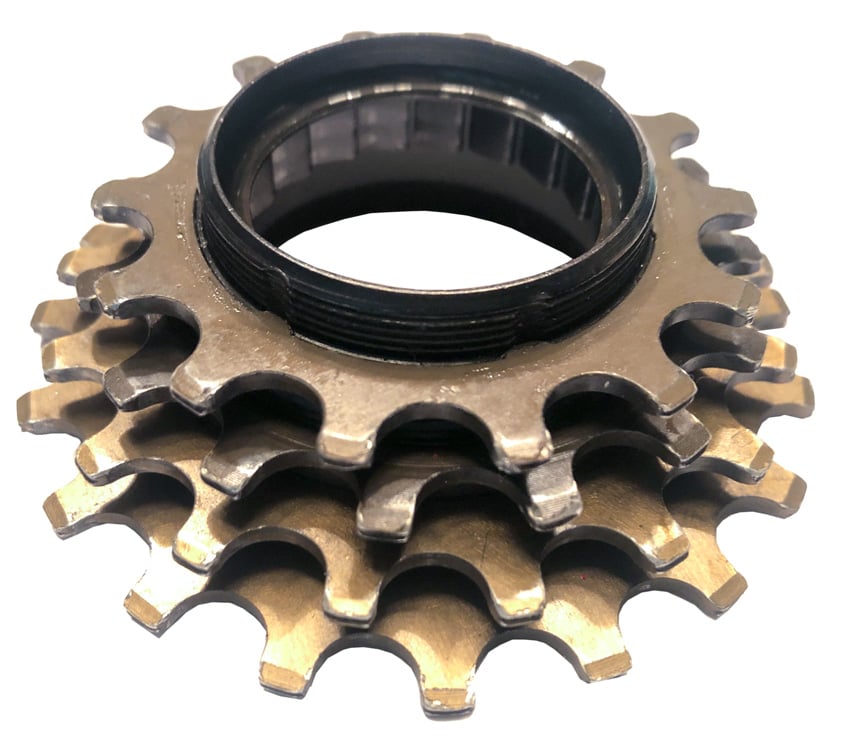
The Regina Superleggera freewheel was sold with a variety of different cog configurations. This freewheel has cogs ranging from 12 tooth to 19 tooth. It is designed for use on flat terrain with only 2 small gaps in the ratios (16t & 18t cogs).
Here is a brief description of the items shown in the image below;
- Splined freewheel removal tool. Used to remove the freewheel from the wheel hub.
- The plastic seal cap. It can be removed by just pulling it out with your finger.
- The 1987 America Superleggera freewheel body.
- Cogs: 12t, 13t, 14t, 15t.
- Thin spacer, 17t cog, thick spacer, 19t cog.
When I removed the cogs from the freewheel, I found that 3 of the cogs are splined (not threaded) and simply slot onto the freewheel body with various spacers fitted between cogs.
How to Remove the Cogs from the Freewheel Body
The following information is based on this reference; Smallest cog (#1) up to Largest cog (#6).
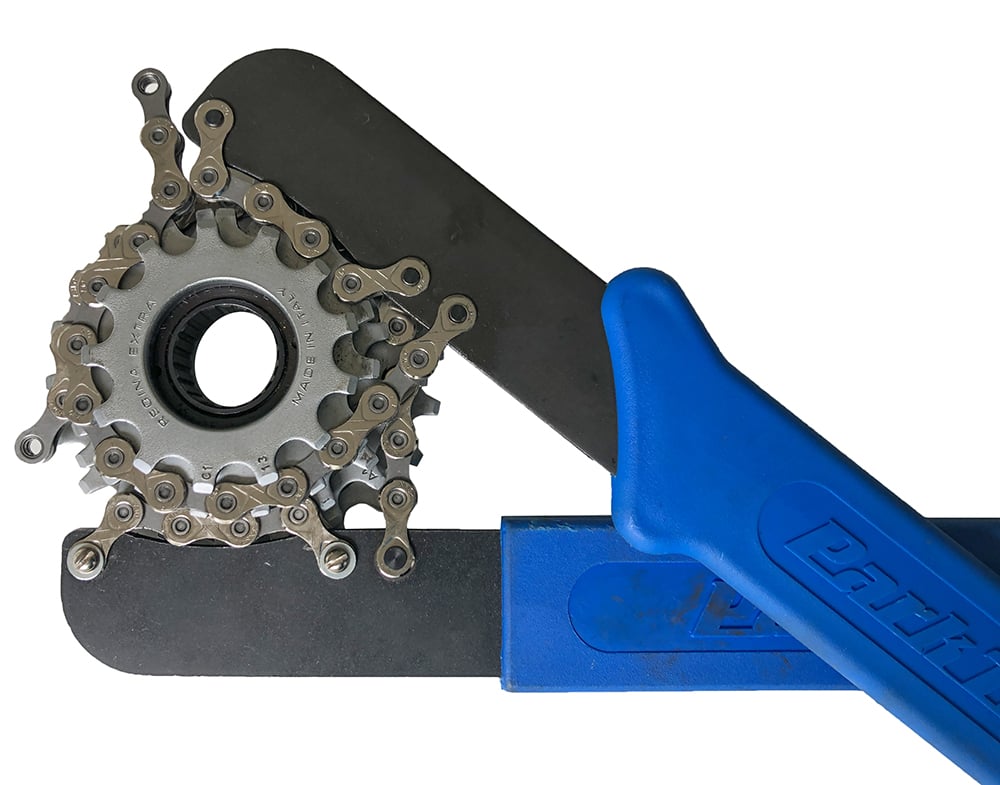
- Cog 1 is threaded into Cog 2 (you can remove cog 2 from the body leaving cog 1 attached).
- Cog 2 is threaded onto the freewheel body.
- Cog 3 is splined and simply slides on and off the freewheel body.
- Cogs 1 to 3 must be removed before you can remove cogs 4 to 6.
- Cog 4 is threaded onto the freewheel body.
- Cogs 5 & 6 are splined and simply slide on/off the freewheel body.
Equipped with this knowledge, please refer to my page on how to remove cogs from a Regina freewheel.
Part Compatibility with other Regina Freewheels
If you look at the splined cogs, they feature a 5 notch design. This is different to the 3 notch design found on other models of Regina freewheels. As alloy cogs are softer than steel cogs, Regina must have decided to add 2 more notches to the splined cogs to ensure they were strong enough to endure pedaling forces.
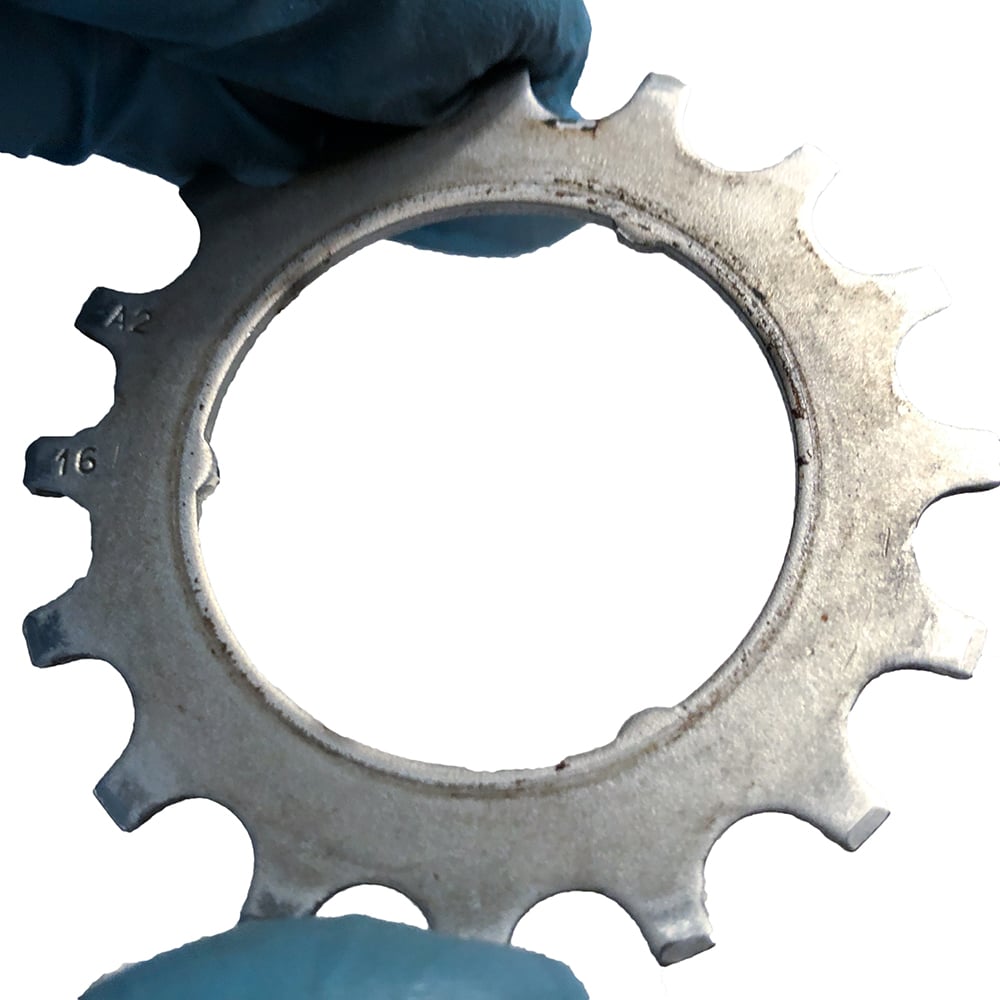
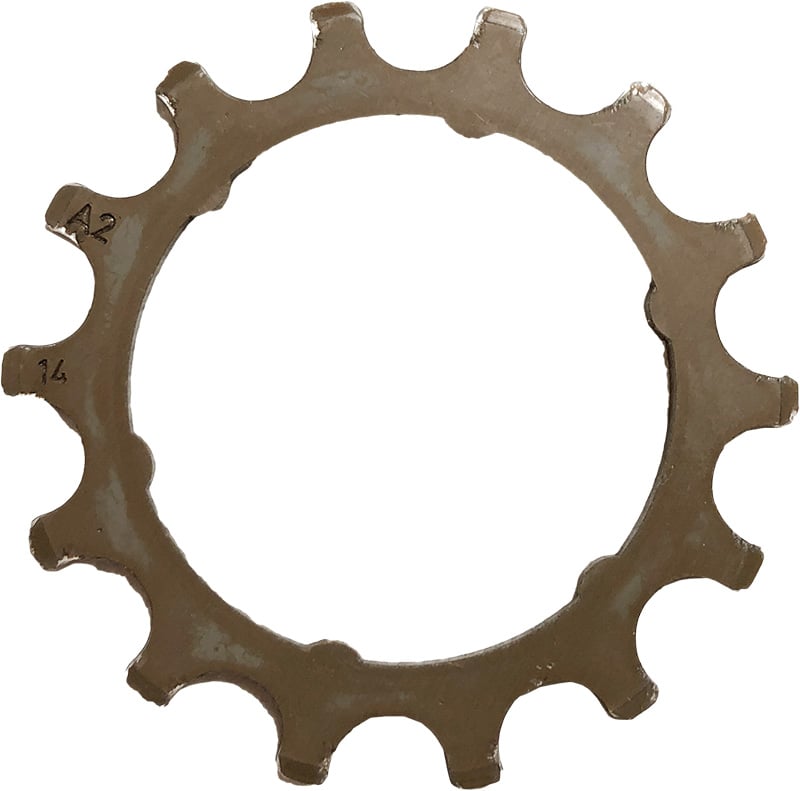
This difference in the number of notches means that the Superleggera freehub body and it’s splined cogs are not compatible with any Regina freewheel body and cogs that feature a 3 notch design. However, the Superleggera threaded cogs can be interchanged with other Regina freewheels of the same era ie. Regina Extra America and Regina CX threaded cogs. This is discussed further in the next section.
Is the Superleggera Freewheel Durable?
I purchased this ‘used’ freewheel on eBay and it looked to be in very good condition. On my very first ride, the gears were jumping around a bit. I thought maybe I wasn’t aligning the rear derailleur correctly on some of the shifts. Then a few kilometers later, I was pedaling and there was no resistance through the cranks. So I stopped and took a look at the freewheel. The fourth cog was slipping on the freehub body. So I moved the chain to the next smallest cog and rode back home. I removed the freewheel from the wheel and then removed all the cogs. Unfortunately I discovered the fourth cog (threaded 15t cog) had a hairline crack in it and was no longer gripping the threaded section of the freewheel body.
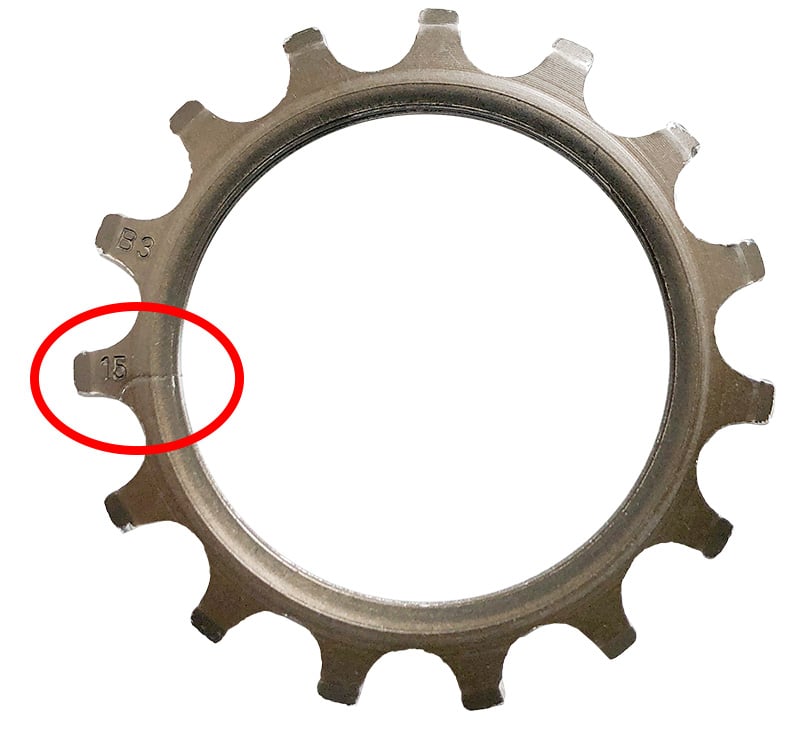
As it was my first ride, I doubt I cracked it and suspect the freewheel was broken by the previous owner. The perils of buying second hand I guess. Regardless, I have to question the durability of the design of the 15t cog for this position on the freewheel. As you can see, the metal is quite thin and apparently not strong enough. I suspect a 16t cog fitted in this position may be stronger.
Unfortuantely, it is difficult to source cogs for this freewheel. That lead me to trying a regular steel Regina CX 16t threaded cog and it screws onto the Superleggera freewheel body with no problems. Width of both cogs are identical at 5mm. There is a difference in color, weight and more importantly, strength.
Rear Wheel Thread Compatibility
All freewheels are designed to be screwed onto the rear wheel hub. Unfortunately there were 3 different threading standards of the era; French, English and Italian.
Various manufacturers, such as Campagnolo clearly marked the thread standard on their rear wheel hubs. Unfortunately, trying to decipher the threading standard of Regina freewheels is more difficult.
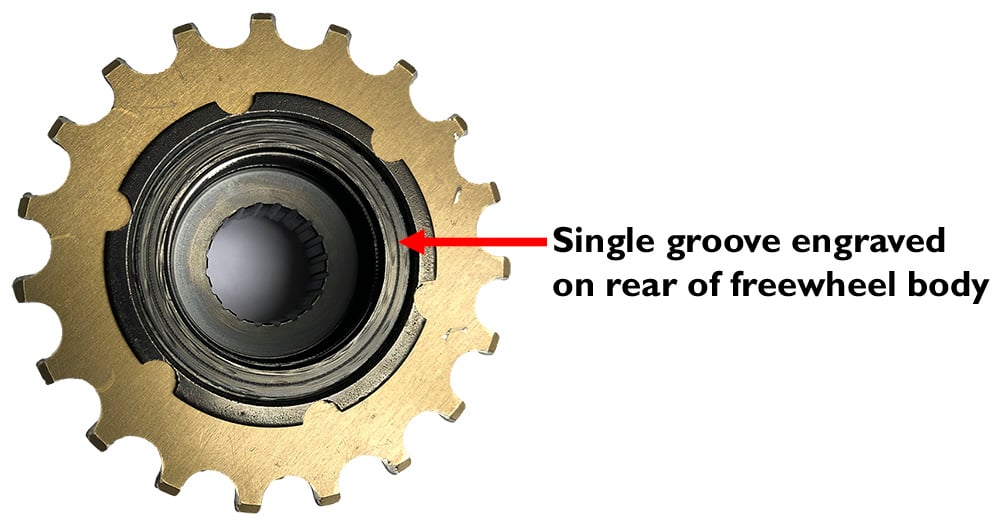
After searching online, it appears some manufacturers marked their freewheels with abbreviated lettering like FF (French threading), or engraved one or more circles on the rear of the freewheel body.
Some freewheels feature no markings at all. This makes it really difficult to identify the thread standard of the freewheel.
Thankfully at some point in the 1980’s, the ISO thread standard was adopted. The ISO threading standard was a clever compromise between the English and Italian threading (which was very close, but not the same). ISO threaded freewheels could be used on both English and Italian threaded rear wheel hubs without damaging the threads.
After some research, I believe the Regina Extra America range of freewheels were built with the ISO standard (around mid 1980’s onward). You can see a single ring engraved on the rear of this Superleggera freewheel body (pictured above). According to some sources, this marking originally symbolised an English threaded freewheel, but this freewheel was supplied with the original container and clearly labelled ISO. It smoothly screws onto my Italian threaded rear hub by hand.
How to Service a Regina America Freewheel
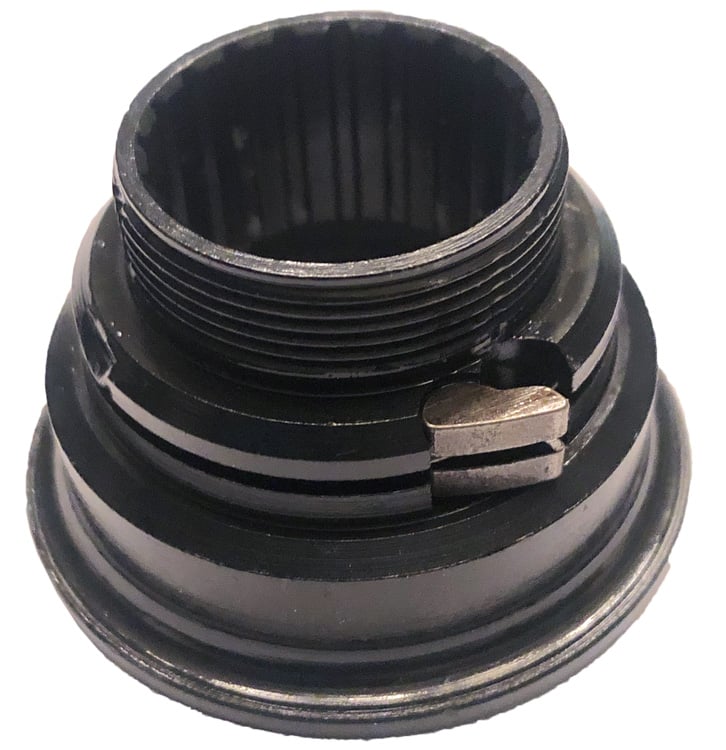
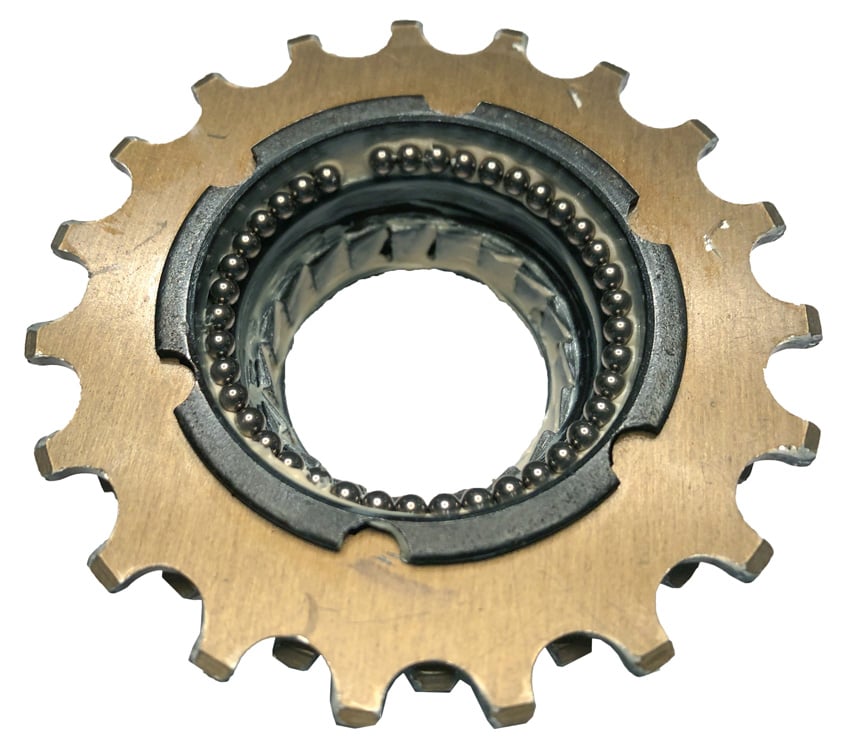
There are several ways you can service a freewheel. The easy option does not require any disassembly of the freewheel. The more thorough option is to disassemble the freewheel body to it’s separate parts. The images below show a disassembled Regina Extra America Superleggera freewheel. It was a fairly easy process, but there are a lot of loose ball bearings, so you need to make sure you don’t lose any.
When you reassemble it, a good quality waterproof grease will hold all the ball bearings in place and protect the internals from water and rust, but it won’t initially spin freely like a new freewheel (which were assembled in the factory with a light oil). But don’t worry, you’re not going to notice it riding and it will spin more freely with use. Grease is perfect for ball bearings and used in many places on a bicycle ie. wheel hubs, bottom brackets and head sets etc. It’s perfectly fine to use in the freewheel. Learn how to service a Regina Freewheel.
This freewheel had 31 loose ball bearings in the upper race of the freewheel with no gap when all bearings were fitted. The lower race of the freewheel had 40 loose ball bearings. Notice the gap between the start and end of the bearings, as seen in the image below. I found it easy to re-assemble the freewheel by fitting the lower bearings to the outer body, rather than the inner body as shown below.
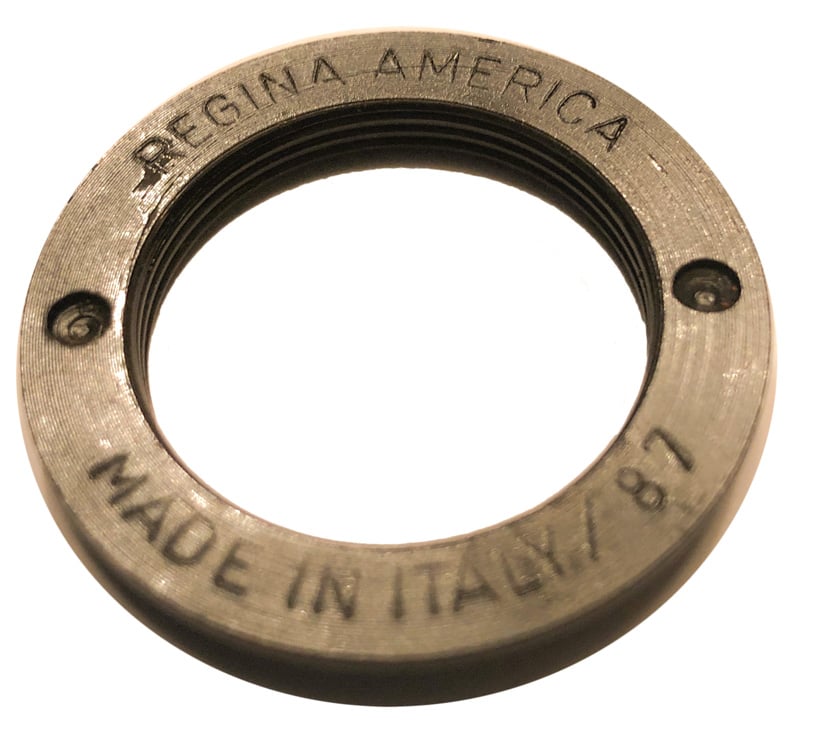
When this is removed the freewheel will fall apart.
Apparently it is dated 1987.
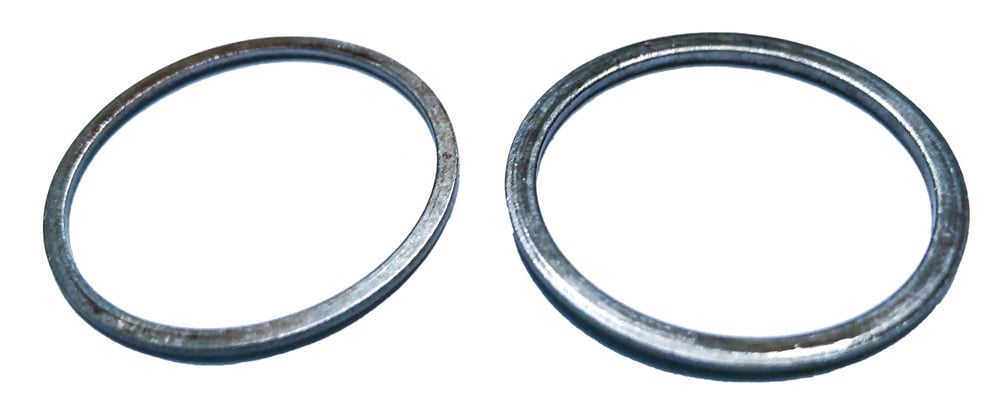
Spacers not the same thickness, 1 thin, 1 thicker.
They are designed to stop you over-tightening the top cone ring.
Upper bearings are not shown.
Disclaimer
Whilst I enjoy working on my own bikes, I am not a qualified bicycle mechanic. The content of this article is purely illustrative and does not constitute professional advice. For your own safety, this type of work should only be undertaken by a qualified bicycle mechanic. Incorrect assembly of parts could result in equipment damage, personal injury or death.
About Me.
I have been riding and working on my own bikes for many years now. I wanted to share my experiences, knowledge and research with others. My aim is to inspire people to get involved in all aspects of this amazing sport. Cheers.
Comments.
I welcome reader feedback in the comments section. Should you wish to suggest an amendment, please include a note advising the source of your information so that myself and other readers can ascertain the accuracy of your information. Note: Trolling or argumentative comments will be removed as they are counter-productive.