
Campagnolo released their first pedal in 1958 and continued making pedals into the 1990’s. Whilst the materials and shapes changed from model to model, many of them share a simple but effective internal cup & cone bearing system. The advantage of this design being it offers a high level of pre-load bearing adjustment and durability. If you have had experience servicing other bike components that feature a cup & cone bearing system eg. wheel hubs, threaded headset or bottom bracket, then servicing a set of pedals is very similar.
Campagnolo included pedals in many of their vintage group sets. The Super Record group set was available with 2 different pedal specifications;
- Super Record pedals (premium option) which featured a titanium axle.
- Superleggeri pedals which featured a heavier steel axle.

This article will explain how I serviced a pair of Campagnolo Super Record pedals. The Super Record pedals are each fitted with 2 sets of 16 ball bearings (1/8″ size). You may find your pedals have a different quantity and size of ball bearing, but the process should essentially be similar.
Why learn to service your pedals?
Learning how to service and adjust a cup and cone bearing system is an invaluable skill when working on vintage bikes as it is common for many wheel hubs, bottom brackets and headsets use a cup and cone design. Even modern Shimano and Campagnolo wheel hubs can feature cup and cone bearing designs.
There are a variety of different ways to service Campagnolo pedals. The information featured in this article is the method I used. Any suggestions or amendments can be added to the comments section below.
Before deciding if this is a process you want to try please note that this article is purely an overview of how I service my own pedals and should not be treated as professional advice. Please read my disclaimer at the end of this article. Please read the entire article before deciding if this is something you want to try yourself.
Remove Pedals from Cranks
First we need to remove the pedals from the cranks. To loosen the right pedal, turn the wrench anti-clockwise but remember the left pedal is reverse threaded, so turn the wrench clockwise to loosen the left pedal.
Pedal Inspection
Holding the pedal, rotate the axle to determine how the axle feels.
- Does the rotation feel notchy, rough or gritty?
- Does the axle rotate freely or is it tight?
- Does the axle have any play (up-and-down or in-and-out movement)?
- Does the axle in both pedals feel the same?
If there is play in the axle, then you could try adjusting the bearing pre-load as a possible quick fix. This can be done without dismantling the pedals and is explained later in this article. However,
If the axle feels rough or gritty, then it may be caused by any of the following;
(a) incorrect pre-load on the bearings.
(b) grit or contaminants in the bearings.
(c) the cups, cones or bearings are damaged.
Once the service is complete, you will be able to compare how the axle feels. Ultimately it should feel very smooth to rotate with no in/out or up/down movement of the axle.
Pedal Servicing Options
There are 2 main ways you can service a set of pedals;
Option 1. Quick and easy, but less thorough.
This option is for people that are not very mechanically minded. It does not require disassembly of the pedal and I will cover it briefly. The basic steps are;
- Unscrew the dust cap by turning it anti-clockwise. This is the same for both left and right pedals. You can buy a special dust cap wrench to remove them if they are really tight. Pliers, vice grips etc are not recommended to remove plastic dust caps as you may damage them.
- There are 2 sets of bearings in each pedal (one set at either end of the pedal). You can either add some lubricant to the bearings through the gaps around the axle, or you may want to spray in a degreaser (or soak the entire pedal) to dissolve any existing lubricant and hopefully clean out some of the grit. Once the inside of the pedal is dry, apply lubricant at both ends and work it in by rotating the axle.
- Hold the pedal body and rotate the axle again. If it still feels rough, try adjusting the bearing pre-load (as explained later in this article).
Option 2. Full disassemble of the pedal, clean, grease and reassemble the pedal.
This article explains this method in detail because you should end up with the best result. Additionally you have the opportunity to assess the condition of all the parts. If you reassemble using good quality grease, the internals should be well protected from water and corrosion and you should not need to repeat this process very often.

Tools Required
To service the Campagnolo Super Record pedals, I used the following tools, but your pedals may require slightly different sized wrenches. This can be easily assessed by simply removing the dust caps.
- a 13mm cone wrench.
- a 16mm wrench for the lock nut.
- Bent nose pliers are useful to remove and fit ball bearings.
- A clean rag, cloth or paper towel
- Good quality water proof grease for bicycle bearings.
- A pair of rubber gloves.
- Small pin (may be required to remove the internal washer).
- Degreaser for cleaning parts
Optional Items:
- Cotton tips
- Dust cap wrench (to loosen tight pedal dust caps)
Disassemble the pedal
Choose any pedal you wish to dismantle and unscrew the dust cap by turning it anti-clockwise (the same for either left and right pedals). If your dust caps are on really tight, you can buy a special dust cap wrench to remove them. Pliers, vice grips etc are not recommended to remove plastic dust caps as you may damage them.


Now slide the 13mm cone wrench onto the flat slots of the cone nut. Position the 16mm wrench on the lock nut. Hold the cone wrench firmly so it doesn’t move and turn the lock nut anti-clockwise to loosen it, then remove the lock nut from the axle. Next, remove the small keyed washer from the axle, you may need a pin to pick it out. Note: there is a channel in the axle designed to fit the small notch in the center of the washer.

Position the pedal over a clean surface like a white paper towel just in case any of the bearings fall out during this part of the disassembly. They are small and you don’t want to lose any of them.
Now we need to unscrew the cone nut by holding the axle and rotating the cone nut anti-clockwise. If you are unable to do this with your fingers, then use the 13mm cone wrench. Whilst removing the cone nut, make sure to keep the axle in the pedal to stop the bearings falling out. Take note of the correct orientation of the cone nut as it will need to be threaded back on the same way when we reassemble the pedal. Before we remove the axle from the pedal, remove the ball bearings from this side of the pedal and place them into a container.
Position the pedal over a white paper towel or cloth and slowly remove the axle from the pedal. Some of the ball bearings from the second race may fall out. I collect all the ball bearings from this side in a different container. Once the axle and all the ball bearings have been removed, look inside the pedal body to double check that no ball bearings slipped in there. They are small and when coated with grease they can easily stick to internal surfaces of the pedal body. Count the number of ball bearings in both containers so you can check none have been lost during cleaning or reassembly.

In my pedals, there are 2 sets of 16 ball bearings (1/8″‘ size). Depending on your pedal, you may have a different number and diameter ball bearings. Regardless the cleaning and reassembly process is still the same.

There may be a different quantity and size of ball bearings in your pedals.
Clean the parts
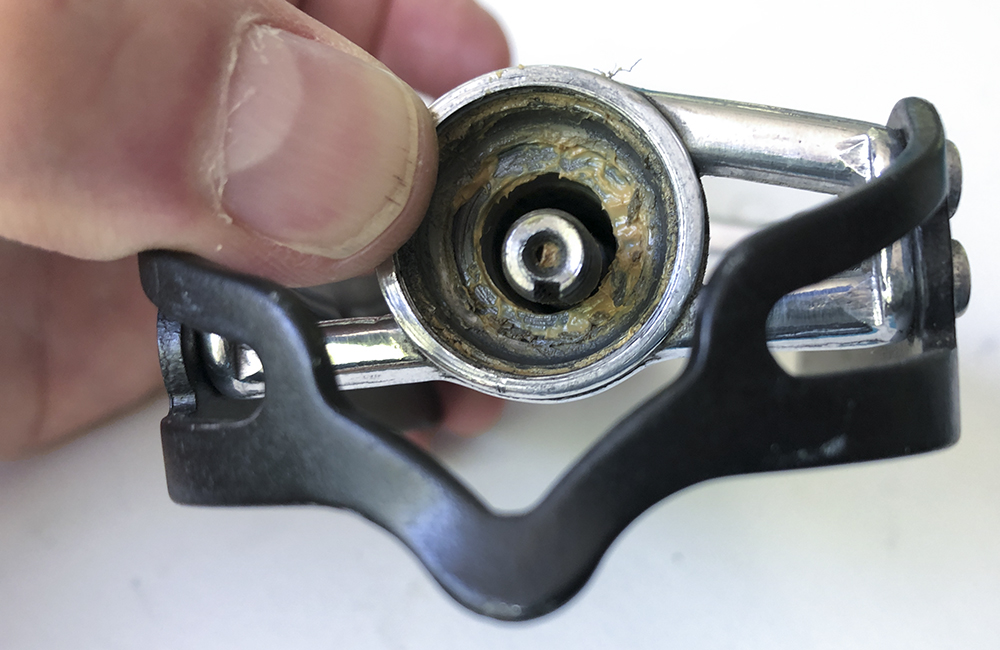
Now it’s time to clean away all the old grease and muck from all parts of the pedal. The more thorough you are, hopefully the better the result. Degreaser, rags and cotton tips are handy for this. Do not use hard tools when cleaning inside the cups of the pedal body as this surface must remain smooth and unscratched. Cotton tips can be handy for this task.

Once you have finished cleaning, make sure the inside of the pedal is dry and free of any degreaser. Check the cups and cones for any pitting or a rough surface. If the cup is damaged, you may need to replace the pedal.
Now we use a bit of degreaser to clean the loose ball bearings and wipe them clean with a rag or paper towel. Inspect the bearings for any wear. Now is the opportunity to replace bearings with the same size if required.
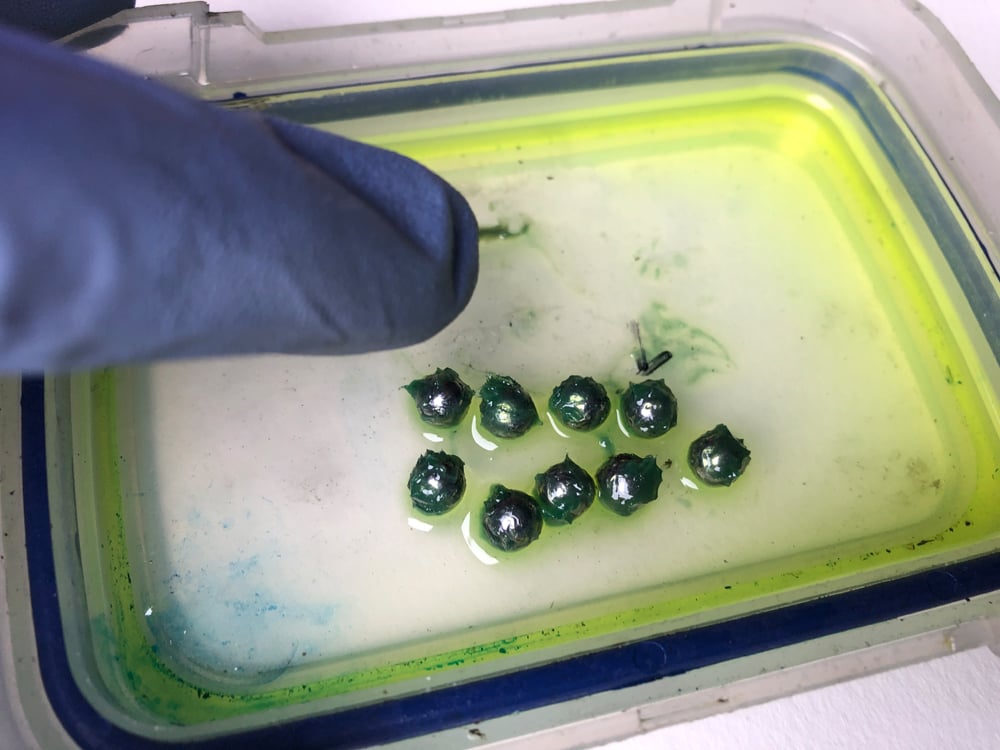
Degrease bearings 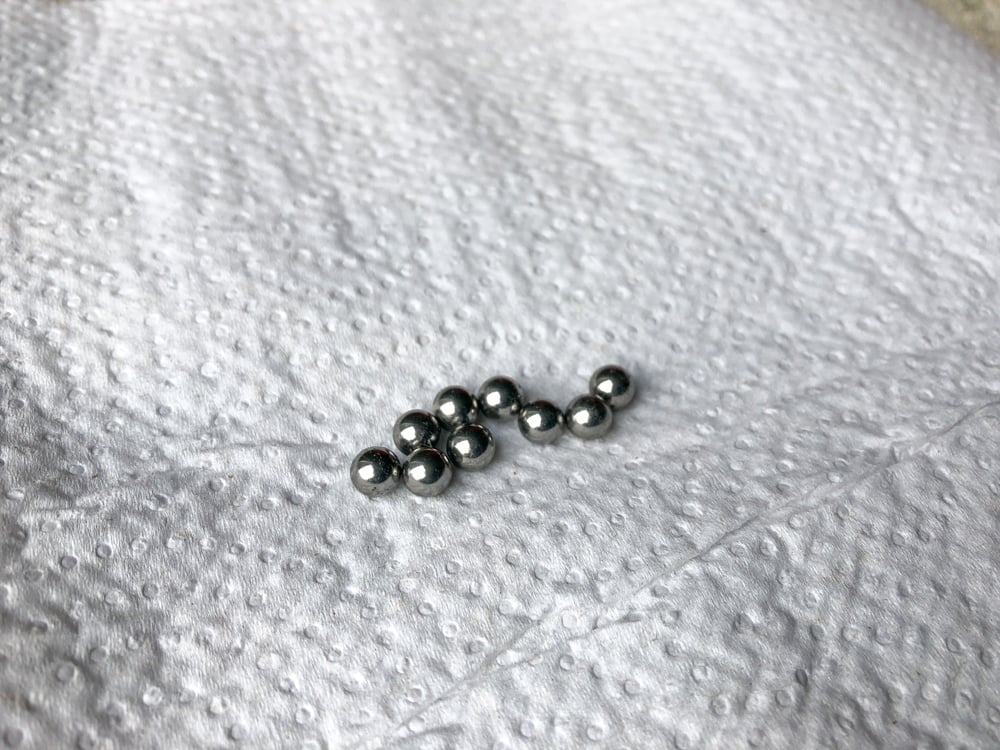
Clean bearings
Reassemble the Pedal
Apply a good layer of grease to the cups on both sides of the pedal body. Use good quality grease, don’t skimp! A small tube will last you for ages as you require so little for this job. Apply a thin layer of grease to the axle cone, axle threads and cone nut. This will help to prevent any corrosion and make it easier to adjust the bearing preload tension as well as disassemble the pedal for the next service.

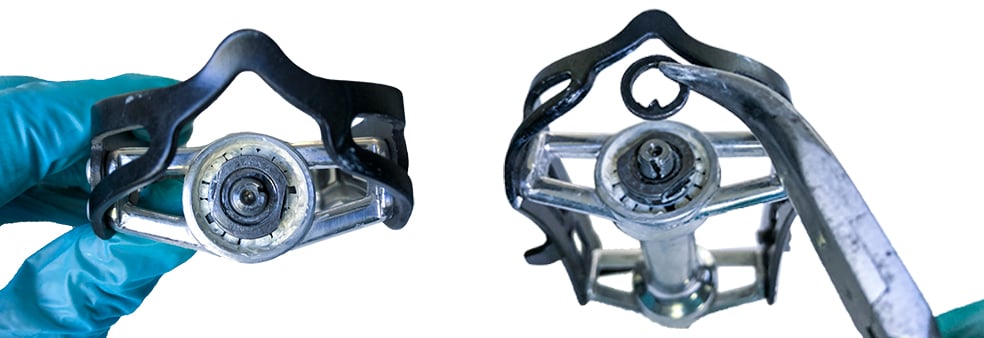
Place the correct number of ball bearings into the cup on both sides of the pedal body. I count them as I insert them to make sure none went missing. The grease should easily hold them in position as shown in the image below.

Before you insert the axle back into the hub. Take a quick look to ensure all the bearings are still in place and none have fallen into the middle of the pedal body or out onto your paper towel. Carefully insert the axle into the hub making sure not to dislodge any bearings in the process.
Pay attention to position of the bearings on the side where the axle exits. They need to be in the correct position, don’t set them too low in the cup. Slowly thread the cone nut onto the axle, making sure it is in the correct orientation. Keep an eye on the ball bearings as you tighten the cone nut to make sure they don’t slide out of position. If they do move out of position, loosen the cone nut and re-position the bearings again. You will know when they are sitting correctly when the cone nut is fitted and the bearings are evenly spaced and rotate evenly on the same plane when you turn the pedal axle. If there are gaps or you can’t thread the cone nut all the way down, then the bearings are not positioned correctly. It may take a few tries to complete this step correctly.
At this stage we only tighten the cone nut enough to hold the bearings in position and prevent the axle falling out of the pedal body. Fit the washer onto the pedal axle. Align the notch in the washer with the channel of the axle. Loosely thread the lock nut onto the axle, but not down into contact with the black washer just yet.
Bearing tension adjustment
So far everything is quite straight forward. This next step will usually require a number of repetitions to achieve the perfect bearing tension setting regardless of how many times you have done it before. Ultimately we only want the cone nut tight enough to eliminate any play in the axle. Provided the bearings and races are in good condition, the correct tension should result in the pedal axle rotating very smoothly.
Step 1. Tension the cone nut.
Adjust the cone nut tension so it makes very light contact with the ball bearings. Slowly rotate the pedal axle. Does it feel super smooth with no gritty, notchy or rough feelings? It if doesn’t, loosen the cone nut a little and repeat until it feels super smooth.
Step 2. Check the axle for any play.
Check the axle does not move up-and-down or in-and-out of the pedal body. If the axle has any play, tighten the cone nut just a little and test again for play. Repeat this in small increments until there is no play in the axle.
Step 3. Set the lock nut.
Holding the cone nut and axle in it’s current position, tighten the lock nut until it makes light contact with the washer (top of cone nut). Do not fully tighten the lock nut yet. This step is necessary to prevent the cone nut moving out of adjustment in step 4.

Step 4. Check axle rotation (second time).
Hold the pedal body and gently rotate the axle again to see how it feels. We want the rotation to feel just like before, super smooth, not notchy, gritty or rough. If the axle does not rotate smoothly, loosen the lock nut slightly then loosen the cone nut slightly. Again lightly tighten the lock nut and repeat this process until the axle rotates smoothly again.
Step 5. Final Test.
Repeat step 2 again ie. check for play in the axle again. If there is no play in the axle and the axle rotates smoothly, go to step 6, otherwise repeat the tensioning process until you get the best result you can. Ultimately the most important thing is there must NOT be any play in the axle before continuing with step 6.
Step 6. Tighten the lock nut.
Fit the cone wrench on the cone nut and the other wrench to the lock nut. Hold the cone nut wrench and axle in position, then tighten the lock nut a little (but not fully tight yet). Again check the axle for smooth rotation and no play. If it is still OK, repeat step 6 a few times until the lock nut is completely tight against the cone. You may find tightening the lock nut affects the bearing tension and it needs re-adjustment. Don’t worry, keep persisting until you get it as perfect as you can. The must not be any play in the axle when complete.
Fit the Pedal Dust Cap
Lastly fit the pedal dust cap. I usually put a little bit of grease on the threads before screwing it on. Finger tight should be enough to keep it in place. Check it after a few rides to be sure.

Congratulations!
You should now have a smooth rotating pedal axle with no play. The new grease may add some resistance so the rotation, so it may not rotate as lightly as it did before the service but this is normal and will of course depend on the viscosity of the grease you used. Over time everything will settle-in and the axle will being to spin more freely in the pedal.
References
I hope you found this article interesting. I have listed the following website pages as general references.
Disclaimer!
Whilst I enjoy working on my own bikes, I am not a qualified bicycle mechanic. The content of this article is purely illustrative and does not constitute professional advice. For your own safety, this type of work should only be undertaken by a qualified bicycle mechanic. Incorrect assembly of parts could result in equipment damage, personal injury or death.
About Me.
I have been riding and working on my own bikes for many years now. I wanted to share my experiences, knowledge and research with others. My aim is to inspire people to get involved in all aspects of this amazing sport. Cheers.
Comments.
I welcome reader feedback in the comments section. Should you wish to suggest an amendment, please include a note advising the source of your information so that myself and other readers can ascertain the accuracy of your information. Note: Trolling or argumentative comments will be removed as they are counter-productive.
Thank you for such an informative review and maintenance guide. I just bought a pair of NOS Superleggeri with the steel axle. I intend to use them from now on and replaced my clip in pedals.
What type of cleats were used with these pedals ? Clip in LOOK pedals were brand new when I first got into serious cycling in the early 80s, so I only had cages for a short time and I do not remember what I used. Now I want to match up some winter shoes for my “New” Vintage Super Leggerri