
Regina was a highly regarded Italian manufacturer of high quality vintage freewheels and chains. This article only discusses the process of removing the smaller cogs (or sprockets) from the freewheel. This task is required on some Regina freewheels for the purposes of gaining access to the top cone ring so the freewheel can be disassembled for a full internal service. You can read more about that in my article on how to service a Regina freewheel.
Tools Required
The tools I used to remove cogs from my Regina freewheel were;
- Freewheel Removal Tool.
Required to remove the freewheel from the bicycle wheel. There are many different types to suit different brands and models do your research carefully before buying if you don’t have one. - 2 x Chain Whip tools or 1 x Chain Whip tool (plus some timber and screws).
These tools are used for removing any small cogs (if required). I use modern 11 and 12 speed Park Tool chain whips to remove cogs from my 6 speed freewheels.
Removing small cogs from the front of the freewheel.
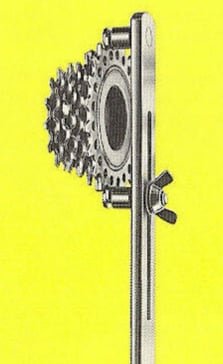
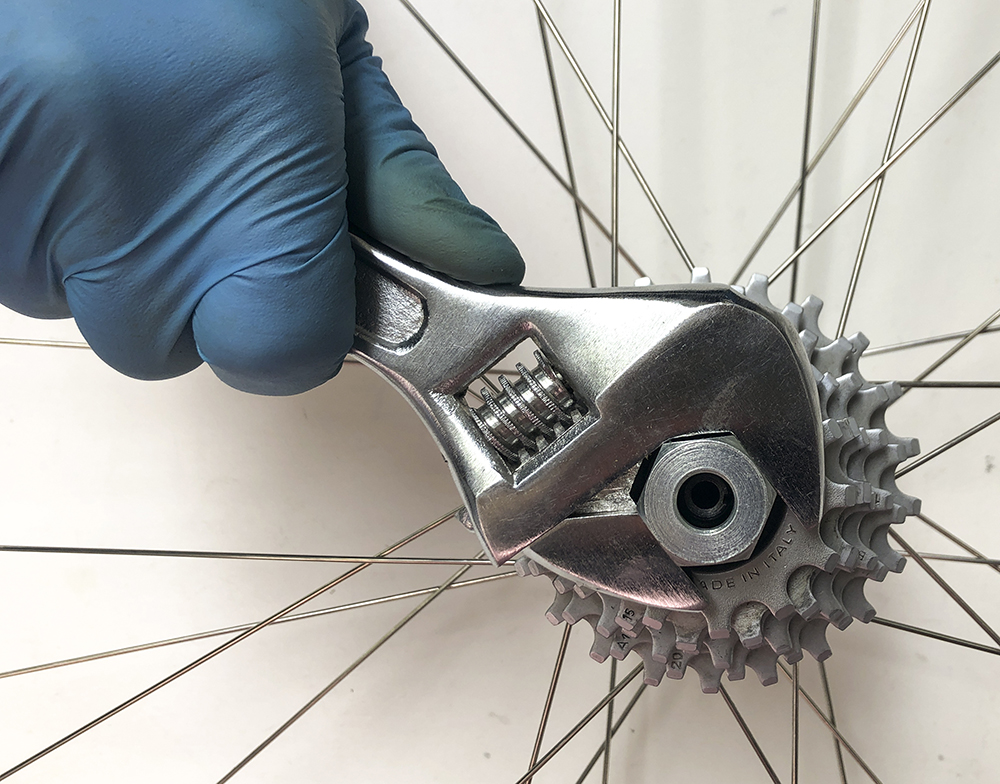
Removing cogs from a freewheel can be done using either 1 or 2 chain whips, however back in the day, there were also specialist tools available such as the Regina freewheel vice shown (image 1 below) which worked just like a single chain whip. With 2 of these tools you could remove cogs.
| 
|
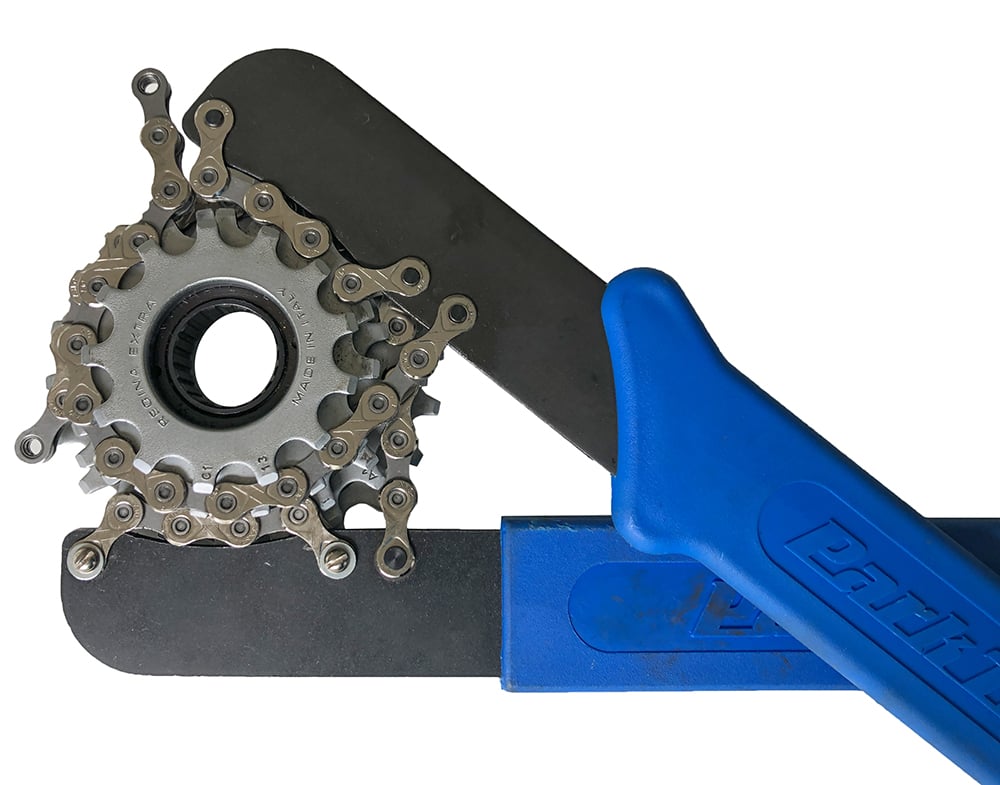
2. Right image: Park Tools chain whip.
In this article I am only going to discuss removing the smaller cogs which is sometimes required if you wish to disassemble a Regina freewheel, however the same tools are required to remove other cogs.
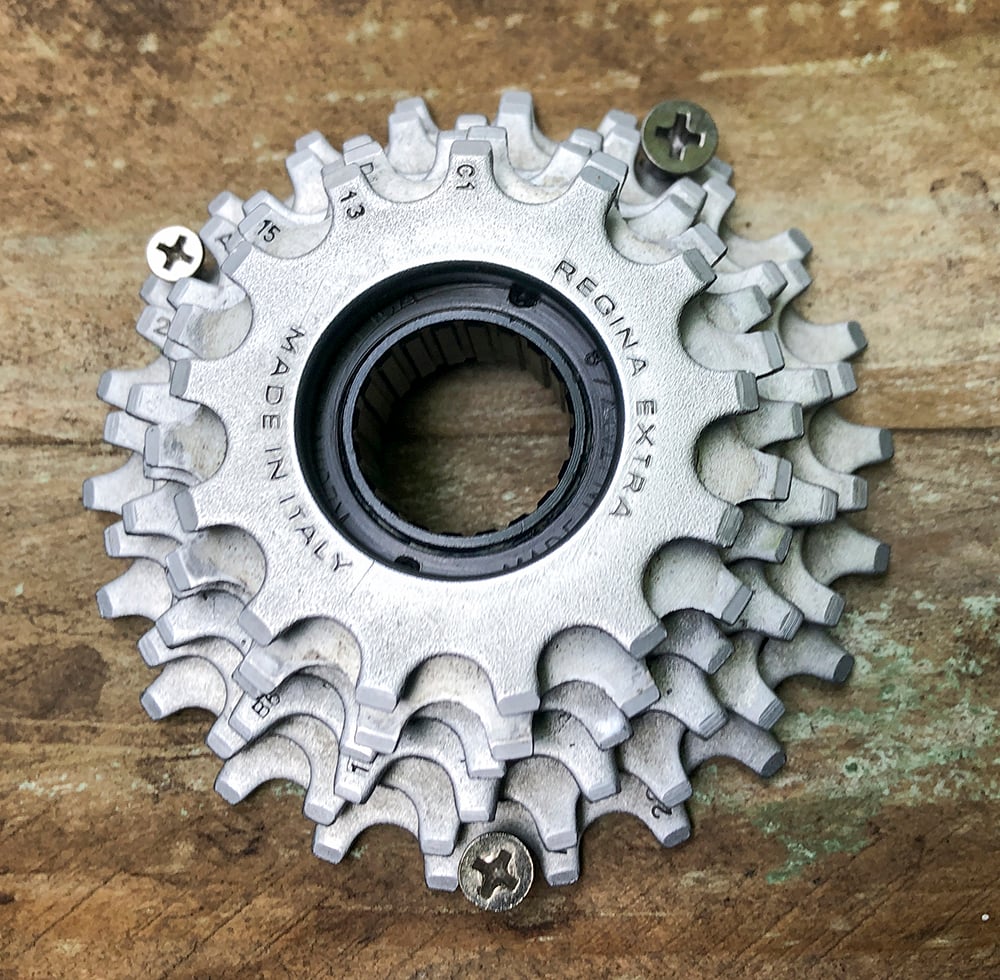
Important Note: You freewheel may contain a mix of threaded and splined cogs (like this Regina Extra America freewheel). Splined cogs simply slide on/off the freewheel body. The smaller cogs thread off the front, whilst I believe the larger cogs are reverse threaded and designed to be screwed off from the rear of the freewheel body.
Option 1. Remove cogs using 2 chain whips.
This step will explain how to remove smaller cogs using 2 chain whips. If you have 2 chain whips, the cogs can be removed without having to remove the freewheel from your bicycle wheel.
This can be done with the freewheel on the bicycle wheel.
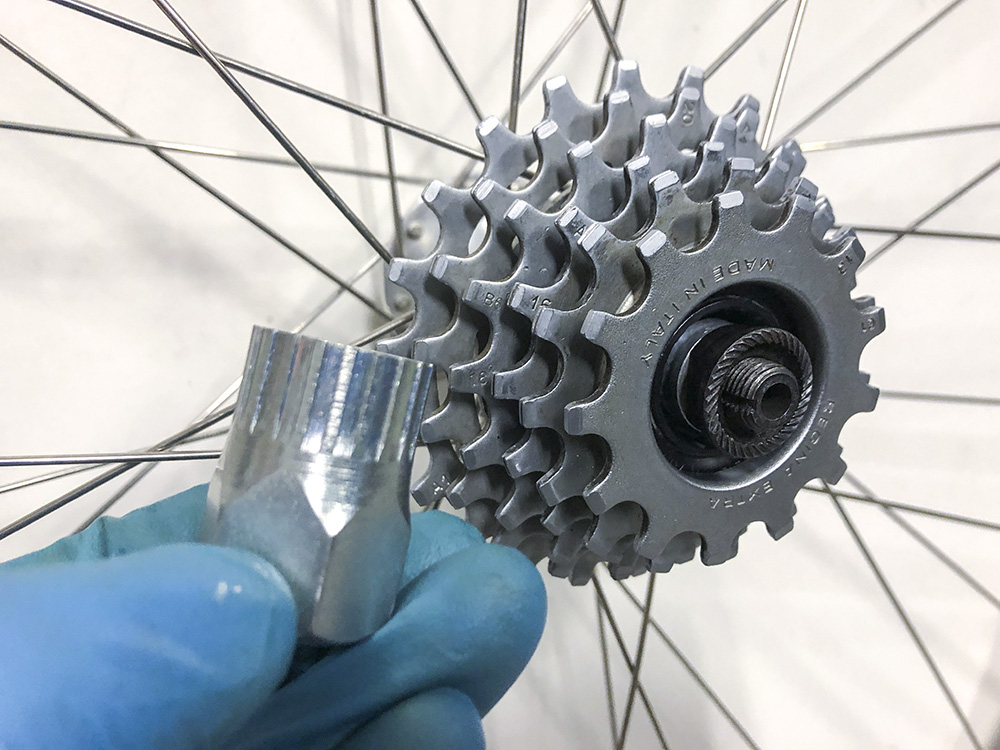
Using 2 chain whips, place one chain whip on the second largest cog (required to stop the freewheel rotating). Then place the second chain whip on the cog you want to remove and turn this cog anti-clockwise to unscrew it. Repeat this process if you need to remove another cog.

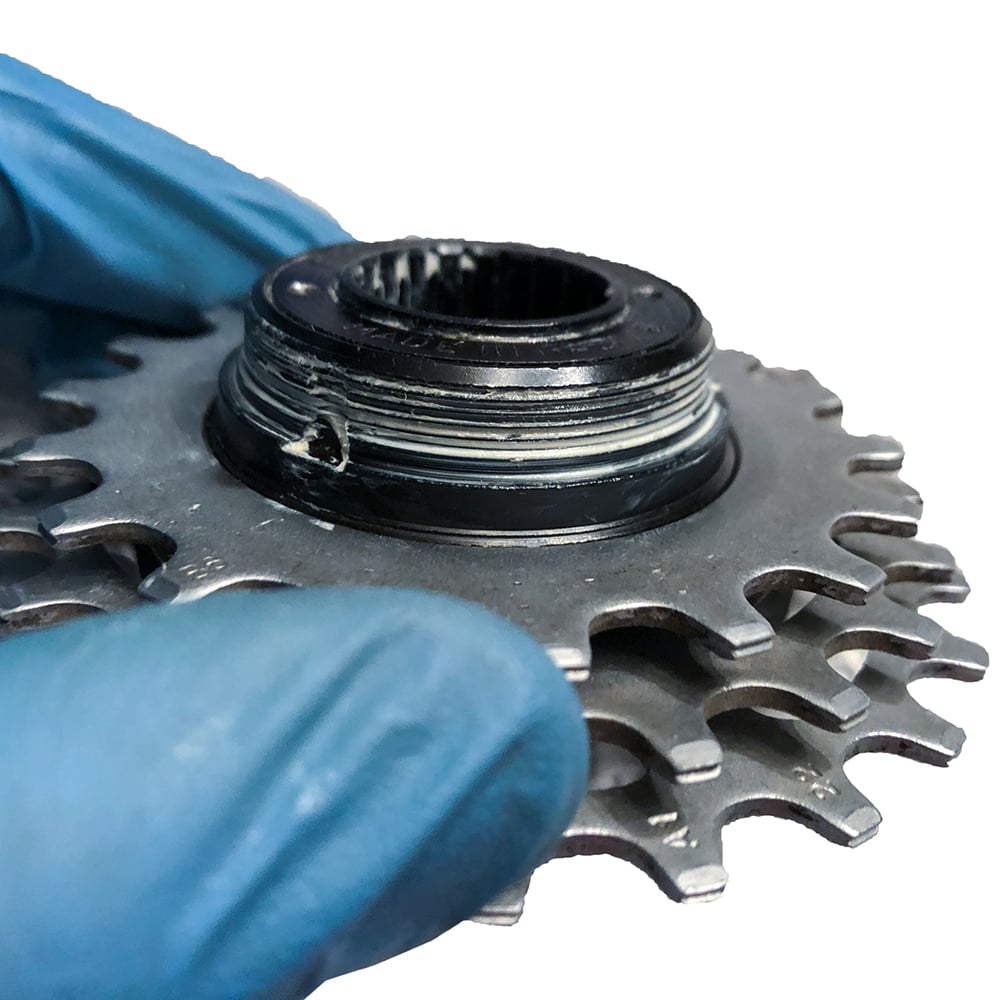
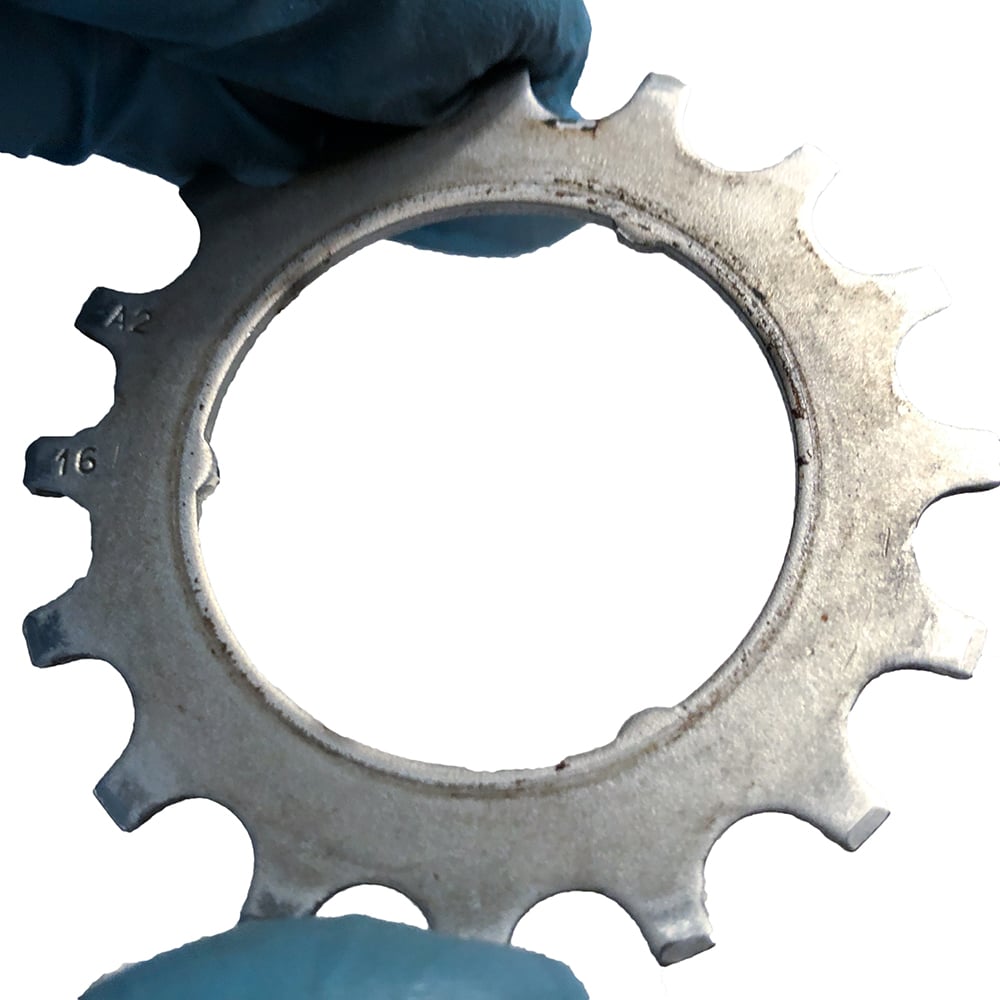 | After removing the 2 smallest cogs, the third cog slid off as it has splines. It was held in place by the second smallest threaded cog. |
Option 2. Removing smaller cogs using 1 chain whip.
If you only have 1 chain whip, you can use this simple technique below to remove the front cogs from the freewheel.
(i) Remove the freewheel from the bicycle wheel
|  |
2. Right image: Unscrew freewheel anti-clockwise to remove.
(ii) Once the freewheel is remove from the bicycle wheel, carefully screw 2 or 3 screws at opposing locations around the freewheel. The screws should be positioned in between the teeth of the largest cog as shown in image below. You don’t need to screw the screws all the way down. We just want the shaft of the screws to stop the freewheel rotating. Be careful not to bend or damage any of the teeth.
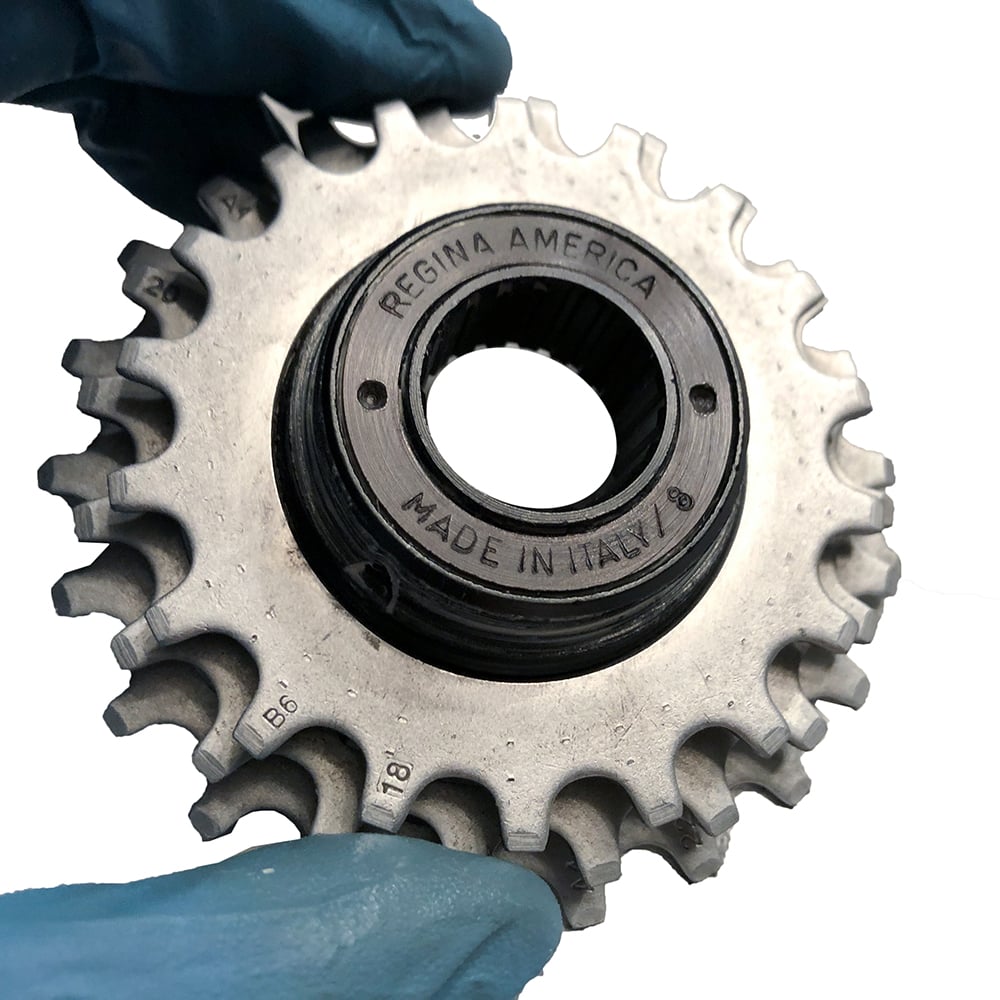
(iii) Now use your chain whip to remove the smaller cogs by turning them anti-clockwise. Remember not all cogs may be threaded onto the freewheel. The third cog on this freewheel was splined and simply slid off once the first 2 threaded cogs are removed.
(iv) Remove the screws to release the freewheel when done.
Disclaimer
Whilst I enjoy working on my own bikes, I am not a qualified bicycle mechanic. The content of this article is purely illustrative and does not constitute professional advice. For your own safety, this type of work should only be undertaken by a qualified bicycle mechanic. Incorrect assembly of parts could result in equipment damage, personal injury or death.
About Me.
I have been riding and working on my own bikes for many years now. I wanted to share my experiences, knowledge and research with others. My aim is to inspire people to get involved in all aspects of this amazing sport. Cheers.
Comments.
I welcome reader feedback in the comments section. Should you wish to suggest an amendment, please include a note advising the source of your information so that myself and other readers can ascertain the accuracy of your information. Note: Trolling or argumentative comments will be removed as they are counter-productive.
Thanks for the great explanation, I want to get a smaller clog with 11 teeth and find some smaller ones so I don’t ghost peddle on my eBike. Where do you get these individual cogs, appreciate your advice.
Russ
Unfortunately it is not easy to find individual cogs for these older freewheels. Even if you buy another freewheel, they were not designed to be able to fit any cog in any position. Additionally, I don’t think there was an 11t cog for freewheels in the 1980’s, the smallest cog I was able to find for a Regina 6 speed freewheel is a 12t. From memory you could get either a 12t – 17t or 12t – 19t. But it would be much simpler to fit a larger chain ring if you need a larger gear. Campagnolo definitely sold 53t chain rings and probably even bigger back then.