Building a bicycle wheel is a rewarding experience for any aspiring bicycle mechanic. I have been tinkering with wheels for over 20 years and I decided to write this article to pass on the information I wish I had known when I first started.
Building and truing wheels requires the right knowledge and the right tools. The aim of this article is to help you save time by learning the correct techniques that a master wheel builder would use when building a wheel.
Initially you might think building a wheel is a bit like trying to solve a Rubicks cube. But it is a straight forward and logical process that you can learn how to do. The techniques are not complex and many of the steps are quite repetitive, so you learn them quickly. However, you will need a quiet work environment when truing a wheel and also need to concentrate on each step.
If you are only interested in learning how to true a wheel, keep reading as this article is perfect for you also. Truing a wheel requires the same tools and techniques, but less work as the wheel is already assembled.
What are the 5 attributes or a perfect wheel?

When building a wheel I want to achieve the best compromise of the following attributes;
- High spoke tension.
- Similar spoke tension for all spokes on the same side of the wheel.
- Laterally true (minimal side to side wobble of the rim).
- Radially true (minimum up and down wobble of the rim).
- Correct dish (rim is centred to the hub).
Don’t worry if you don’t understand all of these concepts yet, they will become crystal clear later if you choose follow my recommendation.
What tools are required?
- Wheel Truing Stand
- Wheel Dishing Tool
- Spoke Tension Meter
- Spoke Wrench
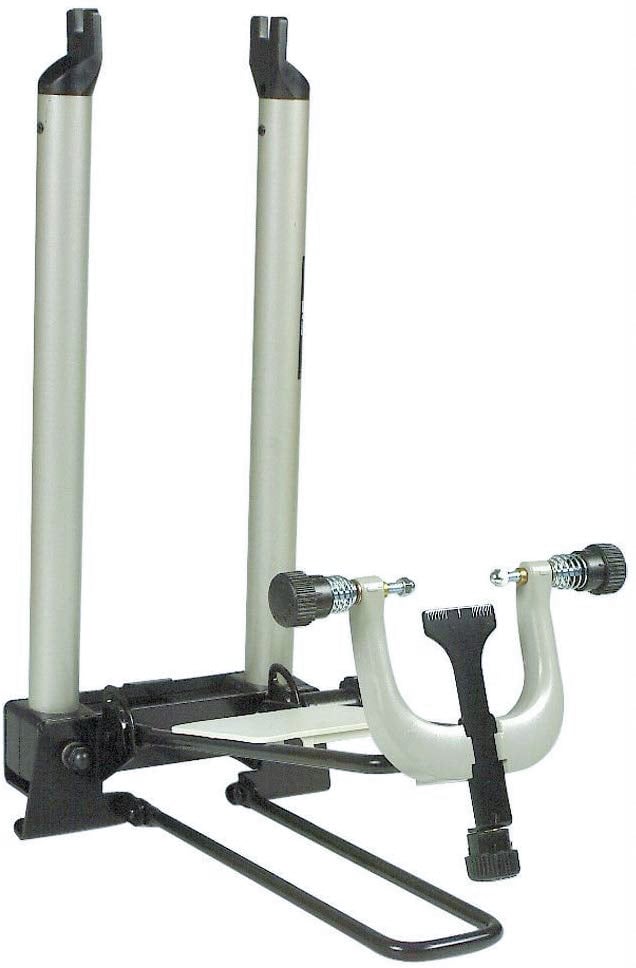
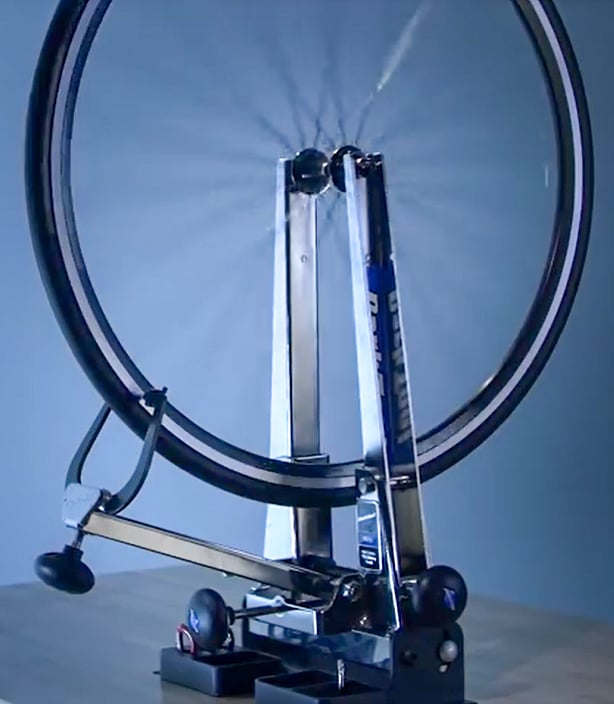
Truing Stand 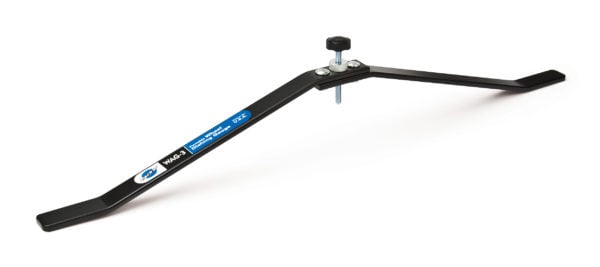
Wheel Dishing Tool 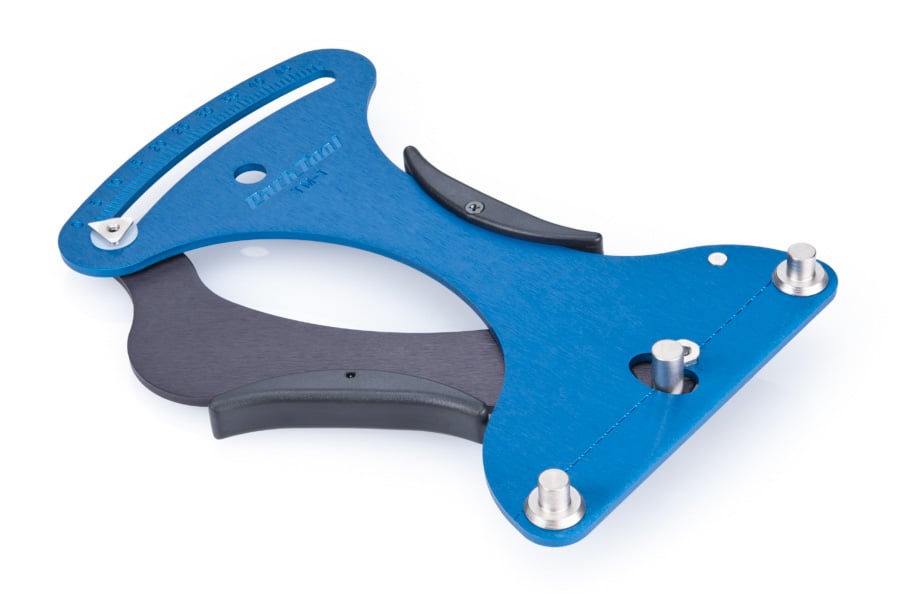
Spoke Tension Meter 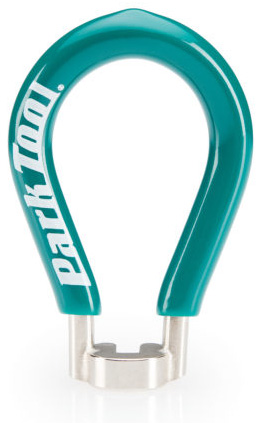
Spoke Wrench
The price and features of all these tools vary from brand to brand. My recommendation is to spend a bit more and buy quality as these tools will last you a very long time. I will discuss the tools in detail later so don’t buy any tools just yet!
What are the processes of building a wheel?
Building a wheel involves the following steps, some of which are repeated many times until the wheel is finished. How many repetitions depends on how perfect you want your finished wheel.
- Measuring (or searching) to determine specific dimensions of your rim and hub.
- Use an online spoke calculator to determine spoke lengths based on the above measurements. Spoke lengths vary in increments of 2mm.
- Lacing the wheels (ie. fitting spokes into hub and rim).
- Tensioning the spokes to a pre-determined kg of force (kgf).
- Truing the wheel (both radially and laterally).
- Balancing the tension of spokes on the same side of the wheel.
- Achieving the correct dish.
- Release of any spoke wind-up.
- Enjoying the finished product.
If that all sounds like gibberish, don’t be put off. These processes will be explained in great detail.
The spokes will straighten as you tighten the nipples.
What type of wheel do you want to build?
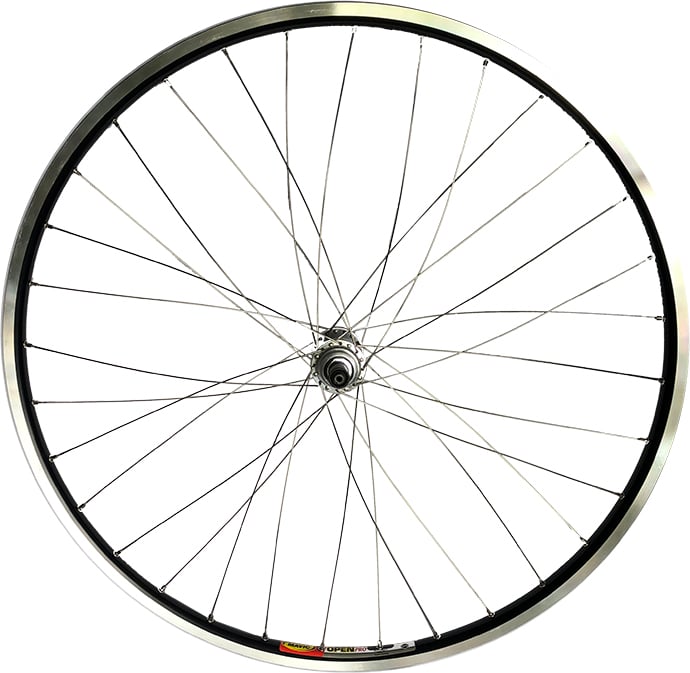
Whether you want to build a wheel for use with rim brakes or disc brakes, the majority of the wheel building process is the same. The variation essentially occurs in how the spokes are laced to the rim, which is the first step of building a wheel. The majority of the time spent building a wheel is in step 2 which involves tensioning and truing the wheel. The techniques applied in step 2 are pretty much the same for any type of wheel.
Learn from a Master Wheel Builder
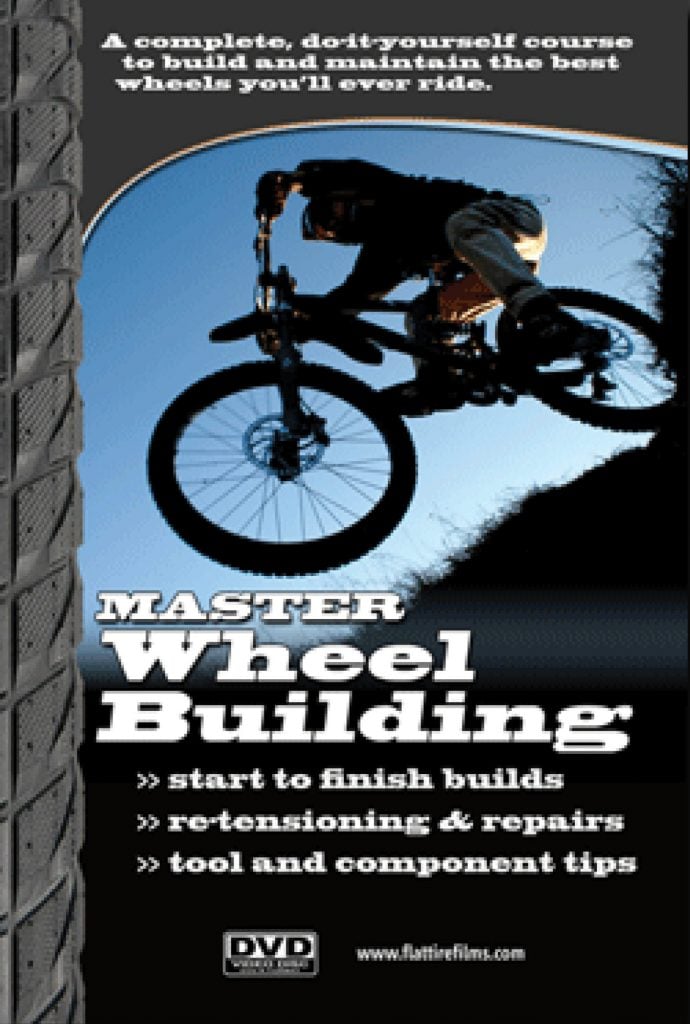
I am not a master wheel builder, but I can recommend someone who is; Bill Mould (billmouldwheels.com). Just to be clear, I am not paid to promote this product and have no affiliation with Bill Mould. This is simply my own recommendation based on my experiences of using his Master Wheel Builder DVD many times now. Additionally, Bill has promptly answered any email enquiries I have sent him over the years.
I first purchased this DVD about 7 years ago and have since built several sets of wheels using his methodology. I use all the wheels I built regularly and with complete confidence. Additionally, if I buy any factory wheels (like Campagnolo, Zipp etc.), I always put them on the truing stand to check the quality of the build, trueness etc. I always record the spoke tensions from new just in case I need to work on the wheel in the future.
I realise that people searching the internet (myself included) want to learn how to do everything for FREE and yet we are quite happy to spend hundreds or thousands of dollars on cycling equipment, clothing and tools.
The best advice I can give you is to outlay the very minimal USD 30.00 to purchase this DVD. It’s cheaper than attending a course and you can follow at your own pace, rewind and replay where required and refer back to it years later when you forget the steps (as I have done several times already).
Building wheels does take time, but everything in this DVD is explained in simple terms with clear examples and illustrations. The steps are provided in a logical and easy to follow process. You will learn all the techniques you will need to build and true wheels, as well as how to use the tools..enough said.
Ready to build your first wheel?
Again.. DON’T BUY ANY TOOLS YET! After you buy the DVD, watch the whole presentation first. If you think that building or truing wheels is too complex, it hasn’t cost you much. Otherwise, after watching the DVD you will also have learnt more about the tools. I have added a few tool tips of my own below. Now you are ready to invest in some tools.
In the DVD, Bill will demonstrate the entire process of building a rear wheel for use with rim brakes from scratch, but the DVD includes appendices for other types of wheels you may want to build. Now I recommend you get hold of an OLD bicycle wheel in reasonable condition. This will be your training wheel. If you make any mistakes or totally stuff it up, you haven’t ruined a good wheel. Once you have mastered the steps on your training wheel, then you can either choose to build a brand new wheel (from scratch) or true any of your good wheels with complete confidence.
Another benefit of using a pre-built wheel is that you know all the parts are compatible and the spokes are the correct length. You don’t need to buy a rim and hub, precisely measure these parts, calculate spoke lengths and order the spokes and nipples. You simply disassemble the training wheel and you are ready to go. Alternatively, if you only want to learn how to true a wheel, then you only need to loosen the nipples. Don’t unscrew them from the spokes. The training wheel will save time, cost and effort whilst learning the steps.
If you want to build a wheel from scratch, try to get an old wheel which is the same design as the wheel Bill assembles in his DVD. Preferred training wheel specifications are;
- Rear wheel (to suit rim brakes, not disc brakes).
- Ignore the number of cogs on the wheel, not important.
- Spoke count is not important, but must have the same number of spokes on each side of the hub eg. 14 spokes on left, 14 spokes on right.
- Spokes should be crossing each other (preferably 3 cross lacing).
- Spokes should be J-bend, not straight-pull spokes.
- The rim must not be damaged or buckled (out of true is OK).
- Round spokes. Avoid bladed spokes (these are slower to work with).
- Nipples must not be corroded and turn freely.
- Flats of nipple heads must not be worn or rounded off.
- A quick release skewer may be required, depending on how the wheel is secured in your wheel truing stand.
Additionally you must prepare the old wheel as follows;
- Remove the cogs (cassette or freewheel).
- Remove the tyre, tube and any rim tape inside the rim.
- Disassemble the wheel by going around the entire wheel loosening each nipple a few turns on each pass until the whole wheel can be disassembled and the spokes removed from the hub.
VERY IMPORTANT!
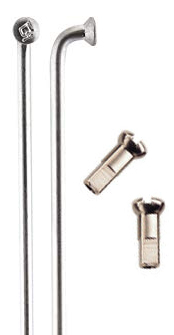
1. The spokes on the right side (drive side) of the rear wheel are slightly shorter than the spokes on the left side. When removing the spokes from the wheel, keep all the spokes from the left side together and all the spokes from the right side together. The nipples should be the same size for all the spokes.
2. I do not recommend riding on a wheel that has been re-built using the original spokes and nipples. We are only rebuilding the wheel as a cheap way to learn the process, not for it to be used. If you ever want to rebuild a wheel to be ridden, always use NEW spokes and nipples. It is easy to measure the old spokes and order new spokes of the same length. You will need to buy new nipples that match the gauge of your new spokes.
The tools I use to build wheels
1. Wheel Truing Stand
When I bought my truing stand (many years ago), I didn’t have much knowledge, so, I went for a basic Minoura Workman Pro stand. Whilst it has lasted well over all those years, it requires the quick release skewer to secure the wheel in the stand. This slows things down a bit. More expensive stands allow you to secure the without the using a skewer. This is faster for the following reasons;
- Much quicker to swap the wheel from side to side. I prefer to work on the right side of the stand, particularly when taking all the tension readings, so I have to swap the wheel around regularly.
- You don’t need to remove the quick release from the wheel every time you want to check the dish of the wheel, and then have to replace it again so you can secure the wheel back into the stand.
2. Dishing Tool
The Minoura Pro wheel stand package included a dishing tool (which was OK), but I upgraded to a Park Portable Dishing Tool. This Park tool is cheap and sturdy and can be quickly disassembled for compact storage.
3. Spoke Tension Meter
The Park TM-1 spoke tension meter is an affordable and effective tool. Bill uses the same tool to build his wheels, so it is obviously good. Mine has been very durable and lasted for years. I bought a new one recently to check if the old one was still accurate because I wanted to build a new set of wheels.
Comparing the readings between the two, the old one was only out by about 10% (as you would expect after 15-20 years). It was easy to re-calibrate the old tool to match the reading of the new tool. So I am still using the old tool and keep the new tool as my calibration reference tool.
I will say that the readings from this tool can fluctuate a little, but you will quickly learn its quirky nature. Overall, it performs well and is quick and easy to use. This is important when you have to use it hundreds of times over the course of building a wheel.
I do NOT recommend building a wheel without using a spoke tension tool. The sound of a plucked spoke or how tight a nipple is to turn are NOT accurate measurements of spoke tension. Even if you only want to true a wheel, this is a must-have tool. It will give you a good insight into how well balanced the spoke tensions are over the entire wheel.
4. Spoke Wrench
Spoke wrenches come in many sizes. Buy a good quality spoke wrench that fits your nipples exactly. The spoke wrench should be sturdy and have a good handle to grip as the nipples can get a little tight later in the build. I have a range of different sized wrenches I have collected as nearly every wheel seems to use different nipple sizes. Take your wheel (or loose nipples) to a bike shop and get the exact size wrench to eliminate the guess work.
Additional Recommendations
- I always use brass nipples. They are fractionally heavier, but more durable and don’t corrode as easy as aluminium nipples do.
- You need to lubricate the nipples with a light oil (like Tri-flow), but I don’t do this at the start. I wait until the nipples become a little firmer to tighten. If you oil them too early, they can sometimes come loose and ruin all the time you spent setting them to the initial starting point.
- When building a rear wheel, I only lubricate the non-drive side nipples if they are becoming a bit tighter to turn (usually near the very end of the build). This is because these nipples don’t have as much tension as the drive side nipples.
- Only release spoke wind-up at the very end of the build when you have got everything perfect. You will most likely need to do another small round of lateral truing after this step.
- I record all the spoke tensions on a piece of paper and keep it as a reference for the next time I work on the wheel.
- When building a new wheel, I order a few additional spokes (of each length) and nipples as spares in case of a riding incident etc.
- If you are going to build a wheel, always buy good quality parts so the time you invest is not wasted on a shabby wheel that won’t last.
Disclaimer!
Whilst I enjoy working on my own bikes, I am not a qualified bicycle mechanic. The content of this article is purely illustrative and does not constitute professional advice. For your own safety, this type of work should only be undertaken by a qualified bicycle mechanic. Incorrect assembly of parts could result in equipment damage, personal injury or death.
About Me.
I have been riding and working on my own bikes for many years now. I wanted to share my experiences, knowledge and research with others. My aim is to inspire people to get involved in all aspects of this amazing sport. Cheers.
Comments.
I welcome reader feedback in the comments section. Should you wish to suggest an amendment, please include a note advising the source of your information so that myself and other readers can ascertain the accuracy of your information. Note: Trolling or argumentative comments will be removed as they are counter-productive.
It is necessary to measure the tension and ensure that all spokes are as close to identical as possible. If they move by 1 mm, they’re too slack.
Yes, very important to have balanced tension over all spokes, but this is achieved by using a spoke tensiometer tool to take accurate spoke tension readings rather than measuring movement of the spokes or plucking them for sound. Each part of the wheel (rim, hub, spokes & nipples) will all have different max tension ratings. You want to build the wheel with highest tension possible, but the tension of each spoke must still be below the max tension rating of the lowest rated component. (ie. rim, hub, spokes & nipples). High spoke tension makes the wheel perform better, stay true and be stronger.