Riding a modern bike with indexed or electronic gear shifting requires little effort or skill to make fast and accurate gear changes. Riding vintage bikes with friction shift gear levers requires skill and practice. However it also provides a great sense of satisfaction when you make perfect gear changes. Here are my tips on how to acheive good change gears with friction shift levers.
Set the Derailleur Limit Screws Correctly
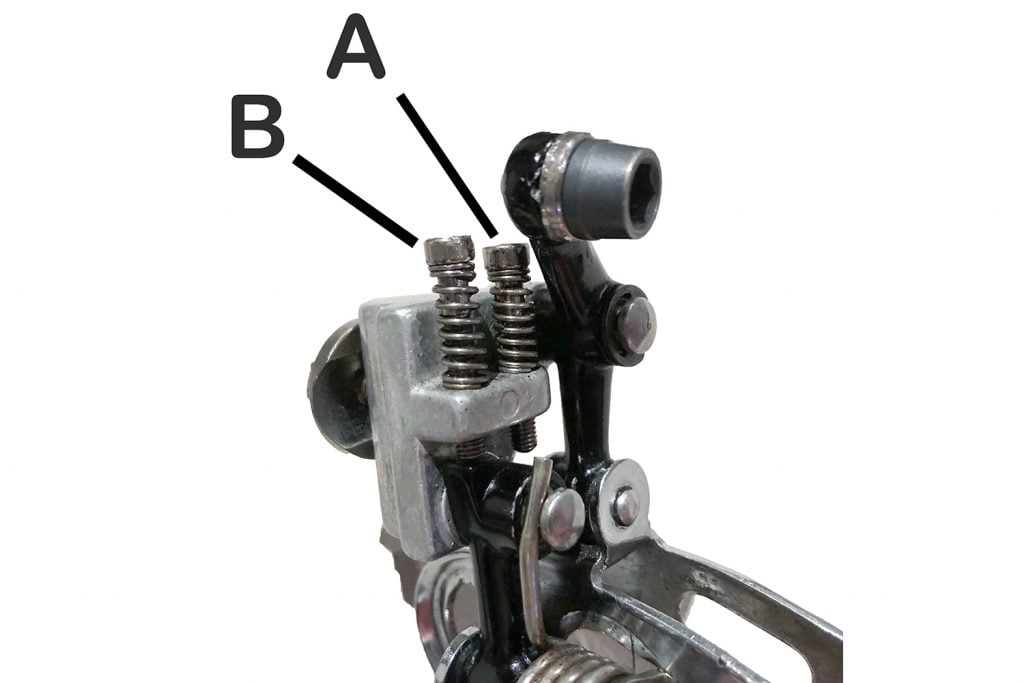
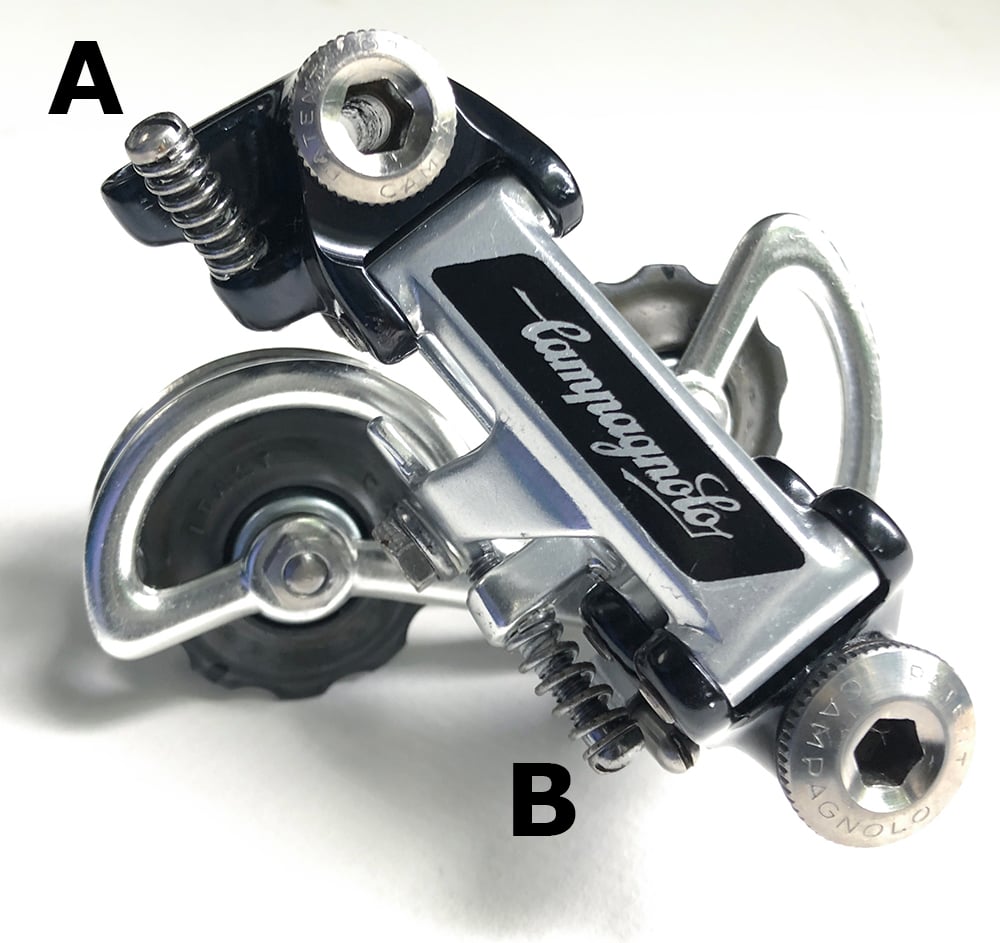
Setting the front and rear derailleur limit screws accurately is a very important step to ensure you have fast and accurate gear changes. You should be able to use the full shift lever throw to change between highest and lowest gears at the front and rear derailleurs. Here are some signs that these screws may need adjustment.
- You are unable to change the to all the gears on your bike.
- Front derailleur is causing the chain to drop off the chain rings at the front.
- Front derailleur is rubbing the inside of the crank arm.
- Chain is rubbing the inside of the front derailleur cage and unable to be trimmed in or out.
- Rear derailleur is rubbing on the wheel spokes.
- Noise from the rear when riding in largest or smallest cogs.
If you are not mechanically minded, take you bike to a local bike shop and they should be able to adjust these screws easily. Once set correctly they generally don’t need any further adjustment.
Plan the Gear Change
Deciding when to change gears is an important skill when riding any bike with gears, but is even more important when riding vintage bikes with friction shift levers. Changing up into higher (harder) gears is simple, but changing down into lower (easier) gears requires good forward planning. Here are my tips;
- Make sure you change into the appropriate gear early, whilst you can still turn the cranks smoothly and without using high power. Changing down to a lower gear when you are struggling to turn the cranks over is a recipe for disaster.
- If you need to reduce the gearing considerably, change the front derailleur to the smaller chain ring rather than trying to change multiple cogs at the rear. Using this technique is faster and more accurate.
Consider the Chain Line
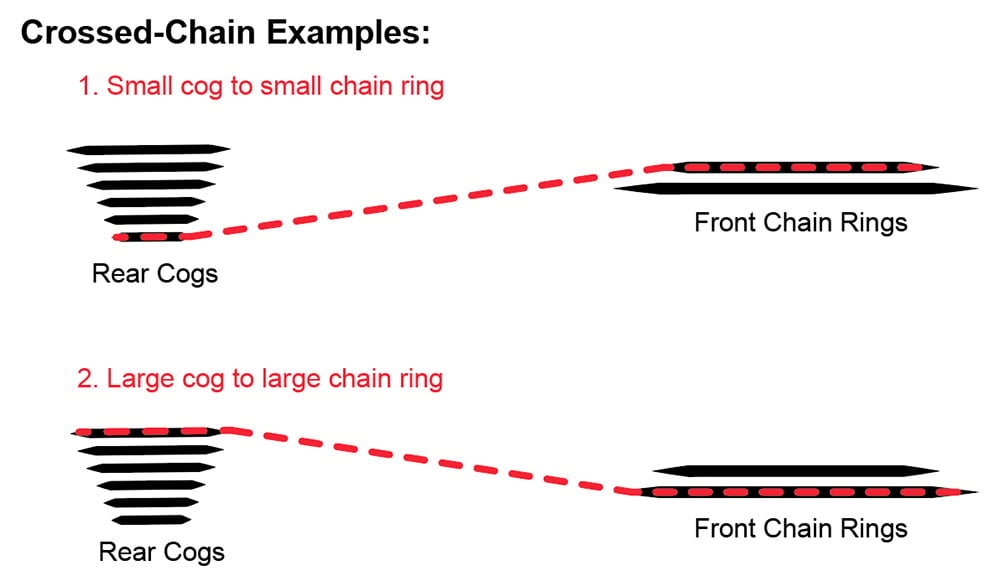
Choose your gears to ensure the chain line is not crossed. We don’t want to end up in either of these gearing combinations;
- Small cog to small chain ring.
- Large cog to large chain ring.
We’ve all seen plenty of Professional riders on TV usually climbing with a crossed chain. Obviously they don’t have to pay for their equipment and will use any means necessary to facilitate the chance for a win. But, this practice is not recommended by manufacturers as it will wear your drive train quicker and make for a noiser riding experience. Additionally, you will lose some watts due to additional friction of a crossed chain line. Ceramic Speed created a very detailed report regarding crossed chains.
So, try to keep track of the gear you are currently riding and factor this into your decision when changing gears to ensure you do not end up with a crossed chain after the upcoming gear shift. You may need to change the front derailleur instead.
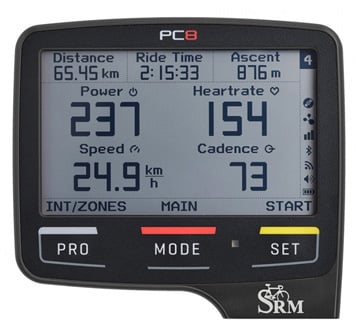
Set the Pedaling Cadence & Power
Power and cadence can make a huge difference to the quality of a gear change on any bike or shifting system. So before changing gears, I recommend you adjust your cadence to an optimal rate for the few seconds it takes to change gear.
Once the gear is changed, you can return to riding with your preferred cadence which may be higher or lower depending on the terrain and gear your just selected. In my experience, gear changes work best with a pedaling at a cadence of around 80-95 rpm. When pedaling at this rate, your power delivery should already be smooth and consistent to facilitate a good gear change.
Generally, I will also often reduce my power by up to 20% throughout the gear change which reduces pressure on the chain and components. This power reduction is only for a few seconds and has no real impact on your speed. If I am climbing, I might even accelerate briefly before reducing power for the gear change.
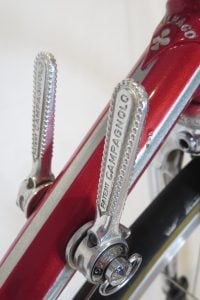
Changing the Front Derailleur
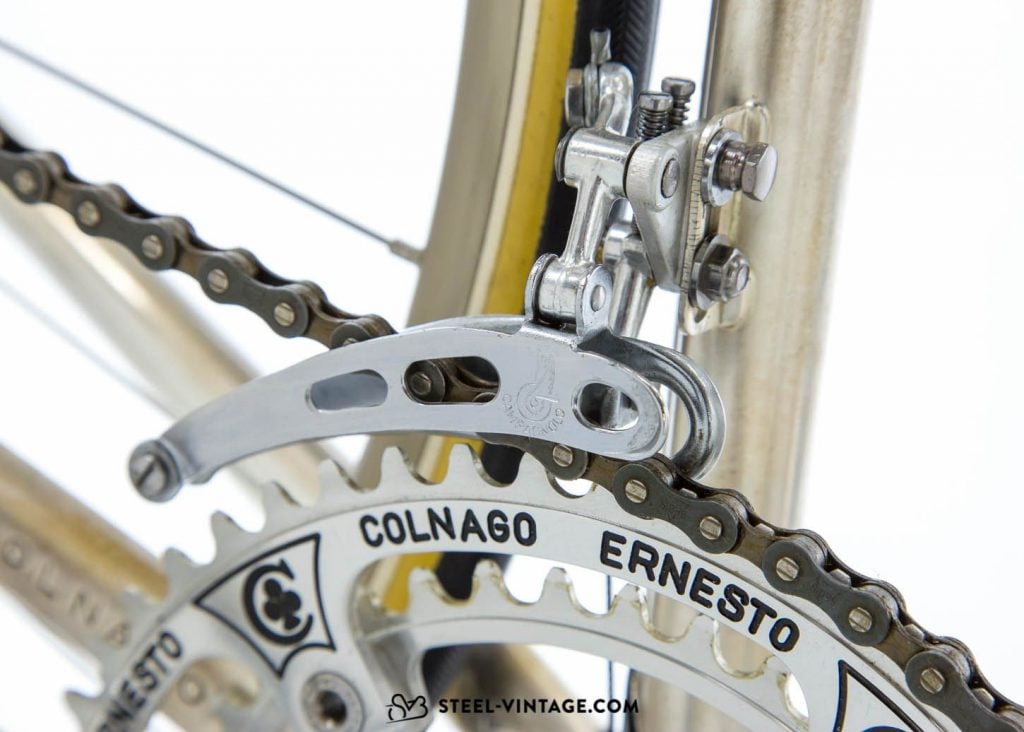
Image courtesy of steel-vintage.com
Shifting between the small and large chain rings using the front derailleur on a vintage should be smooth and quick if your bike is correctly setup and you are using the techniques mentioned above.
I simply either push or pull the front derailleur shift lever through it’s entire range of travel and the chain swaps across accurately and quickly every time.
Once you have successfully changed gears, trim the front derailleur to ensure it is not rubbing on the chain. You will also need to be doing this on occasion
as you change gears at the rear. You can usually hear or see if the chain is rubbing on the inside of the front derailleur cage.
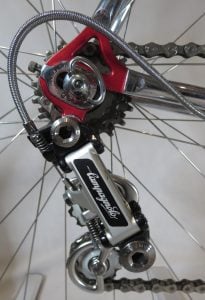
Changing the Rear Derailleur
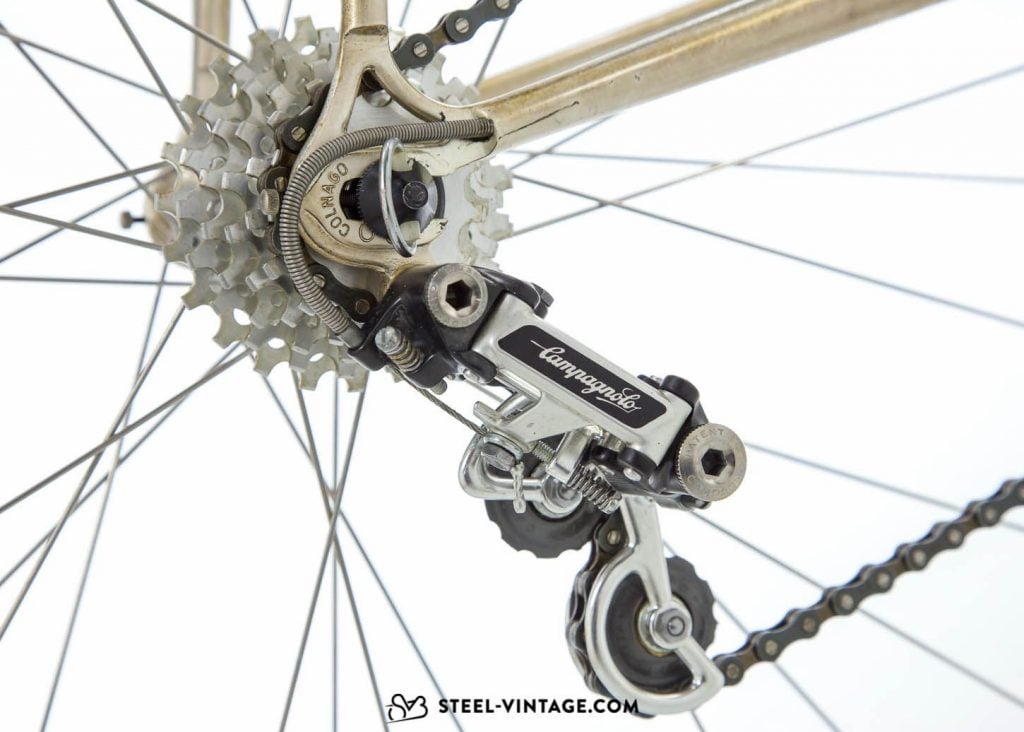
Image courtesy of steel-vintage.com
Changing gears using the rear derailleur requires a lot more skill and practice than changing gears using the front derailleur. It is definitely not like shifting on a modern bike, but is very rewarding when you get the hang of it.
Like the front derailleur, if the bike is set-up correctly you can use the full travel of the shift lever if you want to select either the lowest or highest gear, but most of the time you will be shifting to other gears in between which requires more skill and technique. These are my tips to get the best out of your rear shift;
Changing into harder gears (smaller cogs)
I find it easiest to shift into harder gears because you can feel the increase in resistance through the cranks with each shift.
Smoothly push the shift lever forward until you feel the next gear engage. I find you can change down multiple gears quite quickly and accurately. Once you have found the gear you want, you need to pull the lever back just slightly. This is because changing gears usually requires an over-shift of the cable. By pulling the lever back slightly, it re-aligns the rear derailleur centered to the selected gear. If you don’t do this small trim adjustment, you may find the chain jumps down into the next smaller sprocket when you put more power into the cranks. To practice this, mount the bike in a work stand and change gears, then trim the lever until the derailleur is centered to the selected cog.
Changing into easier gears (larger cogs)
When shifting to easier gears, it is often harder to feel when a shift has occurred as you are reducing resistance and don’t get the same feedback through the cranks.
I recommend you shift only 1 gear at a time to ensure you know where you are on the freewheel. Many times I have tried to shift several cogs at once and ended up with the chain between cogs which basically puts you in neutral, pedaling results in no forward motion.
If you are in a situation where you need to change to a much easier gear, change the front derailleur instead (assuming you are not already riding in the small chain ring).
Once you have changed gears, you may need to do a small trim adjustment to re-center the rear derailleur if you hear some noise from a chain misalignment.
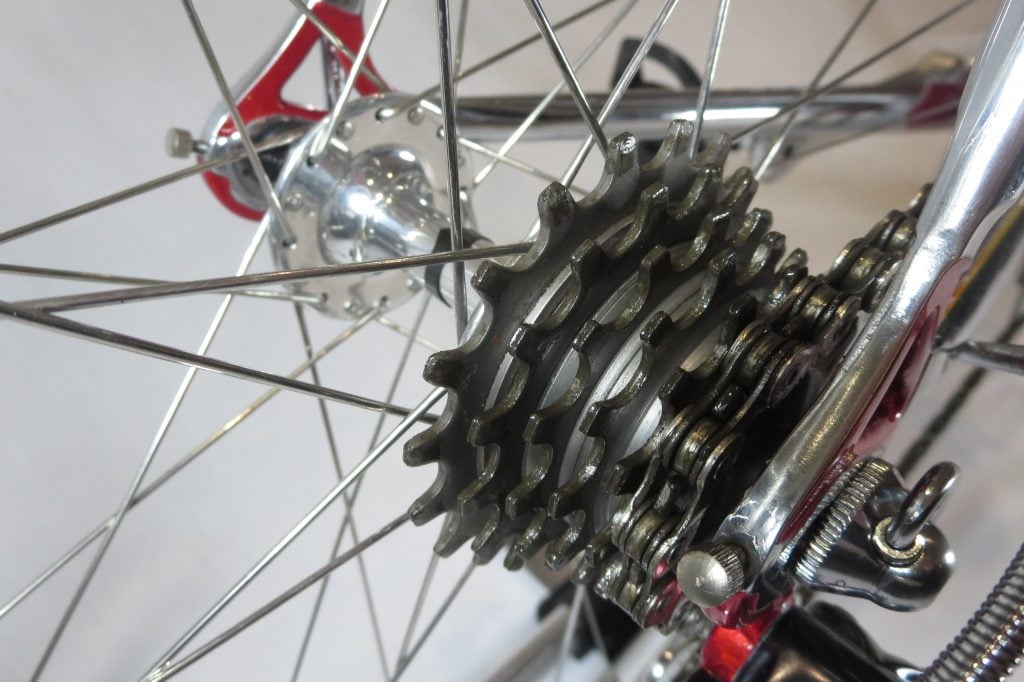
Check the Rear Derailleur is Aligned with the Cog
If you are not sure if the rear derailleur is aligned correctly with the selected cog, there are a few ways you can check.
- Pedal backward and listen if the chain runs smoothly. If it does, then the rear derailleur is aligned correctly, however if it is making a skipping noise, the rear derailleur needs to be adjusted slightly.
- Take a look back at the rear derailleur and see it if looks to be centered to the cog. However, this is not recommended when riding in lots of traffic, where there are lots of obstacles on the road or within a group.
Emergency Stop when Riding in a High Gear
If you need to suddenly stop (eg. a traffic light turns red) and you are riding in a high gear, I recommend using either or these 2 options to ensure you can re-commence riding in an easier gear.
- Use the front derailleur to change the chain to the small chain ring before you have completely stopped pedaling. This works extremely well. It works really well.
- Use the rear derailleur to change to the largest cog by pulling the lever all the way back. Don’t try changing down just a few gears as you may end up between cogs and not able to gain forward momentum.
Both of these options may result in you riding with a crossed-chain, but that can be fixed when you get going again.
Problems with the Chain Jumping Across Gears
Sometimes when you apply power to the pedals, the chain may jump between the gears. It’s a bit annoying and can be caused by any of the following;
- The rear derailleur is not aligned correctly with the sprocket and this causes the chain to jump when you apply power. Just an inaccurate shift to blame. No issue.
- The friction shift lever is not tight enough to hold the derailleur in the correct position. This can occur in 2 ways; (a) When you apply power to pedals the rear derailleur randomly shifts down to a harder gear (smaller sprocket).
(b) You are riding in the large chain ring and it randomly changes down to the smaller chain ring.
This can easily be fixed by tightening the lever bolt (that secures the lever to the frame). If the lever keeps working loose with use, apply a small amount of Loctite and secure the bolt at the correct tension position. You may also need to apply some rosin dust to the washers in the lever to create more friction. Don’t use grease on the washers. - The sprockets or chain ring teeth are worn so the chain slips over the teeth when you apply power to the pedals. This usually occurs if you just fitted a new chain. Replace the worn parts and problem solved.
Front Derailleur Shift Quality: Friction vs Indexed
I find shifting the front derailleur on my vintage bike with friction shifters just as fast and accurate as on my modern bike which is fitted with Dura-ace 9000 mechanical indexed shifting.
I believe this is due to the gearing on my vintage bike. When I compare the chain rings on my vintage bike, there is only a 10 tooth difference between them (42 tooth small chain ring and 52t tooth large chain ring). As such, it is easier for the front derailleur to shift between chain rings that are similar in size.
When you compare this gearing with my modern bike, it has a larger 16 tooth difference between the 2 chain rings ie. 36 tooth small chain ring and 52t tooth large chain ring. The modern gearing is more versatile, but harder for the front derailleur to shift across a larger difference of teeth. So you end up with a similar shifting performance.
Riding out of the Saddle
Changing gears on a modern bike whilst riding out of the saddle is pretty easy, but I don’t do it when riding my vintage bike with friction shifters. It is challenging enough to make good gear changes whilst seated, but if it works for you, go for it.
About Me.
I have been riding and working on my own bikes for many years now. I wanted to share my experiences, knowledge and research with others. My aim is to inspire people to get involved in all aspects of this amazing sport. Cheers.
Comments.
I welcome reader feedback in the comments section. Should you wish to suggest an amendment, please include a note advising the source of your information so that myself and other readers can ascertain the accuracy of your information. Note: Trolling or argumentative comments will be removed as they are counter-productive.
70yr old. Stopped driving 5 yrs ago.
Still riding immaculate 76/77 Motobecane Grand Record that I built
back then. Numerous changes:
drilled Sugino crank. Always ran
tubulars, Mavic GP4 on Campy record
hubs. Blk Royal Gran Compe sidepulls
with under bartape cables. Original
Campy NR ft&rear deraileurs. SunTour
barcon shifters. Blk 1980s rear
Blackburn rack for goodies.
Comment: Just did clean & regrease
on bb & ft hub. I agree the legend of
leaving hubs a bit loose-QR pressure
sets them is a myth. With bike upside
down I start with bearings a whisker
loose & then take out play with micro
adjustments. QR should be firm but
smooth to open with fingers. Done right, with a light spin wheel usually
stops at same place(not necessarily
valve down at 6 oclock).
Nightmare last year-undoing ft axle
locknut shattered-probably 40 yrs of
old age.
Hi Dave, good to hear you are still riding and working on your own vintage bike.
Thanks for such great info, Dave! My shifters have round ends like both your anniversary pics. Your examples are the only ones I’ve seen so far similar ones on my 1987 Team Lemond Comp. Mine also say Campagnolo in script. My brakes and deraileurs are Super Record and the crank and seat post are C-Record. I know they’re original because I bought it new and rode it this morning. Thanks again!!
Thank you so much for writing and posting this. I am new to friction shifting and this helps immensely.
Hi The Jeff, glad to hear it was of interest to you. Enjoy!