
Welcome to part 6 of my Colnago Nuovo Mexico restoration. In the previous parts I have discussed the following parts of this restoration;
- Part 1 – Frame selection and remove paint to raw steel frame.
- Part 2 – Paint colour and decal selection process.
- Part 3 – Choosing the Campagnolo components.
- Part 4 – Wheel build, freewheel and chain selection.
- Part 5 – Choosing the finishing kit
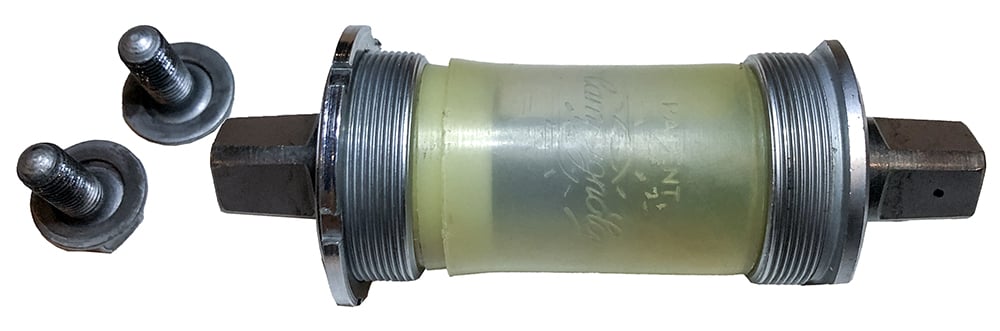
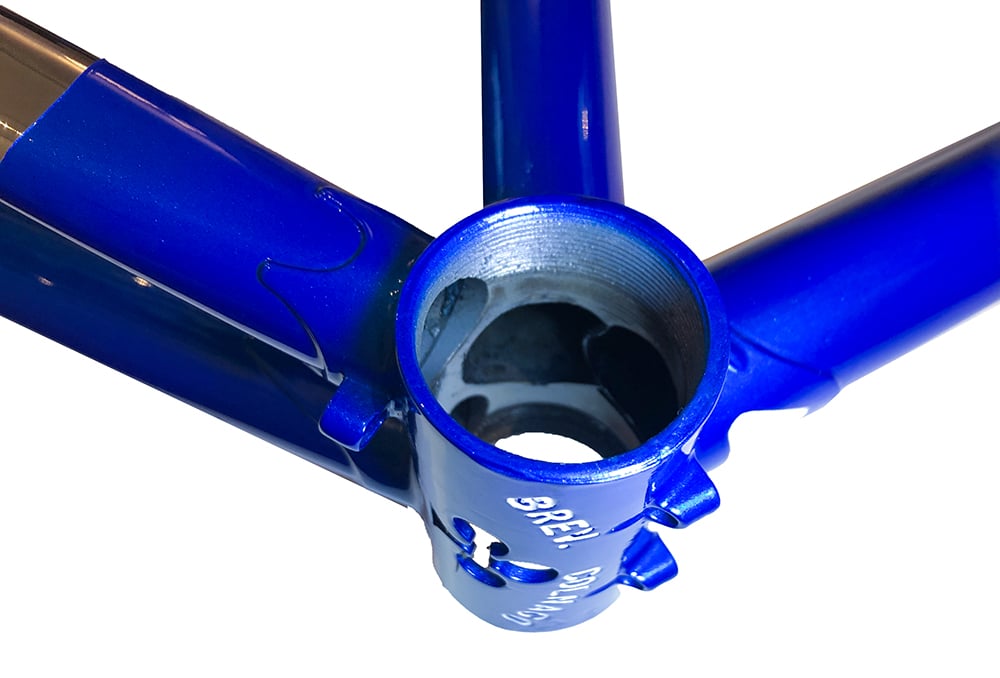
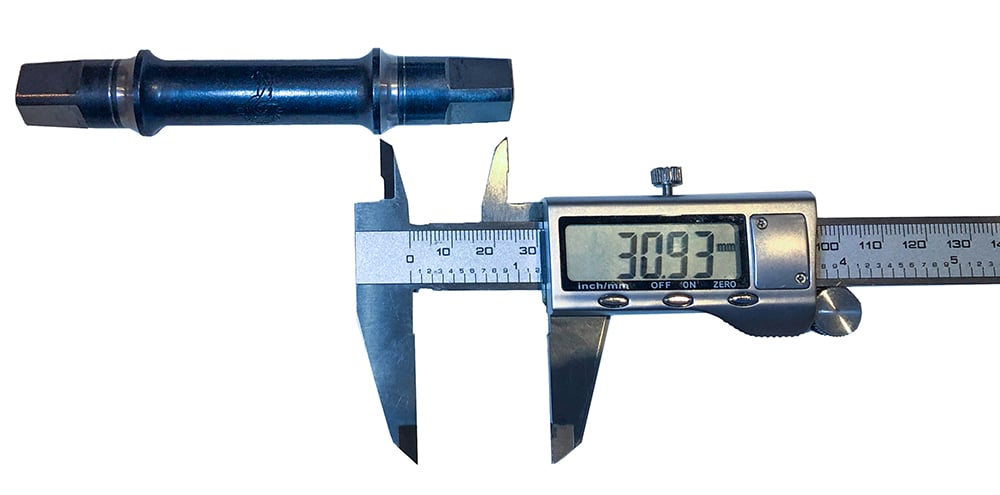
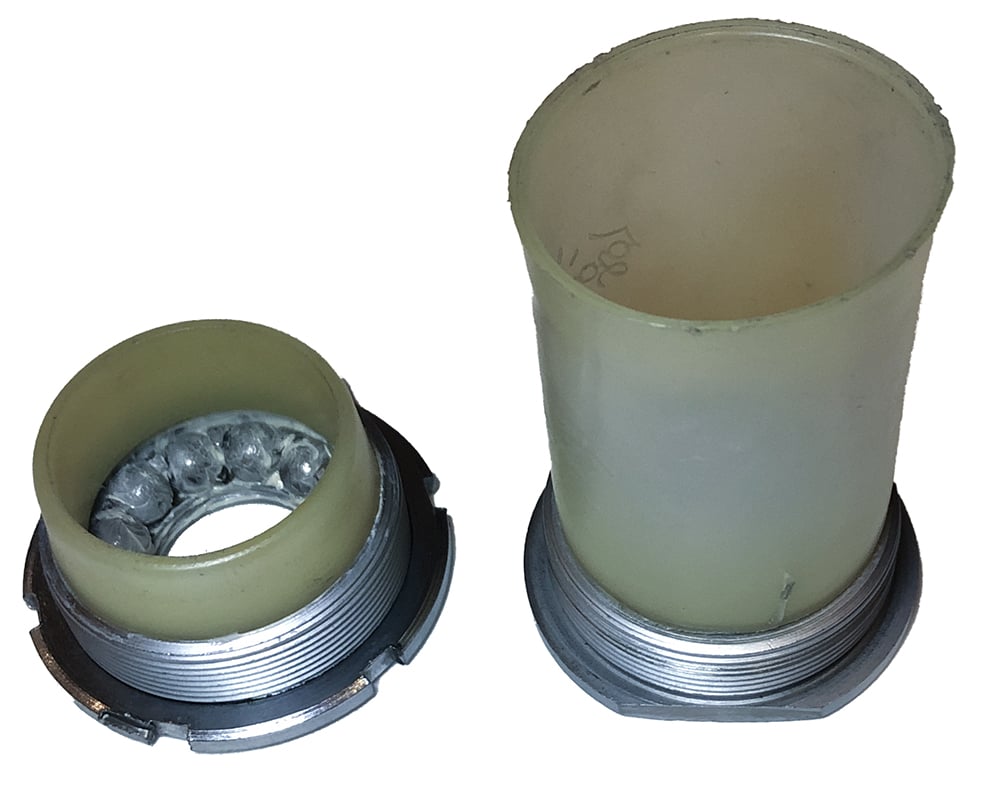
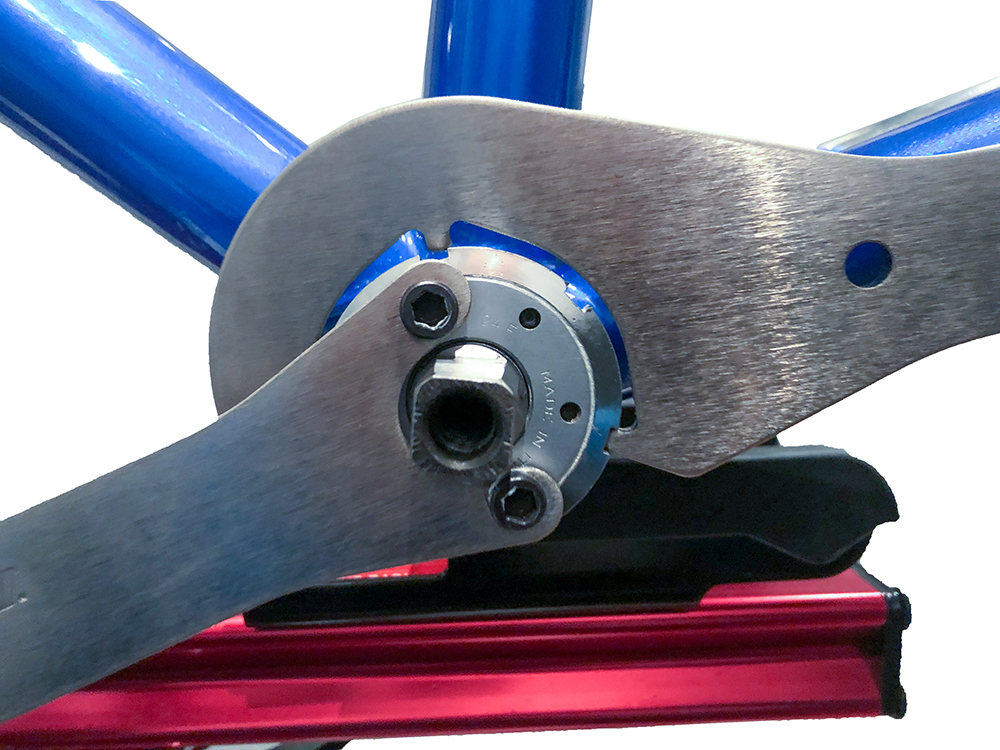
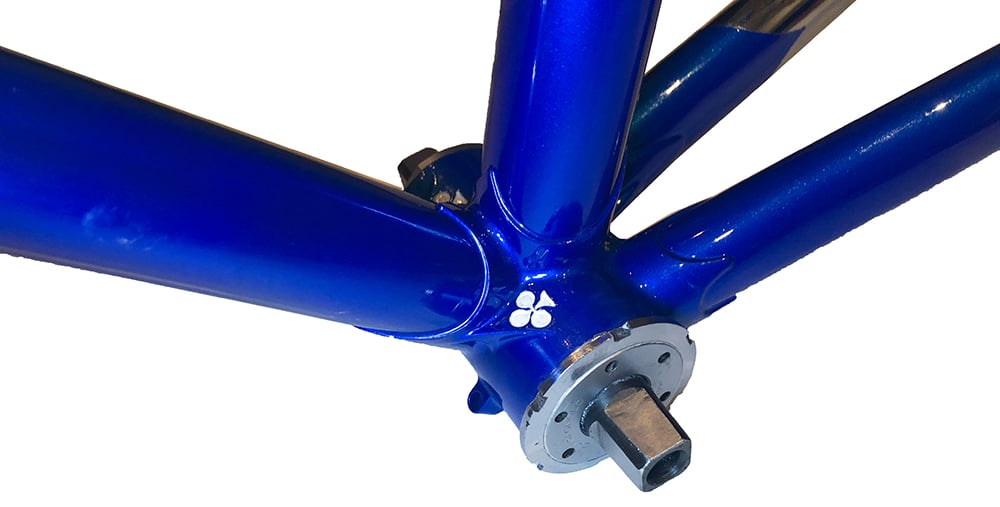
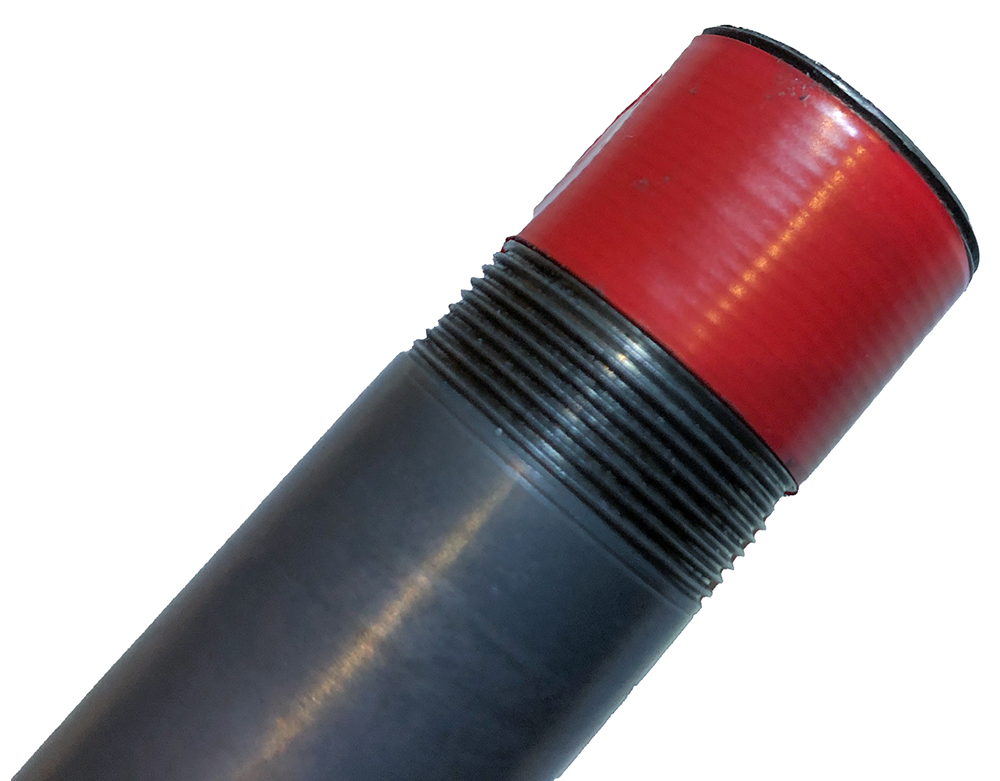
Install the Campagnolo Bottom Bracket
I started the build by assembling the Campagnolo Record Bottom Bracket in the frame. I wrote a complete article describing this process on how to install a vintage Campagnolo Bottom Bracket. The process went smoothly as the frame and BB parts were all in excellent condition. Here are some images;
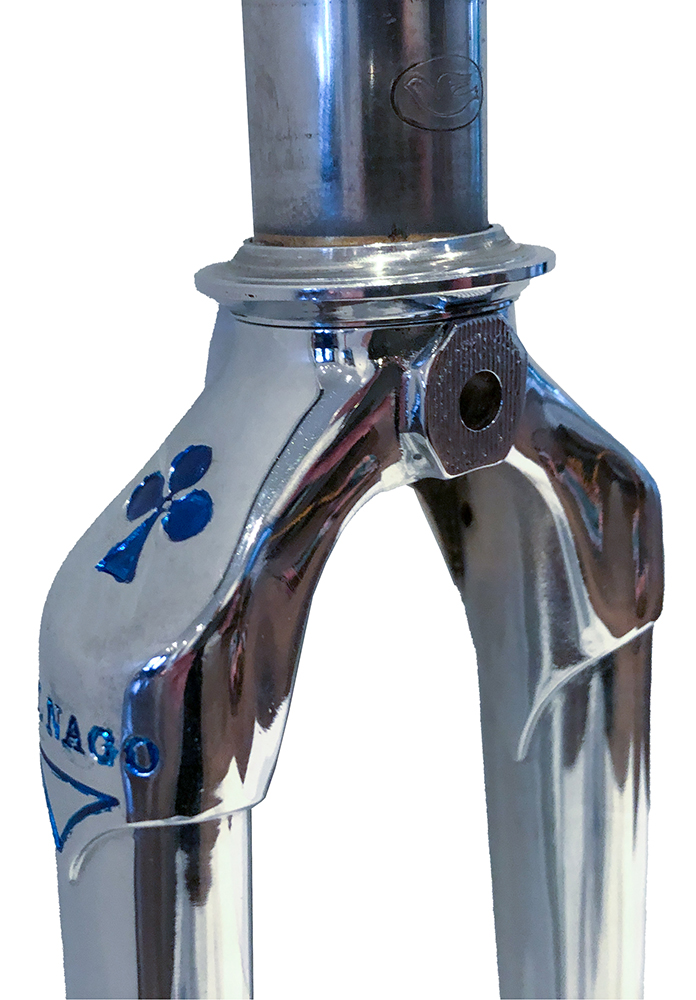
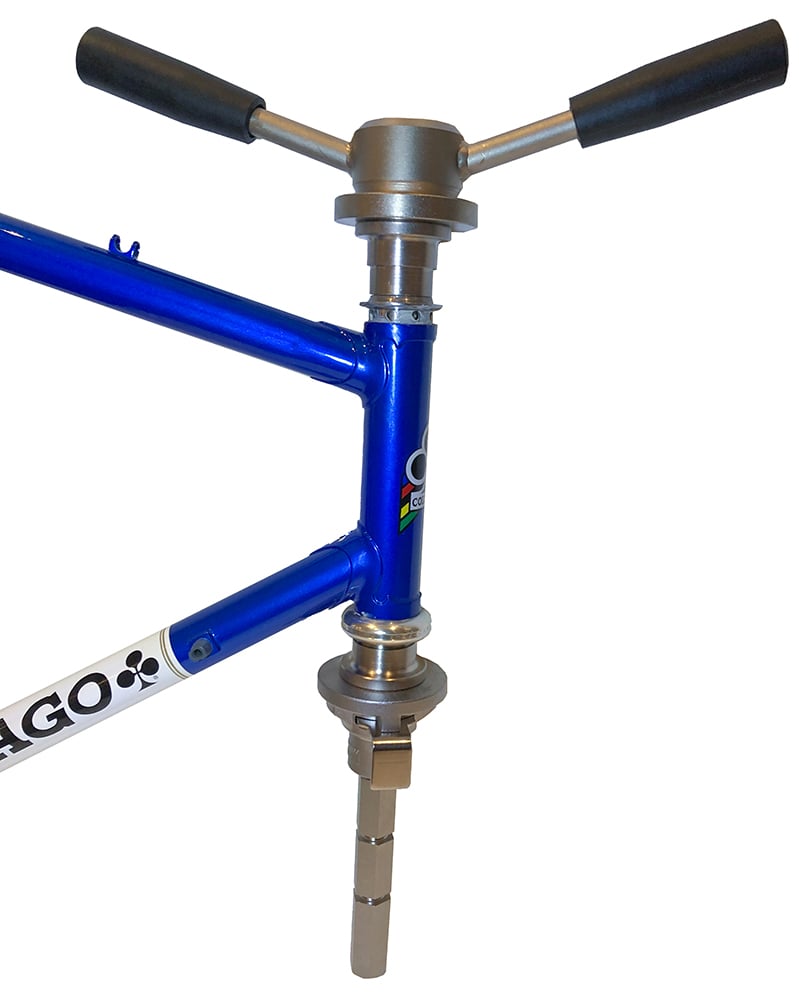
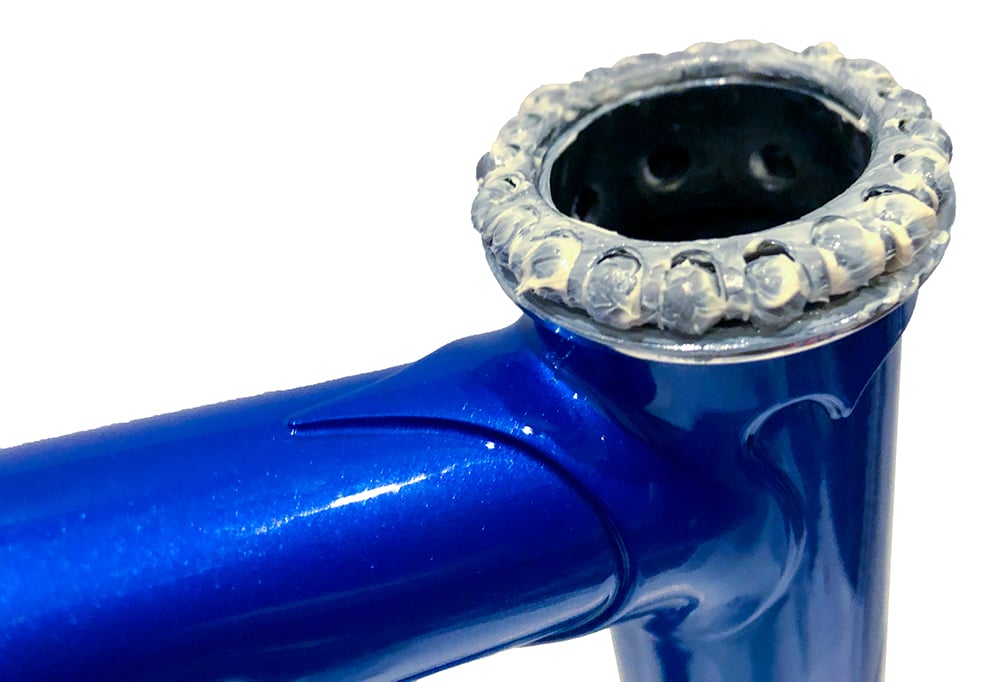
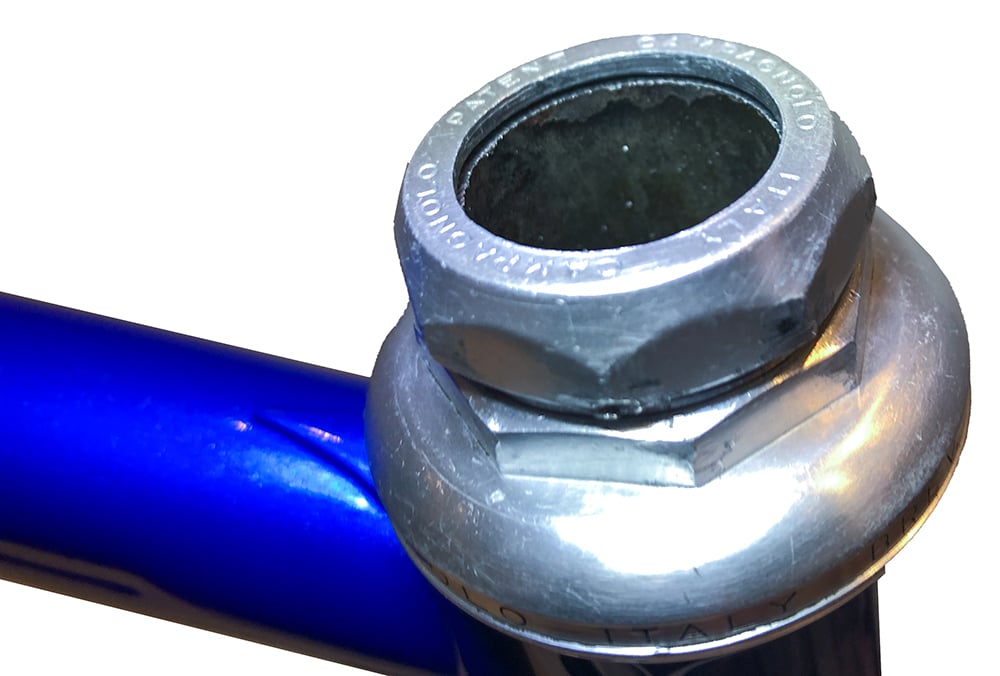
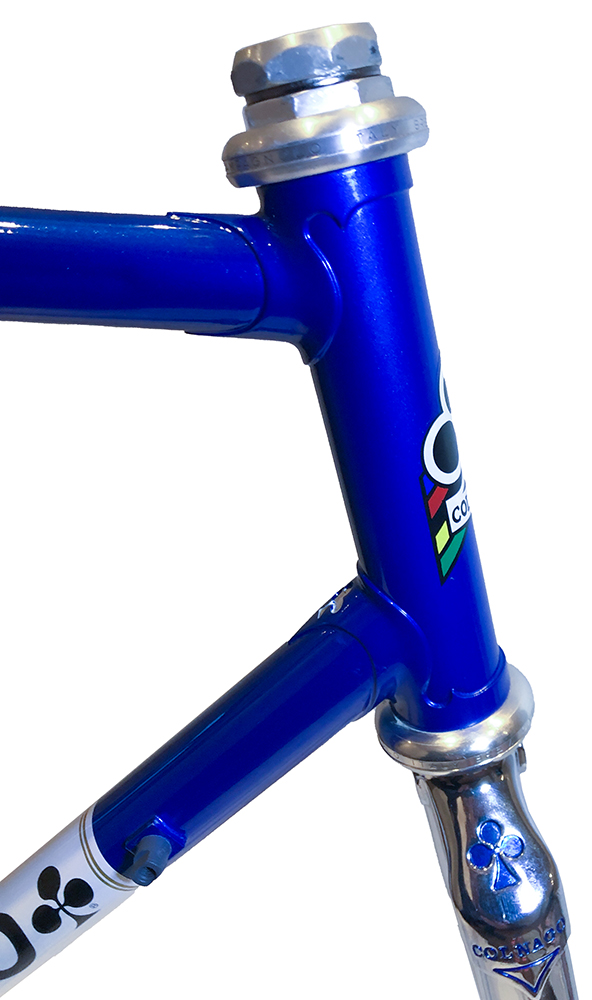
Install the Campagnolo Headset
Next job was to install the headset. I purchased a Campagnolo Super Record headset in very good condition. For people who are interested in the installation process, I wrote a step-by-step article on how to install a Campagnolo threaded headset. The Super Record headset has a lot of alloy parts in the effort to reduce weight, so you need to have the right tools when tightening/loosening the lock nut. Here are some images of the assembly process;
Fit the Handle Bars and Stem
I like to fit the handle bars in the stem before fitting the stem to the bike. This is because the stem needs to be rotated at all kinds of angles to get it around the curves of the handle bars. Always make sure to start with the stem in the correct orientation, so it isn’t facing the wrong direction after you’ve done all the work getting it to the top of the bars.
This 3ttt stem proved to be quite tight when trying to feed it around the curves of the bars. So rather than force it and scratch the pristine finish of handle bars, I found a bolt and nut which I used to expand the stem clamp just a few millimetres. Whilst scratches in this area are covered by bar tape and therefore not visible, this technique also made it very easy to feed the stem over the thicker top section of the bars and avoided scratching the beautiful retro logos that will be visible. This expander trick only works on quill stems that are enclosed on the threaded side like this 3ttt stem as you can see in the diagram below and is explained in how to expand a quill stem to fit handle bars.
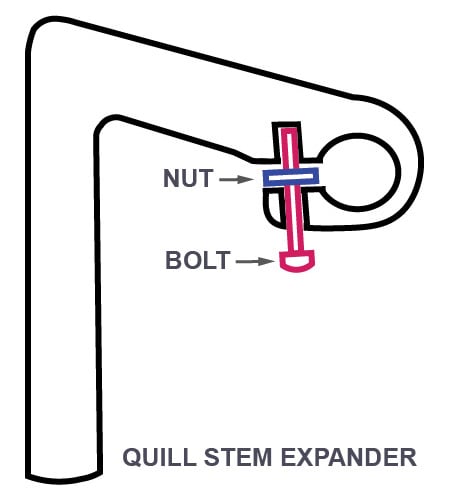
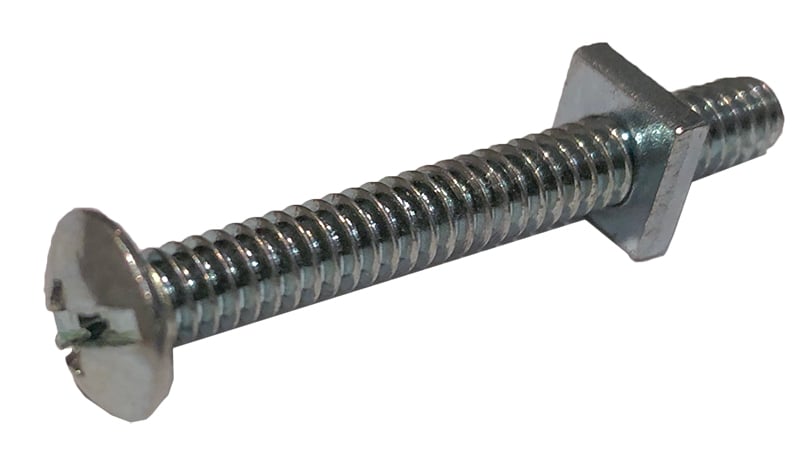
Nut & Bolt used to expand clamp 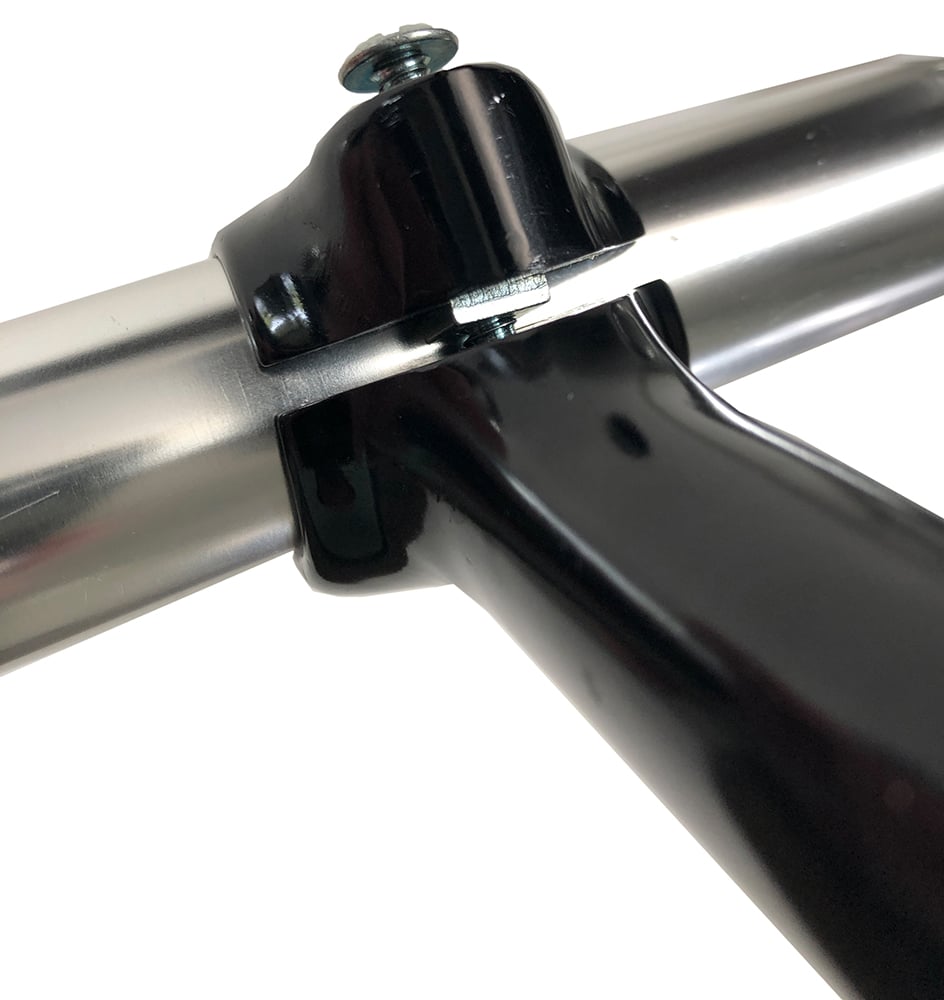
Using a bolt and nut to expand a quill stem clamp
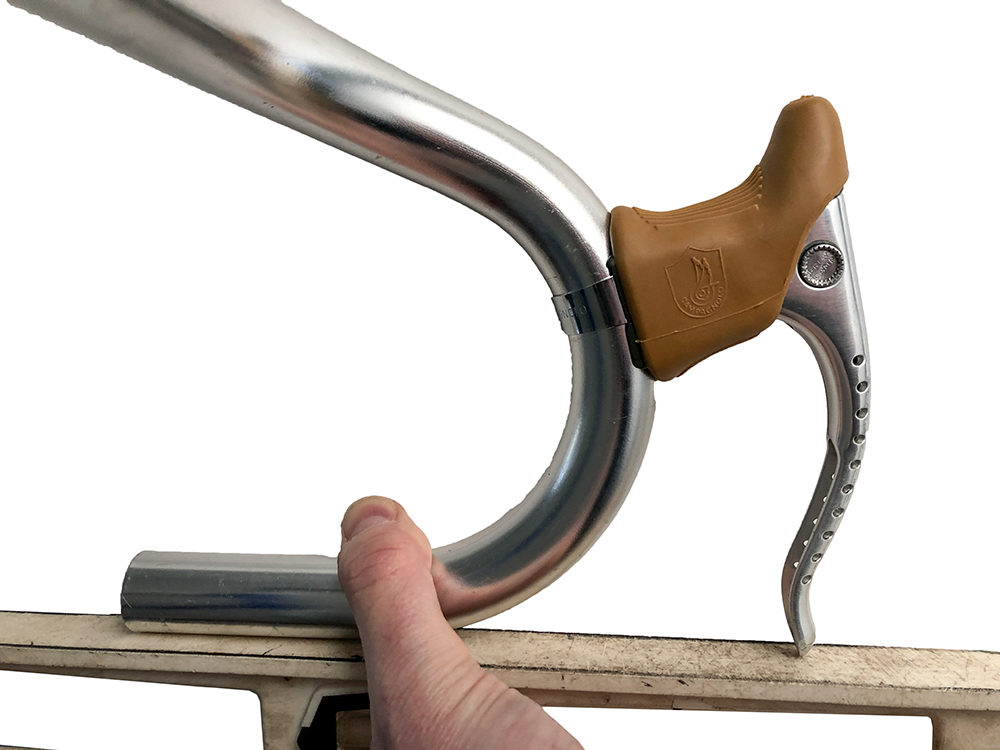
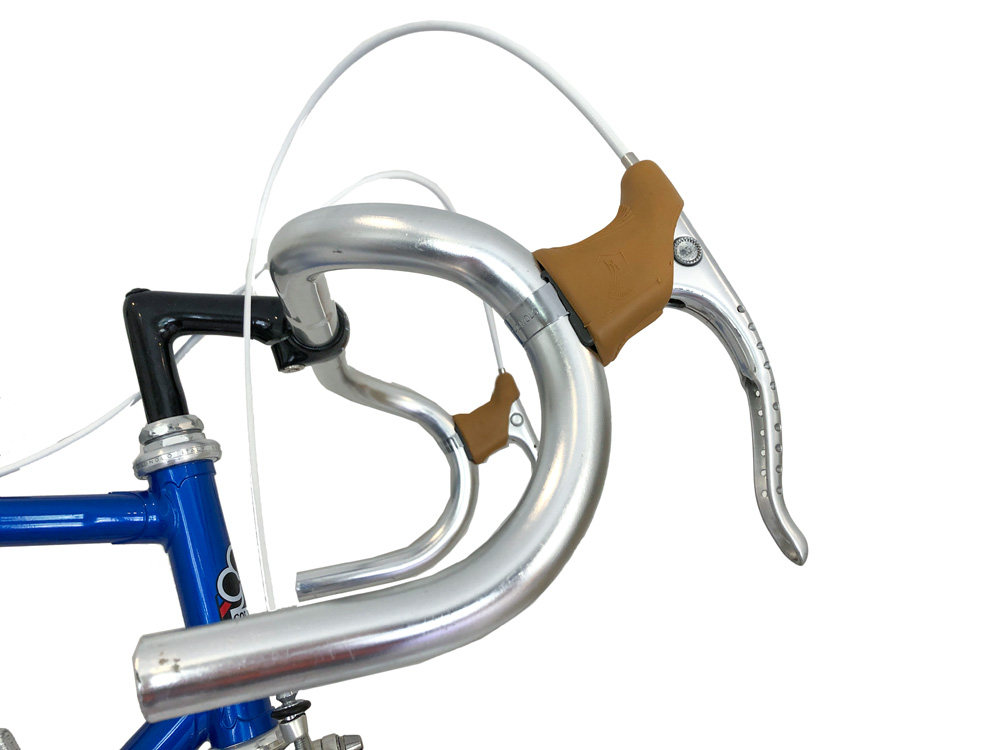
Fit the Brake Levers to the Handle Bars
Now we have the stem fitted to the handle bars, we can install the brake levers on the handle bars. This is a simple operation. I prefer to remove the clamp mounting band from the levers and position it on the bars (again to preserve the finish on the handle bars), then simply re-attach the brake lever to the mounting clamp once in position.
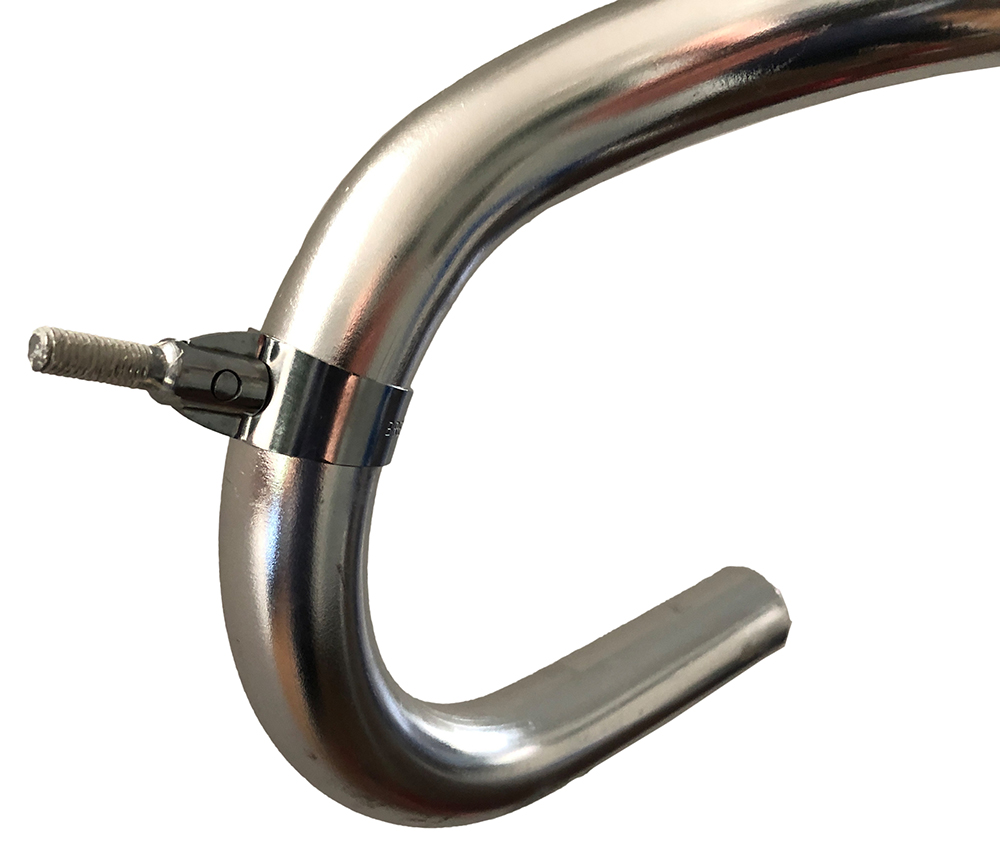
Fit Brake Lever Mounting Clamp 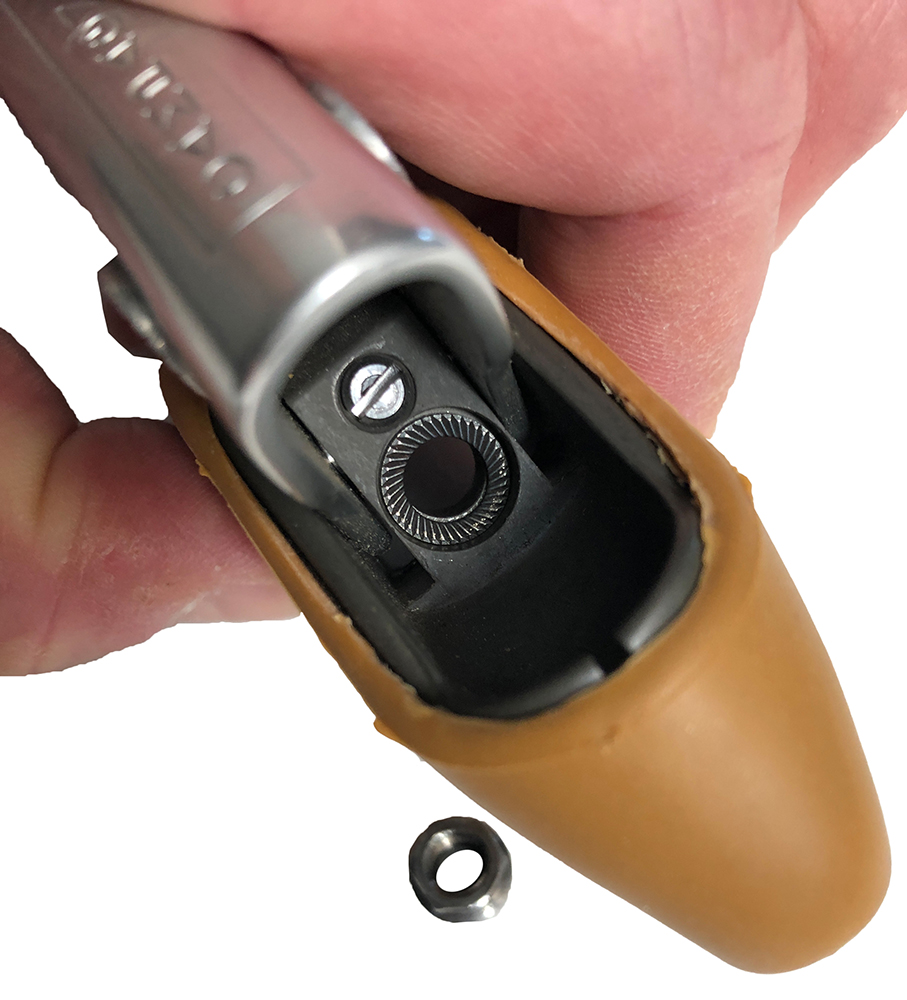
View inside Campagnolo Brake Levers
You can see a small serrated washer sitting inside the Campagnolo Super Record brake lever body. This is conical, so make sure it is re-inserted in the correct orientation before fixing the lever to the clamp bolt with the small nut. Both levers are the same, there is no left or right.
I have fitted a set of aftermarket brown rubber hoods to these brake levers as I purchased them without any rubber covers. If you want to change the rubber hoods due to wear or a new colour preference, this is the perfect time before installing them on the bars with cables and bar tape. To remove or install new rubber covers, just use some talc and feed them over the rear of the lever body, not over the lever.
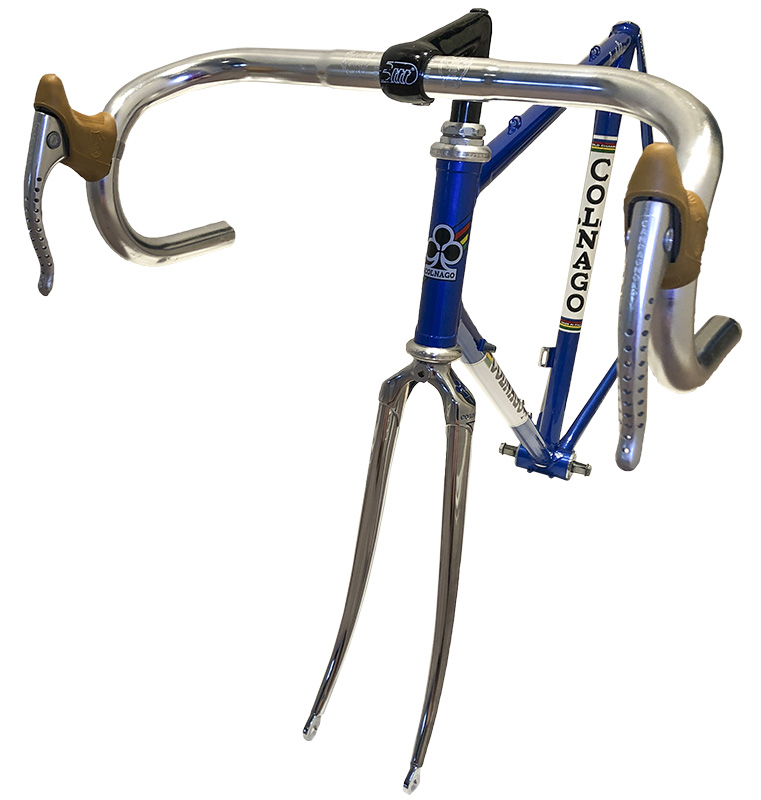
Position Brake Levers on Handle Bars
I have set this levers up in a traditional location with the base of the lever inline with the base of the handle bar drops. This positions the hoods low and forward on the bars which will not suit the preferences of all riders. I find the location quite different to feel of levers on my modern bike. I also use a shorter stem to compensate for the more forward position of these retro levers.
Fit Stem into the Fork Steerer Tube
Some mechanics like to wrap the bar tape before fitting the stem to the bike, but I like to do that at the very end of the build, particularly with white bar tape.
Before inserting the stem into the fork steerer, take a good look at the stem to find the minimum insertion marking. The stem must be inserted so this mark is level with or below the headset lock nut. I applied a light coat of good quality grease to all these areas;
- The stem bolt threads
- Inside the lower section of the stem (where the expander nut will travel)
- The outside of the expander nut
- The outside of the stem (where it will be going into the fork steerer)
- The inside of the fork steerer tube using my finger
It is important to grease the stem as you don’t want the hassle of it corroding inside the fork steerer tube and becoming difficult to remove or adjust down in the future. Once it is in place it is straighten the bars and tighten the stem bolt until the bars do not easily rotate. In case of a crash, it is good if the bars can rotate on an impact, but not when you are railing it down an alpine descent!
Fit Seat Post and Saddle
First I applied grease inside the seat tube of the frame and then to the seat post. This seat post is at the correct height to suit me. FYI the minimum insertion line of this seat post is about 10mm below the top of the seat tube.
The Campagnolo Super Record seat post was available in 2 different lengths. This is the longer post. It is important to ensure the seat tube of the frame is the correct length to fit you otherwise the seat post may not be long enough.
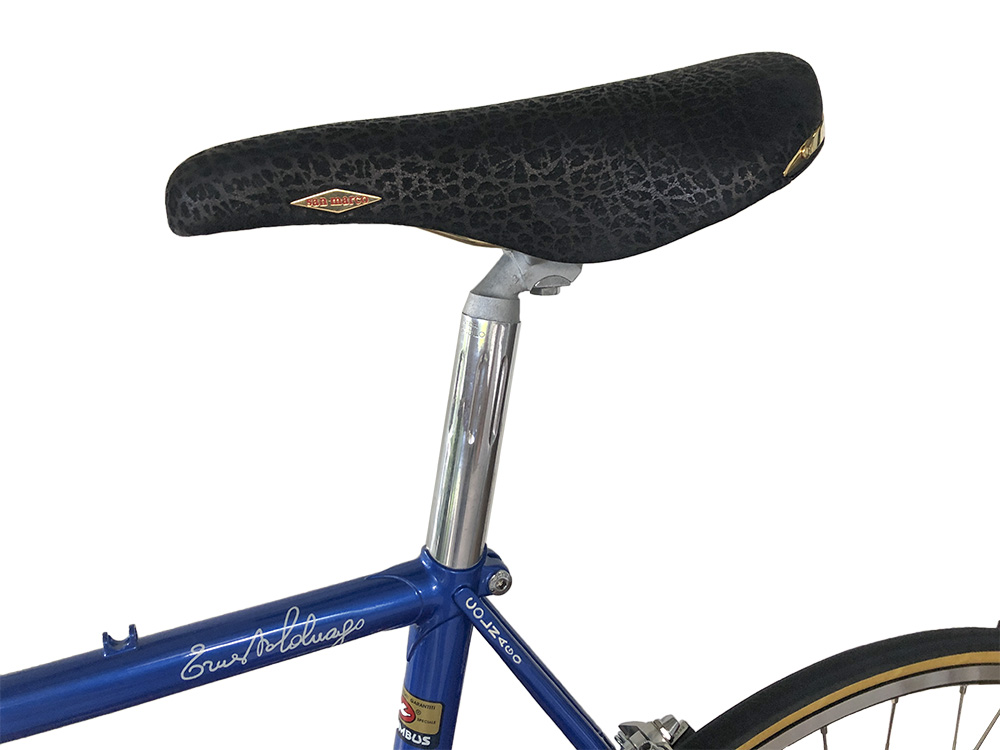
Fit Campagnolo Super Record Seat Post & Rolls Saddle 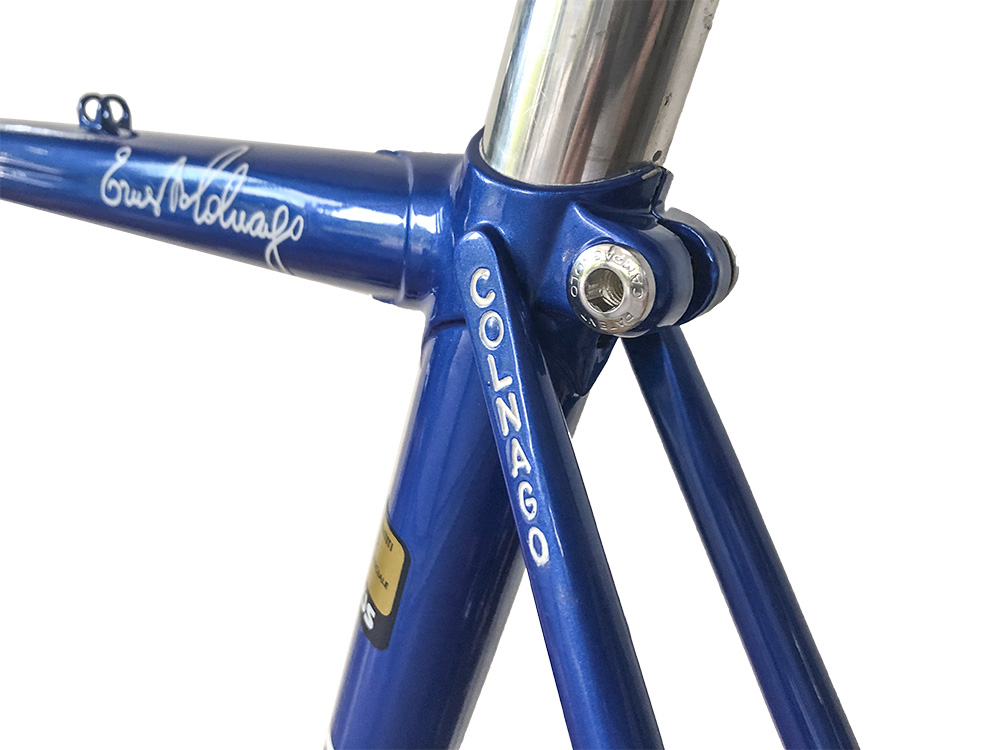
Fit Campagnolo Super Record Seat Post Bolt
The Campagnolo seat post bolt shown above is not super strong and can snap if it is tightened with too much force. I checked the tension on my bolt being just over 7Nm torque that was required to hold the seat post firmly in position. If your frame clamp is a bit sketchy, you might want to use a steel seat post bolt instead of this lightweight Super Record variety.
Fit Brake Calipers
After fitting the brake shoes with new Campagnolo brake blocks, I fitted the front and rear Campagnolo Super Record brake calipers to the forks and frame. When the cables are fitted later, the brake pads can be correctly centered to the rim and tested for toe-in if required.

Campagnolo Super Record Front Brake Fitted 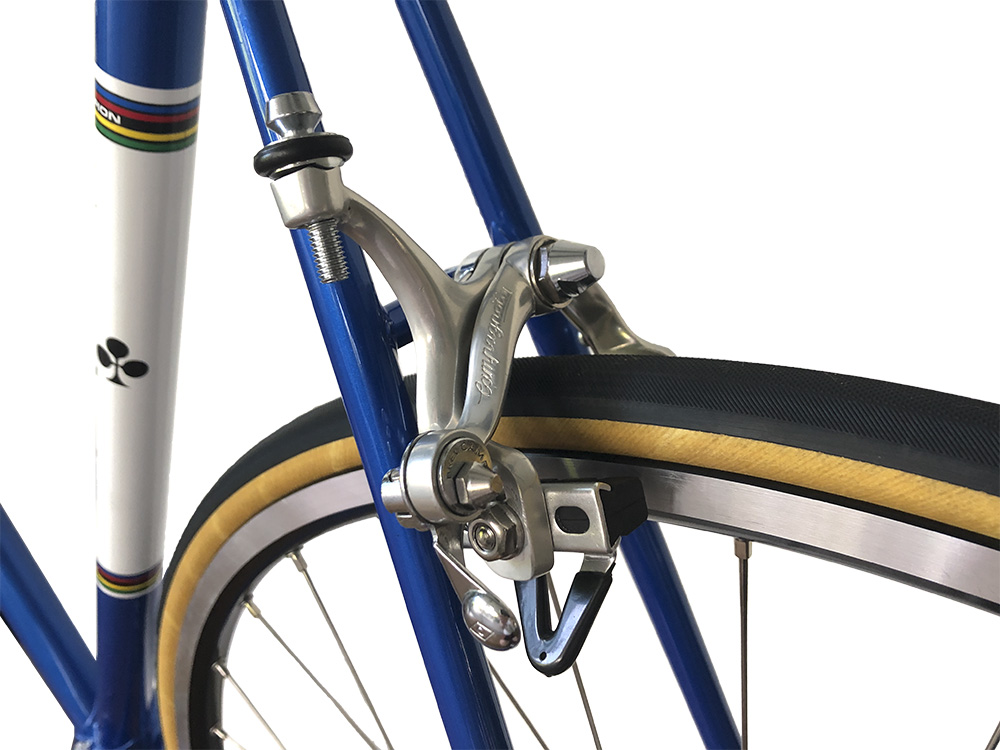
Campagnolo Super Record Rear Brake Fitted
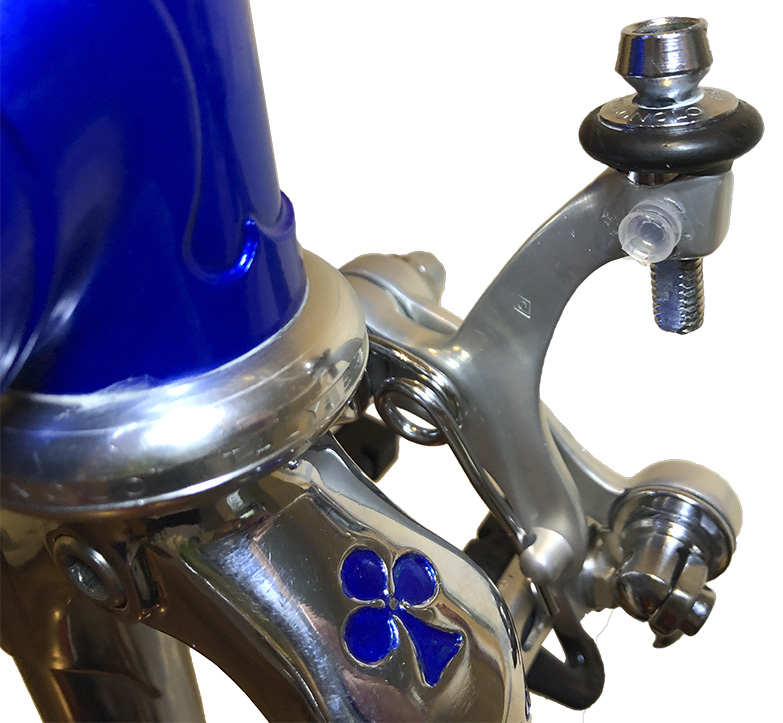
This Super Record front brake caliper wasn’t supplied with the original black rubber brake bumper, so I improvised by using a small clear silicone cavity seal which was re-purposed from an automotive power distribution unit.
I applied a light coat of clear silicone to adhere the bumper into the mounting hole on the caliper. Now it will stay in place but can be removed if desired. See the original bumper and specification in my Campagnolo Super Record Brake Review.
Installing the Brake Cables
I used modern Campagnolo brake cables and housings for this build. Thankfully the cable ferrule hasn’t changed much over time and still works perfectly in these vintage Super Record brake levers.
Installing the cables is very easy, you just need to allow enough cable outer to sit nicely above the handle bars to ensure it doesn’t interfere with your hands when grabbing the tops of the handle bars. Finally just check by turning the bars all the way left and right to ensure the cables stay in position and allow you to turn the bars all the way.
Article Continues on the Next Page
I hope you have enjoyed reading this article so far. On the next page you can read about how the drivetrain components are installed (shifters, crankset, derailleurs & chain).
Disclaimer
Please remember that this information is only to be used as a guide.
I consider myself an enthusiast, not an expert. Whilst I enjoy working on my own bikes, I am not a qualified bicycle mechanic. The content of this article is purely illustrative and does not constitute professional advice. For your own safety, this type of work should only be undertaken by a qualified bicycle mechanic. Incorrect assembly of parts could result in equipment damage, personal injury or death.
About Me.
I have been riding and working on my own bikes for many years now. I wanted to share my experiences, knowledge and research with others. My aim is to inspire people to get involved in all aspects of this amazing sport. Cheers.
Comments.
I welcome reader feedback in the comments section. Should you wish to suggest an amendment, please include a note advising the source of your information so that myself and other readers can ascertain the accuracy of your information. Note: Trolling or argumentative comments will be removed as they are counter-productive.